wordpress小说网站精品成品网站1688
1. 前言
本文介绍如何从零开始,在Android中实现Camera1的接入,并在文末提供Camera1Manager工具类,可以用于快速接入Camera1。
Android Camera1 API虽然已经被Google废弃,但有些场景下不得不使用。
并且Camera1返回的帧数据是NV21,不像Camera2、CameraX那样,需要自己再转一层,才能得到NV21。
Camera1的API调用也比Camera2简单不少,和CameraX的简单程度差不多,所以在一定的场景下,Camera1还是有其用途的。
2. 前置操作
2.1 添加权限
在AndroidManifest中添加如下权限
<uses-permission android:name="android.permission.WRITE_EXTERNAL_STORAGE" />
<uses-permission android:name="android.permission.CAMERA" />
<uses-permission android:name="android.permission.RECORD_AUDIO" />
2.2 申请权限
别忘了申请权限
ActivityCompat.requestPermissions(this@WelComeActivity,arrayOf(android.Manifest.permission.WRITE_EXTERNAL_STORAGE,android.Manifest.permission.RECORD_AUDIO,android.Manifest.permission.CAMERA),123
)
2.3 声明XML布局
新建一个Activity,在其XML中声明SurfaceView
<?xml version="1.0" encoding="utf-8"?>
<androidx.constraintlayout.widget.ConstraintLayout xmlns:android="http://schemas.android.com/apk/res/android"xmlns:app="http://schemas.android.com/apk/res-auto"android:background="@color/black"android:layout_width="match_parent"android:layout_height="match_parent"><SurfaceViewandroid:id="@+id/surfaceView"android:layout_width="0dp"android:layout_height="0dp"app:layout_constraintDimensionRatio="9:16"app:layout_constraintBottom_toBottomOf="parent"app:layout_constraintLeft_toLeftOf="parent"app:layout_constraintRight_toRightOf="parent"app:layout_constraintTop_toTopOf="parent" /></androidx.constraintlayout.widget.ConstraintLayout>
3. 实现预览功能
3.1 添加SurfaceView的回调
binding.surfaceView.holder.addCallback(surfaceCallback)private var surfaceCallback: SurfaceHolder.Callback = object : SurfaceHolder.Callback {// Surface创建时override fun surfaceCreated(holder: SurfaceHolder) {}// Surface改变时override fun surfaceChanged(holder: SurfaceHolder, format: Int, width: Int, height: Int) {}// Surface销毁时override fun surfaceDestroyed(holder: SurfaceHolder) {}
}
3.2 打开相机
当Surface创建时,也就是在surfaceCreated的时候,打开相机
private var camera: Camera? = null
private fun openCamera(holder: SurfaceHolder) {try {camera = Camera.open(cameraId)} catch (e: Exception) {e.printStackTrace()}
}
3.3 开始预览
当我们打开相机后,就可以开始预览了
这里首先将设置camera1预览的尺寸,一般来说,通过camera!!.parameters.supportedPreviewSizes获取到的列表中,第一项就是最推荐的尺寸了。
private fun setPreviewSize() {//获取摄像头支持的宽、高val supportedPreviewSizes: List<Camera.Size> = camera!!.parameters.supportedPreviewSizessupportedPreviewSizes.forEach {Log.i("ZZZZ", "${it.width}*${it.height}")}val parameters = camera?.parametersval size = supportedPreviewSizes[0]parameters?.setPreviewSize(size.width, size.height)camera?.setParameters(parameters)
}
接着,将SurfaceHolder设置到camera中。setPreviewDisplay接受一个SurfaceHolder对象作为参数,该对象表示预览显示的表面。通过调用setPreviewDisplay方法,可以将相机的预览数据输出到指定的表面对象上,从而在预览界面中显示出相机的拍摄画面。
camera?.setPreviewDisplay(holder)
接着调用setDisplayOrientation方法来设置相机的预览方向。该方法接受一个参数,即预览方向的度数。例如,如果要在竖直模式下使用相机,而默认的预览方向是水平的,那么就可以通过调用setDisplayOrientation方法将预览方向顺时针旋转90度。
camera?.setDisplayOrientation(90)
最后,调用startPreview()就可以启动相机的预览了
camera?.startPreview()
来看一下完整代码
private fun startPreview(holder: SurfaceHolder) {try {setPreviewSize()camera?.setPreviewDisplay(holder)camera?.setDisplayOrientation(90)camera?.startPreview()} catch (e: IOException) {e.printStackTrace()}
}
3.4 效果如下
4. 实现拍照功能
4.1 调用拍照接口
要进行拍照,调用camera.takePicture即可,它共有3个回调参数
ShutterCallback shutter(捕获图片瞬间的回调):快门回调是在拍照时快门按下的瞬间调用的回调。它允许您在拍照时执行一些自定义操作,例如触发闪光灯或显示自定义的拍照界面。PictureCallback raw(原始图像数据回调):原始图像数据回调是在拍照后,获取到原始未压缩的数据时调用的回调。您可以在这个回调中对图像数据进行处理或保存。PictureCallback jpeg(JPEG图像数据回调):JPEG图像数据回调是在拍照后,获取到图像的JPEG格式数据时调用的回调。您可以在这个回调中对JPEG图像数据进行处理或保存。
这里我们只需要用到jpeg回调
private val threadPool = Executors.newCachedThreadPool()binding.btnTakePicture.setOnClickListener {camera?.takePicture(null,null,{ data, camera ->//jpeg回调})
}
4.2 在jpeg回调中保存图片
//MediaFileUtils类详见本文附录
val pictureFile: File = MediaFileUtils.getOutputMediaFile(MEDIA_TYPE_IMAGE)!!
try {val fos = FileOutputStream(pictureFile)fos.write(data)fos.close()
} catch (e: FileNotFoundException) {Log.d(TAG, "File not found: ${e.message}")errorCallBack.invoke(e)
} catch (e: IOException) {Log.d(TAG, "Error accessing file: ${e.message}")errorCallBack.invoke(e)
}
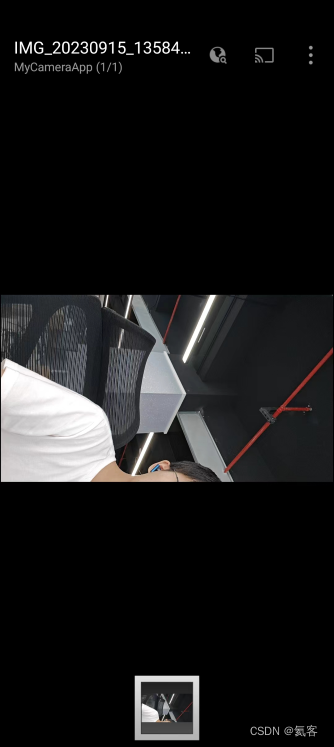
来查看下效果,可以看到图片已经被保存了,但是图片的方向目前是有问题的。
4.3 解决图片保存的方向问题
所以,我们需要先将图片转成bitmap,旋转角度后,再保存
修改代码为如下代码
//路径示例 : /storage/emulated/0/Pictures/MyCameraApp/IMG_20230726_135652.jpg
val pictureFile: File = MediaFileUtils.getOutputMediaFile(MediaFileUtils.MEDIA_TYPE_IMAGE)!!
val bitmap = BitmapFactory.decodeByteArray(data, 0, data.size)
val matrix = Matrix()
matrix.postRotate(270F)
val rotatedBitmap: Bitmap = Bitmap.createBitmap(bitmap, 0, 0, bitmap.width, bitmap.height, matrix, true
)
//ImageUtils需要依赖 implementation 'com.blankj:utilcodex:1.31.1'
ImageUtils.save(rotatedBitmap, pictureFile, Bitmap.CompressFormat.JPEG)
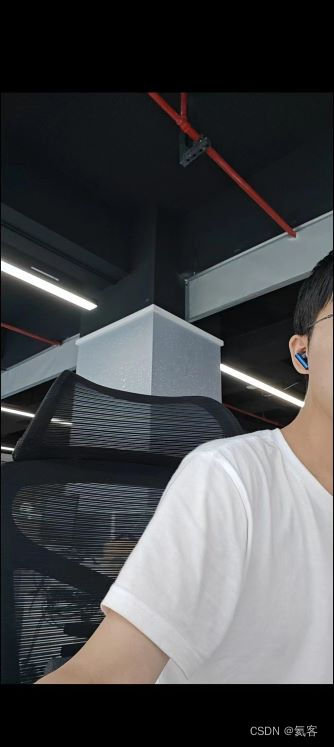
来看一下效果,可以看到现在图片方向是对了,但是图片左右的内容是相反的
4.4 解决图片保存镜像问题
要解决图片的镜像问题,就调用一下matrix.postScale左右水平变换就好了
matrix.postScale(-1F, 1F, bitmap.width / 2F, bitmap.height / 2F)
完整代码如下
val pictureFile: File =
MediaFileUtils.getOutputMediaFile(MediaFileUtils.MEDIA_TYPE_IMAGE)!!
//路径示例 : /storage/emulated/0/Pictures/MyCameraApp/IMG_20230726_135652.jpg
val bitmap = BitmapFactory.decodeByteArray(data, 0, data.size)
val matrix = Matrix()
matrix.postRotate(270F)
matrix.postScale(-1F, 1F, bitmap.width / 2F, bitmap.height / 2F)
val rotatedBitmap: Bitmap = Bitmap.createBitmap(
bitmap, 0, 0, bitmap.width, bitmap.height, matrix, true
)
//ImageUtils需要依赖 implementation 'com.blankj:utilcodex:1.31.1'
ImageUtils.save(rotatedBitmap, pictureFile, Bitmap.CompressFormat.JPEG)
5. 实现录像功能
要录制视频,需要使用MediaRecorder,若要使用 Camera1 拍摄视频,需要谨慎管理 Camera 和 MediaRecorder,并且必须按特定顺序调用相应方法。您必须遵循以下顺序,才能使您的应用正常工作:
- 打开相机。
- 做好准备,并开始预览(如果您的应用会显示正在录制的视频,而通常情况下都是如此)。
- 通过调用
Camera.unlock()解锁相机,以供 MediaRecorder 使用。 - 通过在
MediaRecorder上调用以下方法来配置录制:- 通过
setCamera(camera)关联您的Camera实例。 - 调用
setAudioSource(MediaRecorder.AudioSource.CAMCORDER)。 - 调用
setVideoSource(MediaRecorder.VideoSource.CAMERA)。 - 调用
setProfile(CamcorderProfile.get(CamcorderProfile.QUALITY_1080P))以设置质量。 - 调用
setOutputFile(getOutputMediaFile(MEDIA_TYPE_VIDEO).toString())。 - 如果您的应用提供视频预览,请调用
setPreviewDisplay(preview?.holder?.surface)。 - 调用
setOutputFormat(MediaRecorder.OutputFormat.MPEG_4)。 - 调用
setAudioEncoder(MediaRecorder.AudioEncoder.DEFAULT)。 - 调用
setVideoEncoder(MediaRecorder.VideoEncoder.DEFAULT)。 - 调用
prepare()以完成MediaRecorder配置。
- 通过
- 如需开始录制,请调用
MediaRecorder.start()。 - 如需停止录制,请按以下顺序调用以下方法:
- 调用
MediaRecorder.stop()。 - (可选)通过调用
MediaRecorder.reset()移除当前的MediaRecorder配置。 - 调用
MediaRecorder.release()。 - 通过调用
Camera.lock()锁定相机,以便将来的MediaRecorder会话可以使用它。
- 调用
- 如需停止预览,请调用
Camera.stopPreview()。 - 最后,如需释放
Camera以供其他进程使用,请调用Camera.release()。
具体可以见 Camera1 录制视频
下面直接附上代码,直接如下代码就好了
5.1 开始录制
fun startVideo(holder: SurfaceHolder) {mediaRecorder = MediaRecorder()//解锁相机,以供 MediaRecorder 使用camera?.unlock()//设置要用于视频捕获的相机mediaRecorder.setCamera(camera)//设置音频源mediaRecorder.setAudioSource(MediaRecorder.AudioSource.CAMCORDER)//设置视频源mediaRecorder.setVideoSource(MediaRecorder.VideoSource.CAMERA)//设置视频的输出格式和编码mediaRecorder.setProfile(CamcorderProfile.get(CamcorderProfile.QUALITY_1080P))//设置输出视频播放的方向mediaRecorder.setOrientationHint(270)//设置输出文件mediaRecorder.setOutputFile(getVideoFilePath(this))//指定 SurfaceView 预览布局元素mediaRecorder.setPreviewDisplay(holder.surface)try {mediaRecorder.prepare()} catch (e: IOException) {e.printStackTrace()releaseMediaRecorder()}Handler().postDelayed({try {mediaRecorder.start()} catch (e: IOException) {e.printStackTrace()releaseMediaRecorder()}}, 10)
}fun getVideoFilePath(context: Context?): String {val filename = "VIDEO_${System.currentTimeMillis()}.mp4"val dir = context?.getExternalFilesDir("video")return "${dir!!.path}/$filename"
}
5.2 停止播放
fun stopVideo() {mediaRecorder.stop()mediaRecorder.release()camera?.lock()
}
5.3 释放资源
fun releaseMediaRecorder() {if (mediaRecorder != null) {mediaRecorder.reset() // 清除配置mediaRecorder.release()//mediaRecorder = nullcamera?.lock()}
}
6. CameraHelper工具类
可以直接使用这个工具类,来快速接入Camera1
class CameraHelper(private val activity: AppCompatActivity,private var cameraId: Int,private var width: Int = 720,private var height: Int = 1280,
) : Camera.PreviewCallback {private var surfaceHolder: SurfaceHolder? = nullprivate var surfaceTexture: SurfaceTexture? = nullprivate var mCamera: Camera? = nullprivate var buffer: ByteArray? = nullprivate var bytes: ByteArray? = null/*** 打开相机** @param cameraId 后摄 Camera.CameraInfo.CAMERA_FACING_BACK*                 前摄 Camera.CameraInfo.CAMERA_FACING_FRONT*/private fun open(cameraId: Int) {//获得camera对象mCamera = Camera.open(cameraId)mCamera?.let { camera ->//配置camera的属性val parameters = camera.parameters//设置预览数据格式为nv21parameters.previewFormat = ImageFormat.NV21//这是摄像头宽、高setPreviewSize(parameters!!)// 设置摄像头 图像传感器的角度、方向setPreviewOrientation(cameraId)camera.parameters = parameters}}/*** 切换摄像头*/fun switchCamera() {val cameraId = if (cameraId == Camera.CameraInfo.CAMERA_FACING_BACK) {Camera.CameraInfo.CAMERA_FACING_FRONT} else {Camera.CameraInfo.CAMERA_FACING_BACK}switchCamera(cameraId)}/*** 切换摄像头* @param cameraId 指定摄像头ID*/fun switchCamera(cameraId: Int) {this.cameraId = cameraIdpreviewAlign()}private fun previewAlign() {stopPreview()if (surfaceHolder != null) {startPreview(surfaceHolder!!)} else {startPreview(surfaceTexture!!)}}/*** 停止预览*/fun stopPreview() {if (mCamera != null) {mCamera?.setPreviewCallback(null)mCamera?.stopPreview()mCamera?.release()mCamera = null}}/*** 开始预览*/fun startPreview(surfaceHolder: SurfaceHolder) {open(cameraId)this.surfaceHolder = surfaceHolderbuffer = ByteArray(width * height * 3 / 2)bytes = ByteArray(buffer!!.size)//数据缓存区mCamera?.addCallbackBuffer(buffer)mCamera?.setPreviewCallbackWithBuffer(this)//设置预览画面mCamera?.setPreviewDisplay(surfaceHolder)mCamera?.startPreview()}fun startPreview(surfaceTexture: SurfaceTexture) {open(cameraId)this.surfaceTexture = surfaceTexturebuffer = ByteArray(width * height * 3 / 2)bytes = ByteArray(buffer!!.size)//数据缓存区mCamera?.addCallbackBuffer(buffer)mCamera?.setPreviewCallbackWithBuffer(this)//设置预览画面mCamera?.setPreviewTexture(surfaceTexture)mCamera?.startPreview()}private val threadPool = Executors.newCachedThreadPool()/*** 拍摄照片*/fun takePicture(completedCallBack: () -> Unit, errorCallBack: (Exception) -> Unit) {mCamera?.takePicture(null, null, object : Camera.PictureCallback {override fun onPictureTaken(data: ByteArray?, camera: Camera?) {previewAlign()threadPool.execute {val pictureFile: File = getOutputMediaFile(MEDIA_TYPE_IMAGE)!!//路径示例 : /storage/emulated/0/Pictures/MyCameraApp/IMG_20230726_135652.jpgval bitmap = BitmapFactory.decodeByteArray(data, 0, data!!.size)val matrix = Matrix()//修正图片方向,这里只是示例,需要根据实际手机方位来决定图片角度matrix.postRotate(if (cameraId==1) 270F else 90F)if (cameraId==1) {//postScale在矩阵变换之后进行缩放matrix.postScale(-1F, 1F, bitmap.width / 2F, bitmap.height / 2F)}val rotatedBitmap: Bitmap = Bitmap.createBitmap(bitmap, 0, 0, bitmap.width, bitmap.height, matrix, true)ImageUtils.save(rotatedBitmap, pictureFile, Bitmap.CompressFormat.JPEG)completedCallBack.invoke()}}})}override fun onPreviewFrame(data: ByteArray, camera: Camera?) {camera!!.addCallbackBuffer(data)}private fun setPreviewSize(parameters: Camera.Parameters) {//获取摄像头支持的宽、高val supportedPreviewSizes = parameters.supportedPreviewSizesvar size = supportedPreviewSizes[0]Log.d(TAG, "Camera支持: " + size.width + "x" + size.height)//选择一个与设置的差距最小的支持分辨率var m: Int = Math.abs(size.height * size.width - width * height)supportedPreviewSizes.removeAt(0)val iterator: Iterator<Camera.Size> = supportedPreviewSizes.iterator()//遍历while (iterator.hasNext()) {val next = iterator.next()Log.d(TAG, "支持 " + next.width + "x" + next.height)val n: Int = Math.abs(next.height * next.width - width * height)if (n < m) {m = nsize = next}}width = size.widthheight = size.heightparameters.setPreviewSize(width, height)Log.d(TAG, "预览分辨率 width:" + size.width + " height:" + size.height)}private val mOnChangedSizeListener: OnChangedSizeListener? = nullprivate fun setPreviewOrientation(cameraId: Int) {val info = CameraInfo()Camera.getCameraInfo(cameraId, info)val rotation = activity.windowManager.defaultDisplay.rotationvar degrees = 0when (rotation) {Surface.ROTATION_0 -> {degrees = 0mOnChangedSizeListener?.onChanged(height, width)}Surface.ROTATION_90 -> {degrees = 90mOnChangedSizeListener?.onChanged(width, height)}Surface.ROTATION_180 -> {degrees = 180mOnChangedSizeListener?.onChanged(height, width)}Surface.ROTATION_270 -> {degrees = 270mOnChangedSizeListener?.onChanged(width, height)}}var result: Intif (info.facing == CameraInfo.CAMERA_FACING_FRONT) {result = (info.orientation + degrees) % 360result = (360 - result) % 360 // compensate the mirror} else { // back-facingresult = (info.orientation - degrees + 360) % 360}//设置角度, 参考源码注释mCamera!!.setDisplayOrientation(result)}private lateinit var mediaRecorder: MediaRecorderprivate val handle = Handler(Looper.getMainLooper())/*** 开始录像*/fun startVideo(path: String) {mediaRecorder = MediaRecorder()//解锁相机,以供 MediaRecorder 使用mCamera?.unlock()//设置要用于视频捕获的相机mediaRecorder.setCamera(mCamera)//设置音频源mediaRecorder.setAudioSource(MediaRecorder.AudioSource.CAMCORDER)//设置视频源mediaRecorder.setVideoSource(MediaRecorder.VideoSource.CAMERA)//设置视频的输出格式和编码mediaRecorder.setProfile(CamcorderProfile.get(CamcorderProfile.QUALITY_HIGH))//设置输出视频播放的方向,这里只是示例,需要根据实际手机方位来决定角度mediaRecorder.setOrientationHint(if (cameraId == 1) 270 else 90)//设置输出文件mediaRecorder.setOutputFile(path)//指定 SurfaceView 预览布局元素mediaRecorder.setPreviewDisplay(surfaceHolder!!.surface)try {mediaRecorder.prepare()} catch (e: IOException) {e.printStackTrace()releaseMediaRecorder()}handle.postDelayed({try {mediaRecorder.start()} catch (e: IOException) {e.printStackTrace()releaseMediaRecorder()}}, 10)}/*** 释放资源*/fun releaseMediaRecorder() {if (mediaRecorder != null) {mediaRecorder.reset() // 清除配置mediaRecorder.release()//mediaRecorder = nullmCamera?.lock()}}/*** 停止录像*/fun stopVideo() {mediaRecorder.stop()mediaRecorder.release()mCamera?.lock()}interface OnChangedSizeListener {fun onChanged(width: Int, height: Int)}companion object {private const val TAG = "CAMERA_HELPER"}
}
7. 附录
7.1 MediaFileUtils
获取媒体文件路径的工具类
object MediaFileUtils {val MEDIA_TYPE_IMAGE = 1val MEDIA_TYPE_VIDEO = 2/** Create a file Uri for saving an image or video */fun getOutputMediaFileUri(type: Int): Uri {return Uri.fromFile(getOutputMediaFile(type))}/** Create a File for saving an image or video */fun getOutputMediaFile(type: Int): File? {// To be safe, you should check that the SDCard is mounted// using Environment.getExternalStorageState() before doing this.val mediaStorageDir = File(Environment.getExternalStoragePublicDirectory(Environment.DIRECTORY_PICTURES),"MyCameraApp")// This location works best if you want the created images to be shared// between applications and persist after your app has been uninstalled.// Create the storage directory if it does not existmediaStorageDir.apply {if (!exists()) {if (!mkdirs()) {Log.d("MyCameraApp", "failed to create directory")return null}}}// Create a media file nameval timeStamp = SimpleDateFormat("yyyyMMdd_HHmmss").format(Date())return when (type) {MEDIA_TYPE_IMAGE -> {File("${mediaStorageDir.path}${File.separator}IMG_$timeStamp.jpg")}MEDIA_TYPE_VIDEO -> {File("${mediaStorageDir.path}${File.separator}VID_$timeStamp.mp4")}else -> null}}
}
7.2. 本文源码下载
Android Camera1 Demo - 实现预览、拍照、录制视频功能