大学信息化建设 网站群金华网站建设
前言
网上充满着不完善的基于RecyclerView的瀑布流实现,要么根本是错的、要么就是只知其一不知其二、要么就是一充诉了一堆无用代码、要么用的是古老的MVC设计模式。
一个真正的、用户体验类似于淘宝、抖音的瀑布流怎么实现目前基本为无解。因为本人正好自己空闲时也在做前后台一体化开发,所以直接从本人自己项目里(mao-sir.com)公开一部分核心代码以便于加快大家的学习进度,以使得各位不要在这种小东西上折腾太多时间。
什么是瀑布流

注意看这边的这个布局,大家有没有发觉这些照片分成左右、最多的还有分成三列的,但是每一行的照片、视频、内容的高度是“错开”的。最早采用此布局的网站是Pinterest,逐渐在国内流行开来。国内大多数做的好的大厂的APP都是这种布局、尤以UGC(UGC它的中文意思是用户生产内容的意思,简称为UGC)为主的APP采用此布局最多像:知乎上的精品贴、推荐贴、小红书种草等都是这种风格。
瀑布流布局的优点为:
- 吸引用户,当用户在浏览瀑布流式布局的时候(这里抛开懒加载),用户会产生一种错觉,就是信息是不停的在更新的,这会激发用户的好奇心,使用户不停的往下滑动。
- 良好视觉体验,采用瀑布流布局的方式可以打破常规网站布局排版,给用户眼前一亮的新鲜感,用户在浏览内容时会感到很有新鲜感,带来良好的视觉体验。
- 更好的适应移动端,由于移动设备屏幕比电脑小,一个屏幕显示的内容不会非常多,因此可能要经常翻页。而在建网站时使用瀑布流布局,用户则只需要进行滚动就能够不断浏览内容。(这一点和懒加载有一点像)
怎么实现瀑布流
网上有一些第三方控件使用了瀑布流,但是这些第三方控件都已经废弃或者是停更了。这些第三方控件本人都用过,不是有各种BUG就是把问题搞了很复杂。这东西其实很简单,一天内就可以做出生产级别的应用了,哪有这么难。
难就是难在太多初学者为了赶项目或者说很多人急功近利,只想着copy paste,因此搞了一堆其实无用的代码还把问题“混搅”了。
因此本篇会从本质上还原最最干净的瀑布流,同时本人会基于mvvm设计模式来讲这个瀑布流。我们用的就是Android原生的控件:RecyclerView组件。下面是类淘宝、抖音用户极致体验的一个瀑布流“正例”(我们在文未还会给出一个体验不好的反例供读者对比)。

<androidx.recyclerview.widget.RecyclerViewandroid:id="@+id/rv"android:layout_width="match_parent"android:layout_height="wrap_content"></androidx.recyclerview.widget.RecyclerView>下面我们来看实现 。
基于MVVM设计模式的RecyclerView实现瀑布流代码
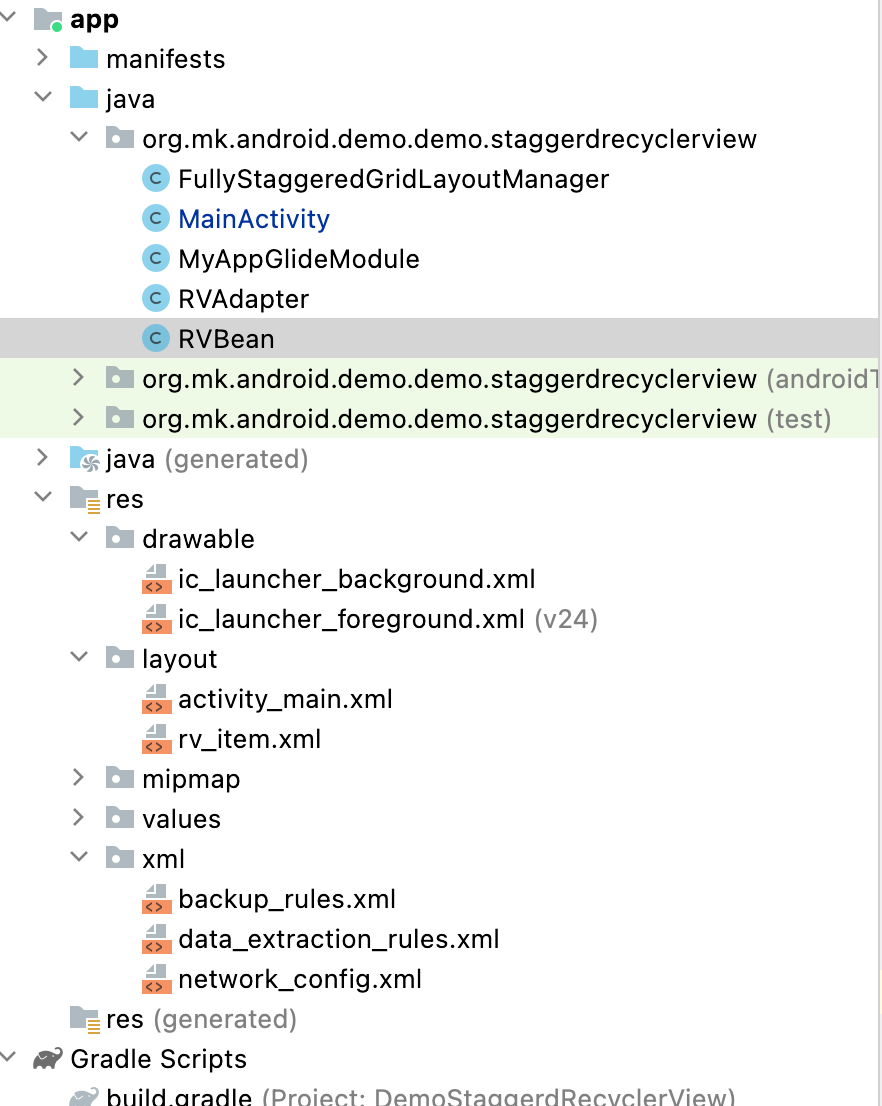
工程整体结构
这是一个使用androidx的基于mvvm的工程。
至于如何把一个工程变成androidx和mvvm此处就不再赘述了,在我前面的博客中已经写了很详细了。
布局
activity_main.xml布局
<?xml version="1.0" encoding="utf-8"?>
<layout xmlns:android="http://schemas.android.com/apk/res/android"xmlns:app="http://schemas.android.com/apk/res-auto"xmlns:tools="http://schemas.android.com/tools"><data></data><LinearLayoutandroid:layout_width="match_parent"android:layout_height="match_parent"android:orientation="vertical"tools:context=".MainActivity"><androidx.recyclerview.widget.RecyclerViewandroid:id="@+id/rv"android:layout_width="match_parent"android:layout_height="wrap_content"></androidx.recyclerview.widget.RecyclerView></LinearLayout>
</layout>
瀑布流中具体的明细布局-rv_item.xml
在明细布局里,整体瀑布流墙就两个元素,一个是照片的url另一个是文本框,实现很简单。
<?xml version="1.0" encoding="utf-8"?>
<layout xmlns:android="http://schemas.android.com/apk/res/android"xmlns:app="http://schemas.android.com/apk/res-auto"><data><variablename="item"type="org.mk.android.demo.demo.staggerdrecyclerview.RVBean" /></data><LinearLayoutandroid:layout_width="match_parent"android:layout_height="wrap_content"><androidx.cardview.widget.CardViewandroid:layout_width="match_parent"android:layout_height="wrap_content"android:layout_margin="8dp"app:cardCornerRadius="8dp"app:cardElevation="4dp"><LinearLayoutandroid:layout_width="match_parent"android:layout_height="wrap_content"android:orientation="vertical"><ImageViewandroid:id="@+id/rvImageView"android:layout_width="match_parent"android:layout_height="wrap_content"android:adjustViewBounds="true"android:scaleType="fitXY"app:url="@{item.url}" /><TextViewandroid:id="@+id/rvTextView"android:layout_width="match_parent"android:layout_height="wrap_content"android:textAlignment="center"android:layout_margin="4dp"android:text="@{item.text}" /></LinearLayout></androidx.cardview.widget.CardView></LinearLayout>
</layout>
现在就来看我们的代码。
后端代码
RVBean.java
package org.mk.android.demo.demo.staggerdrecyclerview;import android.util.Log;
import android.widget.ImageView;import androidx.databinding.BindingAdapter;import com.bumptech.glide.Glide;import java.util.Objects;public class RVBean {private String url;private String text;private final static String TAG = "DemoStaggerdRecyclerView";@BindingAdapter("url")public static void loadImg(ImageView imageView, String url) {Glide.with(imageView).load(url).into(imageView);}public String getUrl() {return url;}public void setUrl(String url) {this.url = url;}public String getText() {return text;}public void setText(String text) {this.text = text;}public RVBean(String url, String text) {this.url = url;this.text = text;}@Overridepublic boolean equals(Object o) {if (this == o) {//Log.i(TAG, ">>>>>>this==o return true");return true;}if (o == null || getClass() != o.getClass()) {//Log.i(TAG, ">>>>>>o==null||getClass()!=o.getClass() is false");return false;}RVBean rvBean = (RVBean) o;if (rvBean.url.length() != url.length() || rvBean.text.length() != text.length()) {//Log.i(TAG, ">>>>>>target length()!=existed url length");return false;}if(url.equals(rvBean.url)&&text.equals(rvBean.text)){//Log.i(TAG,">>>>>>url euqlas && text equals");return true;}else{//Log.i(TAG,">>>>>>not url euqlas && text equals");return false;}}@Overridepublic int hashCode() {int hashCode = Objects.hash(url, text);//Log.i(TAG, ">>>>>>hashCode->" + hashCode);return hashCode;}
}
代码中它定义了两个元素,一个为文本框,一个为用于加载网络图片的url,网络图片我用的是我另一台VM上的Nginx做的静态图片资源服务。
RVAdapter.java
package org.mk.android.demo.demo.staggerdrecyclerview;import android.content.Context;
import android.graphics.Bitmap;
import android.graphics.BitmapFactory;
import android.util.Log;
import android.view.LayoutInflater;
import android.view.View;
import android.view.ViewGroup;
import android.widget.TextView;import androidx.annotation.NonNull;
import androidx.databinding.DataBindingUtil;
import androidx.recyclerview.widget.RecyclerView;import com.bumptech.glide.Glide;import org.mk.android.demo.demo.staggerdrecyclerview.databinding.RvItemBinding;import java.util.ArrayList;
import java.util.Iterator;
import java.util.List;
import java.util.Locale;public class RVAdapter extends RecyclerView.Adapter<RVAdapter.VH> {private Context context;private List<RVBean> rvBeans;private final static String TAG = "DemoStaggerdRecyclerView";public RVAdapter(Context context, List<RVBean> rvBeans) {this.context = context;this.rvBeans = rvBeans;}@Overridepublic int getItemViewType(int position) {return position;}@NonNull@Overridepublic VH onCreateViewHolder(@NonNull ViewGroup parent, int viewType) {return new VH(DataBindingUtil.inflate(LayoutInflater.from(context), R.layout.rv_item, parent, false).getRoot());}@Overridepublic void onBindViewHolder(@NonNull VH holder, int position) {//try {RvItemBinding binding = DataBindingUtil.bind(holder.itemView);//binding.rvTextView.setText(rvBeans.get(position).getText());binding.setItem(rvBeans.get(position));/*//Set sizeBitmapFactory.Options options = new BitmapFactory.Options();options.inJustDecodeBounds = true;//这个参数设置为true才有效,Bitmap bmp = BitmapFactory.decodeFile(rvBeans.get(position).getUrl(), options);//这里的bitmap是个空int outHeight = options.outHeight;int outWidth = options.outWidth;Glide.with(context).load(rvBeans.get(position).getUrl()).override(outWidth,outHeight).into(binding.rvImageView);} catch (Exception e) {Log.e(TAG, ">>>>>>onbindViewHolder error: " + e.getMessage(), e);}*/}@Overridepublic int getItemCount() {return rvBeans.size();}public class VH extends RecyclerView.ViewHolder {public VH(@NonNull View itemView) {super(itemView);}}//增加外部调用增加一条记录public void refreshDatas(List<RVBean> datas) {int pc=0;if (datas != null && datas.size() > 0) {int oldSize = rvBeans.size();//List<RVBean> refreshedData = new ArrayList<RVBean>();boolean isItemExisted = false;for (Iterator<RVBean> newData = datas.iterator(); newData.hasNext(); ) {RVBean a = newData.next();for (Iterator<RVBean> existedData = rvBeans.iterator(); existedData.hasNext(); ) {RVBean b = existedData.next();if (b.equals(a)) {{isItemExisted = true;//Log.i(TAG, b.getText() + " -> " + b.getUrl() + " is existed");break;}}}if (!isItemExisted) {pc+=1;rvBeans.add(a);}}Log.i(TAG,">>>>>>pc->"+pc);if(pc>0){notifyItemRangeChanged(oldSize,rvBeans.size());}}}
}
核心代码导读
- 这个adapter用的正是mvvm设计模式做的adapter;
- 这个adapter和网上那些错误、有坑的例子最大的不同在于getItemViewType方法内必须返回position,否则你的瀑布流在上划加载新数据时会产生界面内对照片重新进行左右切换、重排、或者把照片底部留出很大一块空白如:左边垂直排3张,右边一大边空白或者反之亦然的情况;
- 必须使用notifyItemRangeChanged来通知刷新新数据,网上很多例子用的是notifyDataSetChange或者是其它相关的notify,它们都是错的,这是因为RecyclerViewer在上划下划时会导致整个瀑布流重新布局、而RecyclerView里用的是Glide异步加载网络图片的,这会导致组件看到有一个组片就去开始计算它的高度而实际这个照片还未加载好因此才会导致RecyclerView在上划下划时整体布局重新刷新和重布局。一定记得这个notifyItemRangeChanged,同时这个方法在使用前加载所有的图片(list数据),传参有两个参数,参数1:加载新数据前原数据行.size(),参数2:新加载数据.size();
有了adapter我们来看我们的应用了。
应用前先别急,我们自定义了一个StaggeredGridLayoutManager。
自定义FullyStaggeredGridLayoutManager
这边先说一下,为什么要自定义这个StaggeredGridLayoutManager?
public class FullyStaggeredGridLayoutManager extends StaggeredGridLayoutManager {大家可以认为,这个类是一个策略。这也是网上绝大部分教程根本不说的,这个策略就是从根本上避免RecyclerViewer在上划下划时不要进行左右切换、重新布局、图片闪烁以及“解决Scrollview中嵌套RecyclerView实现瀑布流时无法显示的问题,同时修复了子View显示时底部多出空白区域的问题”用的,我在代码中也做了注释。
此处要敲一下黑板了。因此整个RecyclerView要做到类淘宝、抖音的这种用户体验必须是adapter里的代码和这个自定义StaggeredGridLayoutManager结合起来才能做到。
因此我们下面就来看在MainActivity里如何把adapter结合着这个自定义的StaggeredGridLayoutManager的应用吧。
先上我们自定义的这个StaggeredGridLayoutManager-我们在此把它命名叫做:FullyStaggeredGridLayoutManager的全代码。
FullyStaggeredGridLayoutManager.java代码
package org.mk.android.demo.demo.staggerdrecyclerview;import android.content.Context;
import android.graphics.Rect;
import android.util.AttributeSet;
import android.util.Log;
import android.view.View;import androidx.recyclerview.widget.RecyclerView;
import androidx.recyclerview.widget.StaggeredGridLayoutManager;import java.lang.reflect.Field;/*** @descride 解决Scrollview中嵌套RecyclerView实现瀑布流时无法显示的问题,同时修复了子View显示时底部多出空白区域的问题*/
public class FullyStaggeredGridLayoutManager extends StaggeredGridLayoutManager {private static boolean canMakeInsetsDirty = true;private static Field insetsDirtyField = null;private static final int CHILD_WIDTH = 0;private static final int CHILD_HEIGHT = 1;private static final int DEFAULT_CHILD_SIZE = 100;private int spanCount = 0;private final int[] childDimensions = new int[2];private int[] childColumnDimensions;private int childSize = DEFAULT_CHILD_SIZE;private boolean hasChildSize;private final Rect tmpRect = new Rect();public FullyStaggeredGridLayoutManager(Context context, AttributeSet attrs, int defStyleAttr,int defStyleRes) {super(context, attrs, defStyleAttr, defStyleRes);}public FullyStaggeredGridLayoutManager(int spanCount, int orientation) {super(spanCount, orientation);this.spanCount = spanCount;}public static int makeUnspecifiedSpec() {return View.MeasureSpec.makeMeasureSpec(0, View.MeasureSpec.UNSPECIFIED);}@Overridepublic void onMeasure(RecyclerView.Recycler recycler, RecyclerView.State state, int widthSpec,int heightSpec) {final int widthMode = View.MeasureSpec.getMode(widthSpec);final int heightMode = View.MeasureSpec.getMode(heightSpec);final int widthSize = View.MeasureSpec.getSize(widthSpec);final int heightSize = View.MeasureSpec.getSize(heightSpec);final boolean hasWidthSize = widthMode != View.MeasureSpec.UNSPECIFIED;final boolean hasHeightSize = heightMode != View.MeasureSpec.UNSPECIFIED;final boolean exactWidth = widthMode == View.MeasureSpec.EXACTLY;final boolean exactHeight = heightMode == View.MeasureSpec.EXACTLY;final int unspecified = makeUnspecifiedSpec();if (exactWidth && exactHeight) {// in case of exact calculations for both dimensions let's use default "onMeasure" implementationsuper.onMeasure(recycler, state, widthSpec, heightSpec);return;}final boolean vertical = getOrientation() == VERTICAL;initChildDimensions(widthSize, heightSize, vertical);int width = 0;int height = 0;// it's possible to get scrap views in recycler which are bound to old (invalid) adapter entities. This// happens because their invalidation happens after "onMeasure" method. As a workaround let's clear the// recycler now (it should not cause any performance issues while scrolling as "onMeasure" is never// called whiles scrolling)recycler.clear();final int stateItemCount = state.getItemCount();final int adapterItemCount = getItemCount();childColumnDimensions = new int[adapterItemCount];// adapter always contains actual data while state might contain old data (f.e. data before the animation is// done). As we want to measure the view with actual data we must use data from the adapter and not from  the// statefor (int i = 0; i < adapterItemCount; i++) {if (vertical) {if (!hasChildSize) {if (i < stateItemCount) {// we should not exceed state count, otherwise we'll get IndexOutOfBoundsException. For such items// we will use previously calculated dimensionsmeasureChild(recycler, i, widthSize, unspecified, childDimensions);} else {logMeasureWarning(i);}}childColumnDimensions[i] = childDimensions[CHILD_HEIGHT];//height += childDimensions[CHILD_HEIGHT];if (i == 0) {width = childDimensions[CHILD_WIDTH];}if (hasHeightSize && height >= heightSize) {break;}} else {if (!hasChildSize) {if (i < stateItemCount) {// we should not exceed state count, otherwise we'll get IndexOutOfBoundsException. For such items// we will use previously calculated dimensionsmeasureChild(recycler, i, unspecified, heightSize, childDimensions);} else {logMeasureWarning(i);}}width += childDimensions[CHILD_WIDTH];if (i == 0) {height = childDimensions[CHILD_HEIGHT];}if (hasWidthSize && width >= widthSize) {break;}}}int[] maxHeight = new int[spanCount];for (int i = 0; i < adapterItemCount; i++) {int position = i % spanCount;if (i < spanCount) {maxHeight[position] += childColumnDimensions[i];} else if (position < spanCount) {int mixHeight = maxHeight[0];int mixPosition = 0;for (int j = 0; j < spanCount; j++) {if (mixHeight > maxHeight[j]) {mixHeight = maxHeight[j];mixPosition = j;}}maxHeight[mixPosition] += childColumnDimensions[i];}}for (int i = 0; i < spanCount; i++) {for (int j = 0; j < spanCount - i - 1; j++) {if (maxHeight[j] < maxHeight[j + 1]) {int temp = maxHeight[j];maxHeight[j] = maxHeight[j + 1];maxHeight[j + 1] = temp;}}}height = maxHeight[0];//this is max heightif (exactWidth) {width = widthSize;} else {width += getPaddingLeft() + getPaddingRight();if (hasWidthSize) {width = Math.min(width, widthSize);}}if (exactHeight) {height = heightSize;} else {height += getPaddingTop() + getPaddingBottom();if (hasHeightSize) {height = Math.min(height, heightSize);}}setMeasuredDimension(width, height);}private void logMeasureWarning(int child) {if (BuildConfig.DEBUG) {Log.w("LinearLayoutManager", "Can't measure child #"+ child+ ", previously used dimensions will be reused."+ "To remove this message either use #setChildSize() method or don't run RecyclerView animations");}}private void initChildDimensions(int width, int height, boolean vertical) {if (childDimensions[CHILD_WIDTH] != 0 || childDimensions[CHILD_HEIGHT] != 0) {// already initialized, skippingreturn;}if (vertical) {childDimensions[CHILD_WIDTH] = width;childDimensions[CHILD_HEIGHT] = childSize;} else {childDimensions[CHILD_WIDTH] = childSize;childDimensions[CHILD_HEIGHT] = height;}}@Override public void setOrientation(int orientation) {// might be called before the constructor of this class is called//noinspection ConstantConditionsif (childDimensions != null) {if (getOrientation() != orientation) {childDimensions[CHILD_WIDTH] = 0;childDimensions[CHILD_HEIGHT] = 0;}}super.setOrientation(orientation);}public void clearChildSize() {hasChildSize = false;setChildSize(DEFAULT_CHILD_SIZE);}public void setChildSize(int childSize) {hasChildSize = true;if (this.childSize != childSize) {this.childSize = childSize;requestLayout();}}private void measureChild(RecyclerView.Recycler recycler, int position, int widthSize,int heightSize, int[] dimensions) {final View child;try {child = recycler.getViewForPosition(position);} catch (IndexOutOfBoundsException e) {if (BuildConfig.DEBUG) {Log.w("LinearLayoutManager","LinearLayoutManager doesn't work well with animations. Consider switching them off",e);}return;}final RecyclerView.LayoutParams p = (RecyclerView.LayoutParams) child.getLayoutParams();final int hPadding = getPaddingLeft() + getPaddingRight();final int vPadding = getPaddingTop() + getPaddingBottom();final int hMargin = p.leftMargin + p.rightMargin;final int vMargin = p.topMargin + p.bottomMargin;// we must make insets dirty in order calculateItemDecorationsForChild to workmakeInsetsDirty(p);// this method should be called before any getXxxDecorationXxx() methodscalculateItemDecorationsForChild(child, tmpRect);final int hDecoration = getRightDecorationWidth(child) + getLeftDecorationWidth(child);final int vDecoration = getTopDecorationHeight(child) + getBottomDecorationHeight(child);final int childWidthSpec =getChildMeasureSpec(widthSize, hPadding + hMargin + hDecoration, p.width,canScrollHorizontally());final int childHeightSpec =getChildMeasureSpec(heightSize, vPadding + vMargin + vDecoration, p.height,canScrollVertically());child.measure(childWidthSpec, childHeightSpec);dimensions[CHILD_WIDTH] = getDecoratedMeasuredWidth(child) + p.leftMargin + p.rightMargin;dimensions[CHILD_HEIGHT] = getDecoratedMeasuredHeight(child) + p.bottomMargin + p.topMargin;// as view is recycled let's not keep old measured valuesmakeInsetsDirty(p);recycler.recycleView(child);}private static void makeInsetsDirty(RecyclerView.LayoutParams p) {if (!canMakeInsetsDirty) {return;}try {if (insetsDirtyField == null) {insetsDirtyField = RecyclerView.LayoutParams.class.getDeclaredField("mInsetsDirty");insetsDirtyField.setAccessible(true);}insetsDirtyField.set(p, true);} catch (NoSuchFieldException e) {onMakeInsertDirtyFailed();} catch (IllegalAccessException e) {onMakeInsertDirtyFailed();}}private static void onMakeInsertDirtyFailed() {canMakeInsetsDirty = false;if (BuildConfig.DEBUG) {Log.w("LinearLayoutManager","Can't make LayoutParams insets dirty, decorations measurements might be incorrect");}}
}
MainActivity.java
从这儿开始我们要进入正题了,这边要说真正的RecyclerView的应用了。
在此演示代码块里为了同时便于初学者和正在寻找RecyclerView上划下划时错位过大、重新布局影响体验的老手同时阅读和查询问题时方便,我要说一下整个Demo代码运行的设计思路如下:
- 上手先加载12条数据;
- 对上划(手指按住屏幕向上拉),一直拉、拉、拉,拉到第12条,触发了RecyclerView的onScrollStateChanged中的“往上拉拉不动”事件后开始再加载6条数据,以模拟实际项目中的“翻页时走一下后台API取新数据”的过程;
package org.mk.android.demo.demo.staggerdrecyclerview;import androidx.annotation.NonNull;
import androidx.appcompat.app.AppCompatActivity;
import androidx.databinding.DataBindingUtil;
import androidx.recyclerview.widget.DefaultItemAnimator;
import androidx.recyclerview.widget.RecyclerView;
import androidx.recyclerview.widget.SimpleItemAnimator;
import androidx.recyclerview.widget.StaggeredGridLayoutManager;import android.os.Bundle;
import android.util.Log;
import android.view.LayoutInflater;import org.mk.android.demo.demo.staggerdrecyclerview.databinding.ActivityMainBinding;import java.util.ArrayList;
import java.util.List;public class MainActivity extends AppCompatActivity {private ActivityMainBinding binding;private List<RVBean> rvBeanList = new ArrayList<>();private RVAdapter adapter;private final static String TAG = "DemoStaggerdRecyclerView";private final static String CDN_URL="http://172.16.4.249/mkcdn";private FullyStaggeredGridLayoutManager slm=null;@Overrideprotected void onCreate(Bundle savedInstanceState) {super.onCreate(savedInstanceState);binding = DataBindingUtil.inflate(LayoutInflater.from(this), R.layout.activity_main, null, false);setContentView(binding.getRoot());slm=new FullyStaggeredGridLayoutManager(2,FullyStaggeredGridLayoutManager.VERTICAL);binding.rv.setLayoutManager(slm);((SimpleItemAnimator)binding.rv.getItemAnimator()).setSupportsChangeAnimations(false);((DefaultItemAnimator) binding.rv.getItemAnimator()).setSupportsChangeAnimations(false);binding.rv.getItemAnimator().setChangeDuration(0);binding.rv.setHasFixedSize(true);initData();}private void initData() {rvBeanList.add(new RVBean(CDN_URL+"/img/recommend/recom_13.jpeg", "1"));rvBeanList.add(new RVBean(CDN_URL+"/img/recommend/recom_14.jpeg", "2"));rvBeanList.add(new RVBean(CDN_URL+"/img/recommend/recom_15.jpeg", "3"));rvBeanList.add(new RVBean(CDN_URL+"/img/recommend/recom_16.jpeg", "4"));rvBeanList.add(new RVBean(CDN_URL+"/img/recommend/recom_17.jpeg", "5"));rvBeanList.add(new RVBean(CDN_URL+"/img/recommend/recom_18.jpeg", "6"));rvBeanList.add(new RVBean(CDN_URL+"img/recommend/recom_19.jpeg", "7"));rvBeanList.add(new RVBean(CDN_URL+"/img/recommend/recom_20.jpeg", "8"));rvBeanList.add(new RVBean(CDN_URL+"/img/recommend/recom_21.jpeg", "9"));rvBeanList.add(new RVBean(CDN_URL+"/img/recommend/recom_22.jpeg", "10"));rvBeanList.add(new RVBean(CDN_URL+"/img/recommend/recom_23.jpeg", "11"));rvBeanList.add(new RVBean(CDN_URL+"/img/recommend/recom_24.jpeg", "12"));adapter = new RVAdapter(this, rvBeanList);//主要就是这个LayoutManager,就是用这个来实现瀑布流的,2表示有2列(垂直)或3行(水平),我们这里用的垂直VERTICAL//binding.rv.addItemDecoration(new SpaceItemDecoration(2, 20));binding.rv.addOnScrollListener(new RecyclerView.OnScrollListener() {@Overridepublic void onScrollStateChanged(@NonNull RecyclerView recyclerView, int newState) {super.onScrollStateChanged(recyclerView, newState);if (!recyclerView.canScrollVertically(1) && newState == RecyclerView.SCROLL_STATE_IDLE) {Log.i(TAG, "上拉拉不动时触发加载新数据");rvBeanList = new ArrayList<>();rvBeanList.add(new RVBean(CDN_URL+"/img/recommend/recom_25.jpeg", "13"));rvBeanList.add(new RVBean(CDN_URL+"/img/recommend/recom_26.jpeg", "14"));rvBeanList.add(new RVBean(CDN_URL+"/img/recommend/recom_27.jpeg", "15"));rvBeanList.add(new RVBean(CDN_URL+"/img/recommend/recom_28.jpeg", "16"));rvBeanList.add(new RVBean(CDN_URL+"/img/recommend/recom_29.jpeg", "17"));rvBeanList.add(new RVBean(CDN_URL+"/img/recommend/recom_30.jpeg", "18"));adapter.refreshDatas(rvBeanList);}if (!recyclerView.canScrollVertically(-1) && newState == RecyclerView.SCROLL_STATE_IDLE) {Log.i(TAG, "下拉拉不动时触发加载新数据");}}@Overridepublic void onScrolled(RecyclerView recyclerView, int dx, int dy) {super.onScrolled(recyclerView, dx, dy);slm.invalidateSpanAssignments();//防止第一行到顶部有空白}});//((SimpleItemAnimator)RecyclerView.getItemAnimator()).setSupportsChangeAnimations(false);binding.rv.setAdapter(adapter);}
}
核心代码导读:
以下这一陀就是我说的使用自定义的StaggeredGridLayoutManager+adapter中的事件覆盖一起实现了著名的RecyclerView上划下划时重新布局、翻页的梗。

同时,一定要记得覆盖RecyclerView的onScrolled事件,在事件中加入这样的代码
@Override
public void onScrolled(RecyclerView recyclerView, int dx, int dy) {super.onScrolled(recyclerView, dx, dy);slm.invalidateSpanAssignments();//防止第一行到顶部有空白
}
总结
正确的做法
因此这边总结一下共有5个点,做到这5个点才能真正避免网上一堆的关于RecyclerView快速上划下划时整个界面产生了春左右列切换、重新布局、布局不合理如:左边垂直排了3-4个图片而把右边留出一大块空白的梗的综合手段:
- 必须使用一个自定义的StaggeredGridLayoutManager,你可以直接使用我博客中的代码,它来自于我正在制作的上生产的mao-sir.com的app中的代码,这是我的个人的一个开源中台产品;
- 必须要设置上面代码截图中的4个属性即:
SimpleItemAnimator里的setSupportsChangeAnimations(false);
DefaultItemAnimator里的setSupportsChangeAnimations(false);
setChangeDuration(0);
setHasFixedSize(true); -
必须要覆盖RecyclerView的onScrolled方法,在方法里设置防止第一行到顶部有空白的操作;
-
必须要在adapter里覆盖getItemViewType,在方法内返回position;
-
必须要在adapter里刷新数据时使用:notifyItemRangeChanged;
错误的做法
这边我说网上绝大部分示例是错的可能是客气了点,因该说可以搜到的全是错的。我们也来总结一下,希望各位不要再去踩这种坑了。
- 把图片的尺寸预先存在后台、每次接口取图片时后台把这个尺寸返回给到RecyclerView的adapter。。。这是得有多。。。无聊的做法,覆盖一个getItemViewType不就同样实现了这样的手法?
- setGapStrategy(StaggeredGridLayoutManager.GAP_HANDLING_NONE)的做法是错的,设完后图片要么在一开始进入界面时显示不出要么显示不全,我不知道这个问题最早是谁想出的解决办法?怎么自己也不去验证一下对不对?
- 网上还有一种手法也是错的离谱,就是在onBindViewHolder方法里通过BitMap+GLIDE重设图片的尺寸,这种方法根本无效;
下面我们来感受一下使用了网上错误的手法后,这个瀑布流会变成什么样,大家就能感受到我说的这种:体验问题了。这种体验问题在APP上如果没有做好会直接要了你这家企业的“口碑的命”。
来看错误手法导致的差劲的瀑布流体验
请看下面的“反例”的演示,注意到了上划或者下划时左右列切换、重排的问题了没?给大家感受一下。

后记
此处我们需要写一下RecyclerView在生产上真正使用时在设计上的一个补充点。
根据上面的代码我们可以看到我用了上划触发上划到一页底部并实现翻页的无缝衔接的体验。
但实际在生产上我们会遇到上千~近万张图片的前后台传输。如果图片一多、翻页一多,因为这个翻而是介于前后台交互的一个动作,因此有时在遇有弱网或者是网络抖动时卡死Android主进程并导致App闪退、卡屏、白屏等现象。
所以,我这边给出万级QPS并发下的瀑布流设计上的两个点:
- APP的首页、分类、搜索的list、瀑布流、三行三列这种界面的数据必须来自后台的es,而不是去什么后台查数据库这么来一下。在中/后台,我们通过企业内部的运营管理平台对于内容、商品进行“上下架”后会触发一个ES或者是RediSearch(我的开源产品里已经彻底不用ES了)的全量或者是增量索引;
- 在APP端,不能翻一页就去后台取一下!而是APP端也要做一层“缓存”,可以把已经获取到的数据存在本地的内嵌存储,本地取不到再去取后/中台的API接口获取数据;
以此充分极大化加快我们APP端的反映速度同时取得最优的用户体验。
好,结束今天的教程。大家不妨自己动一下手试试看效果去吧。