做网站是做完给钱还是百度高级搜索
目录
实现窗口可视化
数字图像加密
窗口布局设置
基于混沌Logistic的图像加密
基于三重DES的图像加密
数字图像解密
窗口布局设置
基于混沌Logistic的图像解密
基于三重DES的图像解密
基于LSB的数字水印提取
窗口布局设置
水印的嵌入与提取
实现窗口可视化
这里我们使用python自带的tkinter标准库实现图形用户界面(GUI)应用程序,其提供了一组工具和组件,使开发者能够创建窗口、按钮、文本框、标签等各种 GUI 元素,并通过编写代码来处理用户的输入和操作。
首先我们先导入tkinter库及其对应要使用的函数:
from tkinter import *
# 导入tkinter中的对话框函数messagebox并将其重命名为 mbox
import tkinter.messagebox as mbox
通过主函数main()创建窗口,并设计其对应的样式:
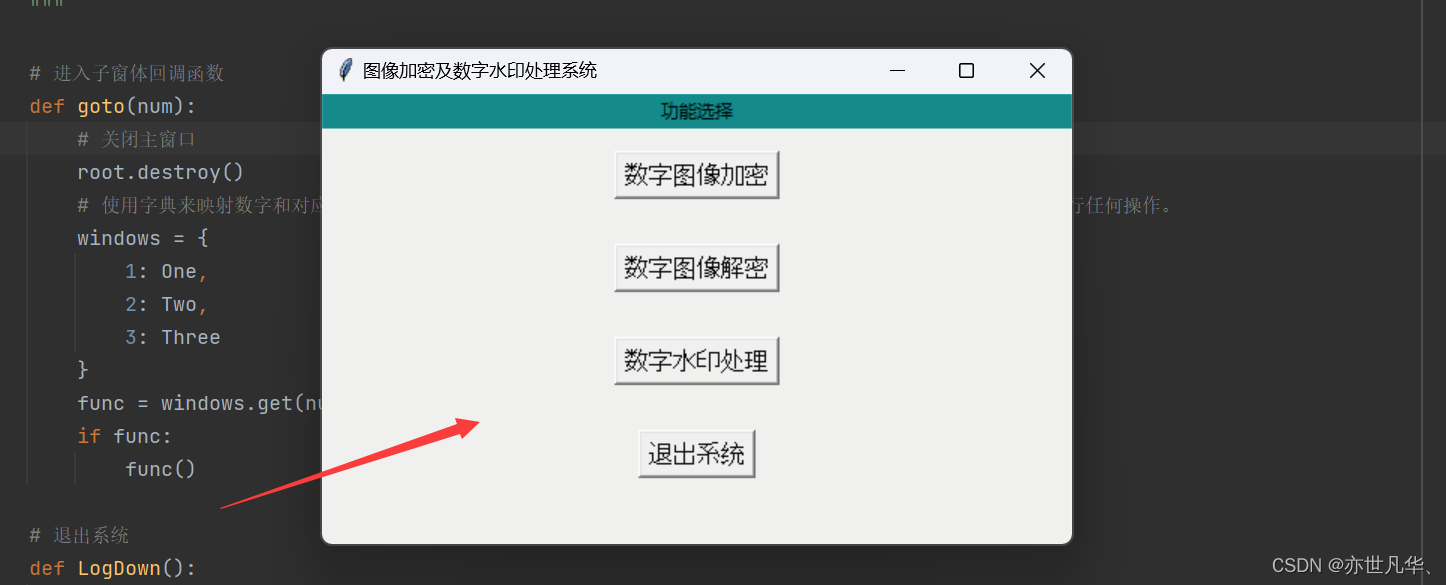
def main():# 创建主窗体布局root = Tk()# 设置窗口大小为 300x200 像素,并将其放置在屏幕位置 (600, 200)root.geometry('500x300+600+200')# 设置标题root.title('图像加密及数字水印处理系统')"""创建一个标签组件参数: root表示该组件父容器即窗口,text参数表示显示文本内容,bg为标签背景颜色pack() 方法将标签添加到父容器中,fill=X 表示填充方向为水平方向(X 轴方向)"""Label(root, text='功能选择', bg='#008c8c').pack(fill=X)"""创建一个按钮组件参数: root是该组件的父容器,text参数表示按钮上显示的文本内容,font参数设置按钮文本的字体和大小,command参数设置按钮的回调函数这里使用一个lambda表达式来定义回调函数。表达式实际上是一个匿名函数,当用户点击按钮时,会调用该函数,然后函数会调用goto()函数并将参数传递给它。"""接下来继续在main()函数下给窗口添加内容,这里添加四个按钮,并给每个按钮设置回调函数:
# 进入子窗体回调函数def goto(num):# 关闭主窗口root.destroy()# 使用字典来映射数字和对应的窗口函数,然后在 goto 函数中进行查找和调用,如果找到则调用该函数,否则不执行任何操作。windows = {1: One,2: Two,3: Three}func = windows.get(num, lambda: None)if func:func()# 退出系统def LogDown():if mbox.askokcancel("退出", "确认退出系统吗?"):root.destroy()# 设置窗口布局btn1 = Button(root, text="数字图像加密", font=('Arial', 12), command=lambda: goto(1))# pack()方法将按钮组件添加到父容器中。参数用于设置垂直方向上的外边距(即上下边距),其值为 15。btn1.pack(pady=15)btn2 = Button(root, text="数字图像解密", font=('Arial', 12), command=lambda: goto(2))btn2.pack(pady=15)btn3 = Button(root, text="数字水印处理", font=('Arial', 12), command=lambda: goto(3))btn3.pack(pady=15)btn4 = Button(root, text="退出系统", font=('Arial', 12), command=LogDown)btn4.pack(pady=15)# 监听并处理用户的事件,直到程序被显式关闭或者窗口被销毁, 只有当主事件循环结束(即窗口被关闭或销毁)时,才会继续执行 mainloop() 后面的代码。root.mainloop()接下来给字典映射的函数名称放置在和main()函数平级的位置,最后调用主函数
# 第一个窗口
def One():print(1)# 第二个窗口
def Two():print(1)# 第三个窗口
def Three():print(1)# 执行 main() 函数
if __name__ == '__main__':main()
最终执行的效果如下:
感觉画面有点小丑,加个图片试试吧, 需要导入 ImageTk 和 Image 类,它们位于 PIL(Python Imaging Library)库中,终端执行如下命令进行安装:
pip install pillow然后设置背景图片,根据自己设备的图片,调整按钮的上边距内容:
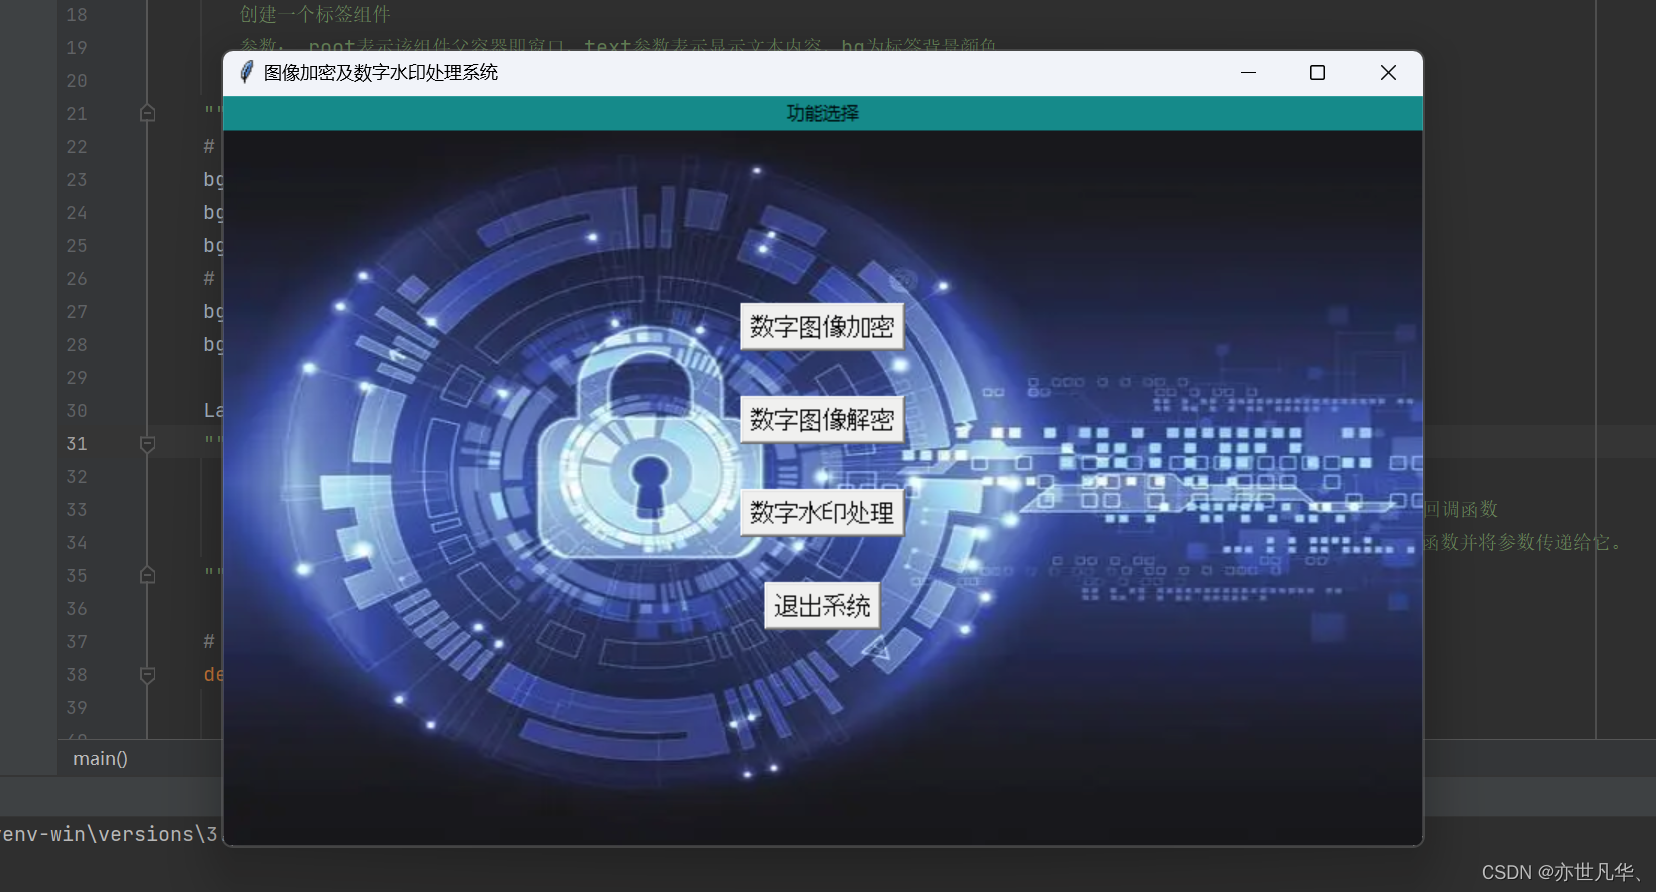
# 加载背景图片
bg_image = Image.open("bg.jpg")
bg_image = bg_image.resize((800, 500), Image.BILINEAR)  # 调整图片大小
bg_photo = ImageTk.PhotoImage(bg_image)
# 创建一个标签组件作为背景
bg_label = Label(root, image=bg_photo)
bg_label.place(x=0, y=0, relwidth=1, relheight=1)
画面如下(效果还行,暂时先这样吧,后期有新功能再接着改):
数字图像加密
数字图像加密按钮,当我们点击之后也是呈现一个窗口,这里撰写两种对图像进行加密的方式,ok接下来我们首先实现基本窗口的设置:
窗口布局设置
图像加密窗口的布局样式与主窗口的布局样式一致,这里就不再赘述了,具体的代码如下:
# 第一个窗口
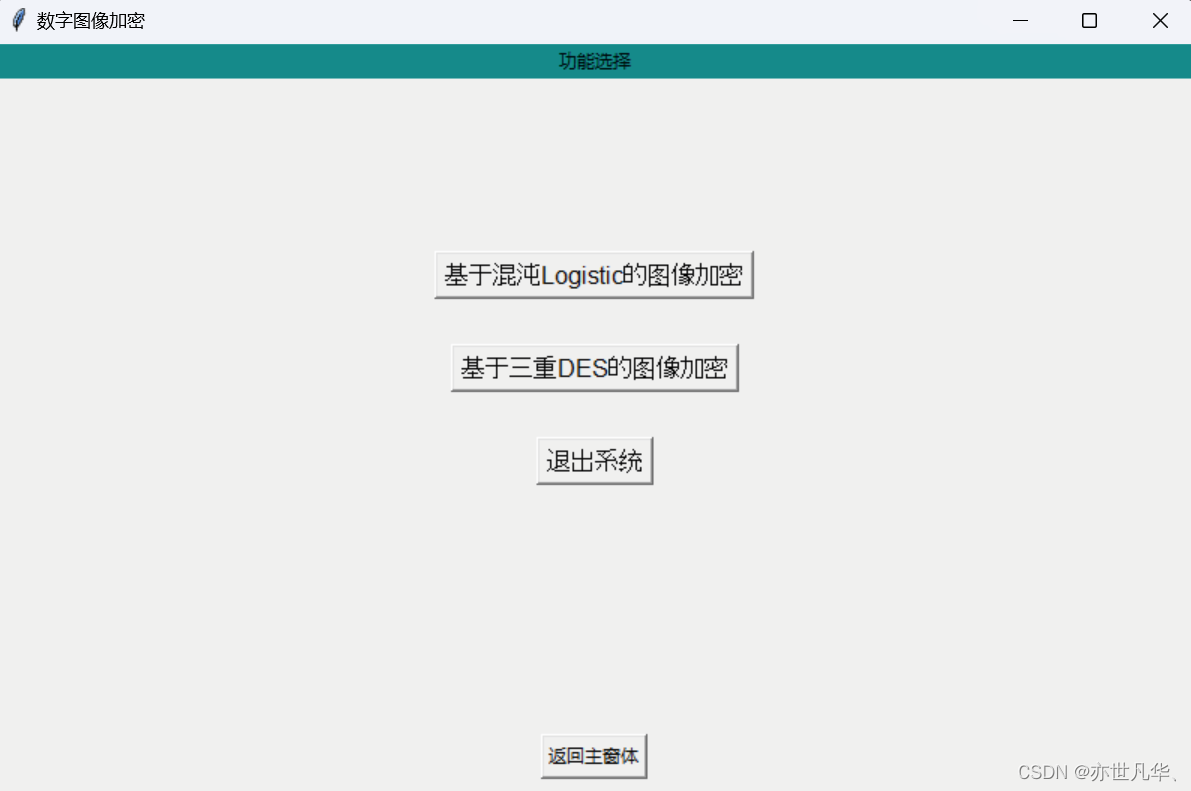
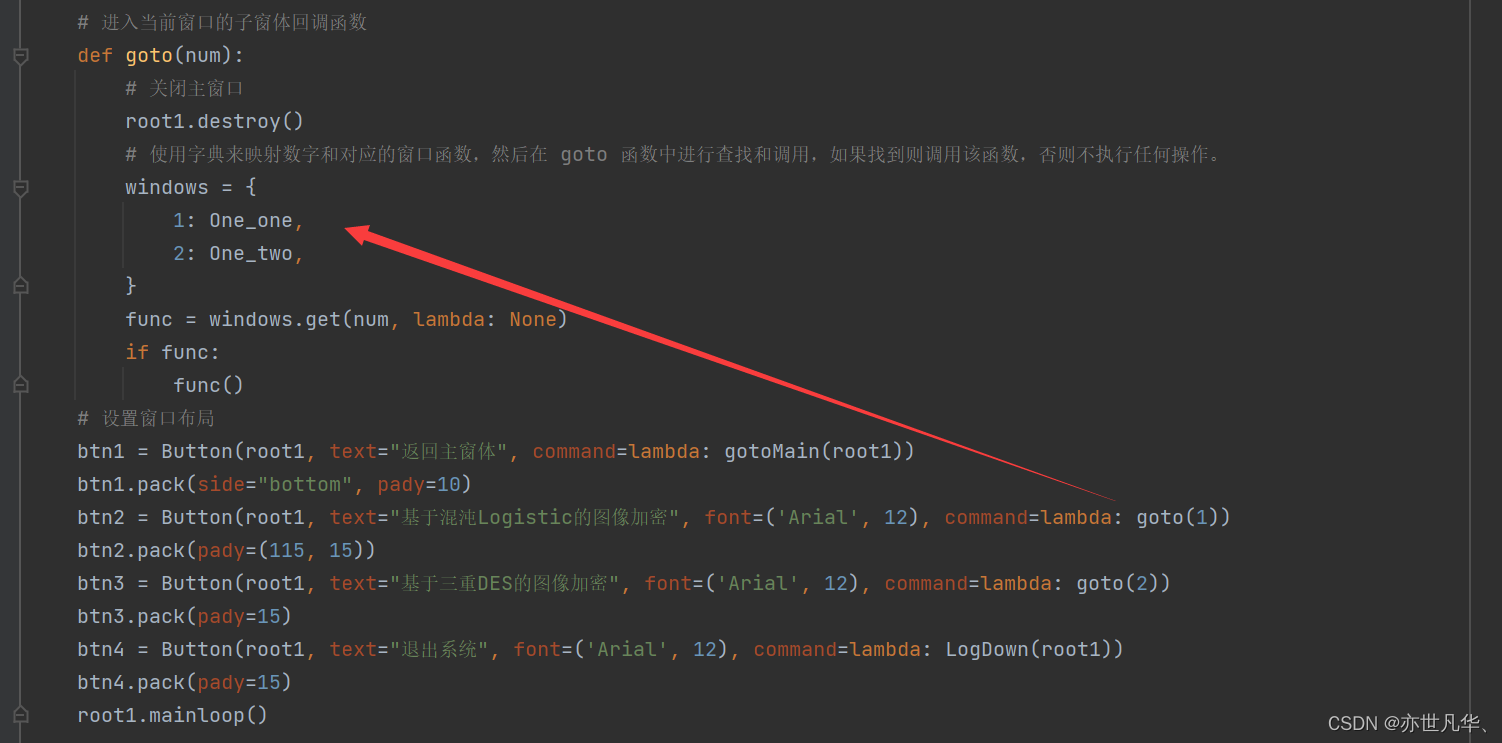
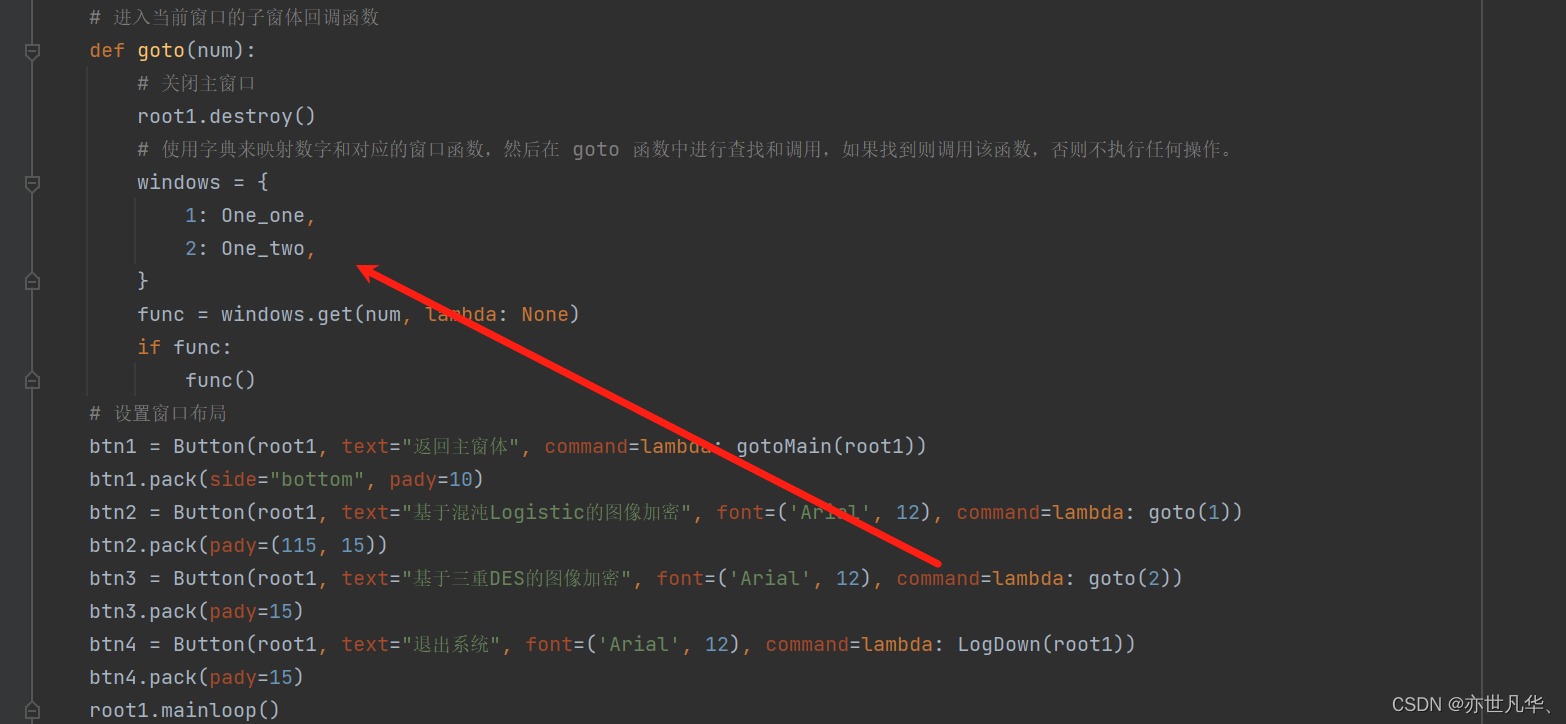
def One():# 函数内部使用全局变量encryptionglobal encryption# 将全局变量encryption的值设置为True,以表示已经进行了加密操作。encryption = True# 创建子窗口布局root1 = Tk()# 设置窗口大小为 300x200 像素,并将其放置在屏幕位置 (600, 200)root1.geometry('800x500+600+200')# 设置标题root1.title('数字图像加密')Label(root1, text='功能选择', bg='#008c8c').pack(fill=X)# 进入当前窗口的子窗体回调函数def goto(num):# 关闭主窗口root1.destroy()# 使用字典来映射数字和对应的窗口函数,然后在 goto 函数中进行查找和调用,如果找到则调用该函数,否则不执行任何操作。windows = {1: One_one,2: One_two,}func = windows.get(num, lambda: None)if func:func()# 设置窗口布局btn1 = Button(root1, text="返回主窗体", command=lambda: gotoMain(root1))btn1.pack(side="bottom", pady=10)btn2 = Button(root1, text="基于混沌Logistic的图像加密", font=('Arial', 12), command=lambda: goto(1))btn2.pack(pady=(115, 15))btn3 = Button(root1, text="基于三重DES的图像加密", font=('Arial', 12), command=lambda: goto(2))btn3.pack(pady=15)btn4 = Button(root1, text="退出系统", font=('Arial', 12), command=lambda: LogDown(root1))btn4.pack(pady=15)root1.mainloop()从上面的代码中,我们设置了一个全局变量用于表达图像是否处在加密状态中:
# 定义全局变量
encryption = False  # 表示未加密状态
最终呈现的结果如下:
基于混沌Logistic的图像加密
当我们点击该加密算法的按钮之后,通过回调函数进入到该加密算法界面:
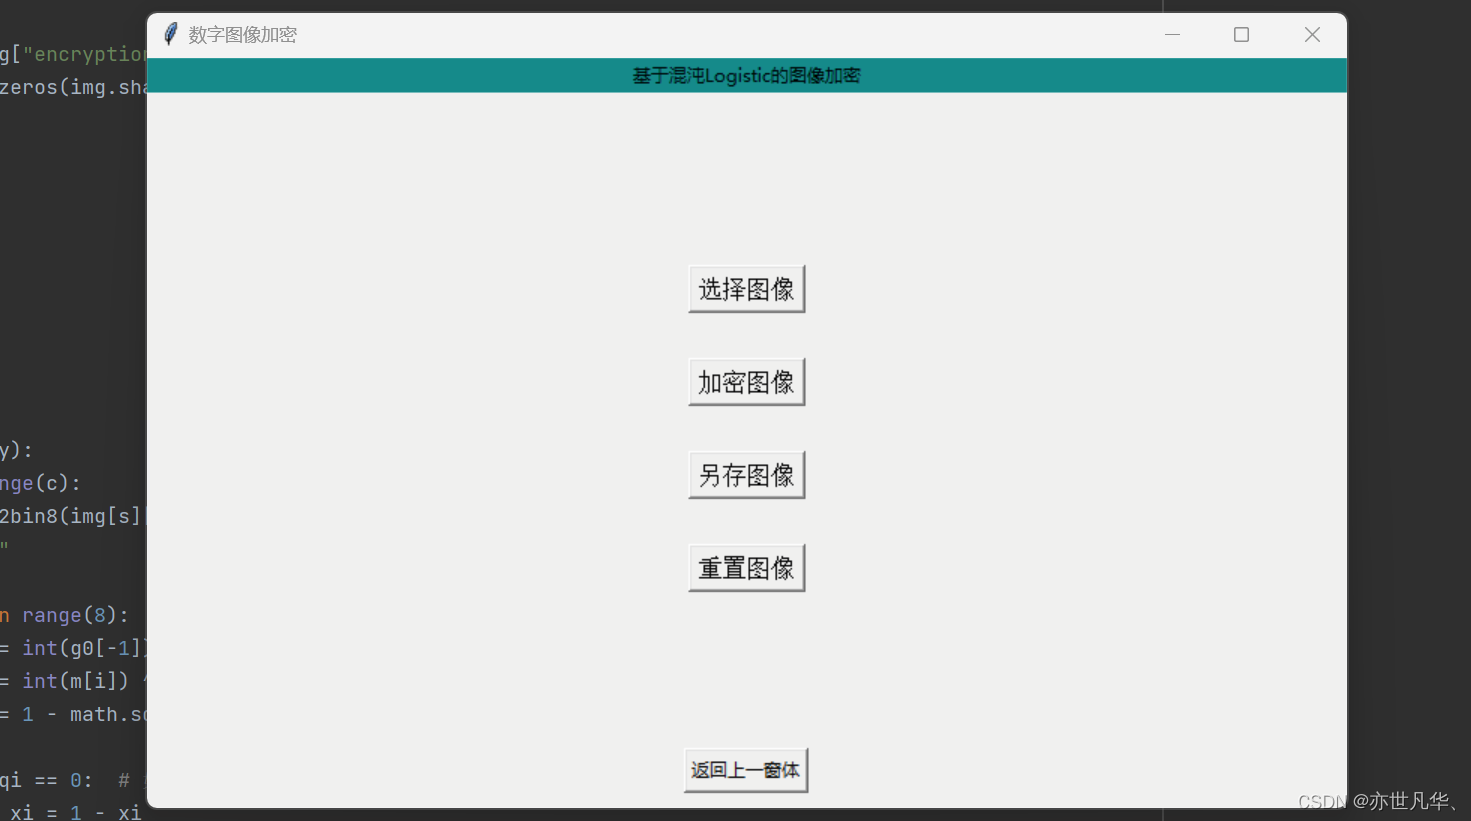
然后接下来我们开始设置进入到该图像加密的UI界面的设置,代码如下:
def One_one():# 页面布局root1_1 = Tk()root1_1.geometry('800x500+600+200')root1_1.title('数字图像加密')Label(root1_1, text='基于混沌Logistic的图像加密', bg='#008c8c').pack(fill=X)# 回调函数def goOne():root1_1.destroy()One()# 设置窗口布局btn1 = Button(root1_1, text="返回上一窗体", command=goOne)btn1.pack(side="bottom", pady=10)btn2 = Button(root1_1, text="选择图像", font=('Arial', 12), command=Open_img)btn2.pack(pady=(115, 15))btn3 = Button(root1_1, text="加密图像", font=('Arial', 12), command=Logistical)btn3.pack(pady=15)btn4 = Button(root1_1, text="另存图像", font=('Arial', 12), command=SaveEncryptionImg)btn4.pack(pady=15)btn5 = Button(root1_1, text="重置图像", font=('Arial', 12), command=ResetEncryptionImg)btn5.pack(pady=15)root1_1.mainloop()呈现的界面如下:
接下来我们开始写选择图像的回调函数进行书写,这里需要先下载opencv-python库,对于opencv-python库,它使用PEP 517来构建wheels,但是可能缺少一些必要的编译工具,解决此问题的方法是升级pip到最新版本,并确保已安装所有必要的编译工具。建议您也将pip升级到最新版本,可以通过运行以下命令来升级:
python -m pip install --upgrade pipopencv-python这个库内存比较大,建议临时换源来进行安装
pip install opencv-python -i https://pypi.tuna.tsinghua.edu.cn/simple/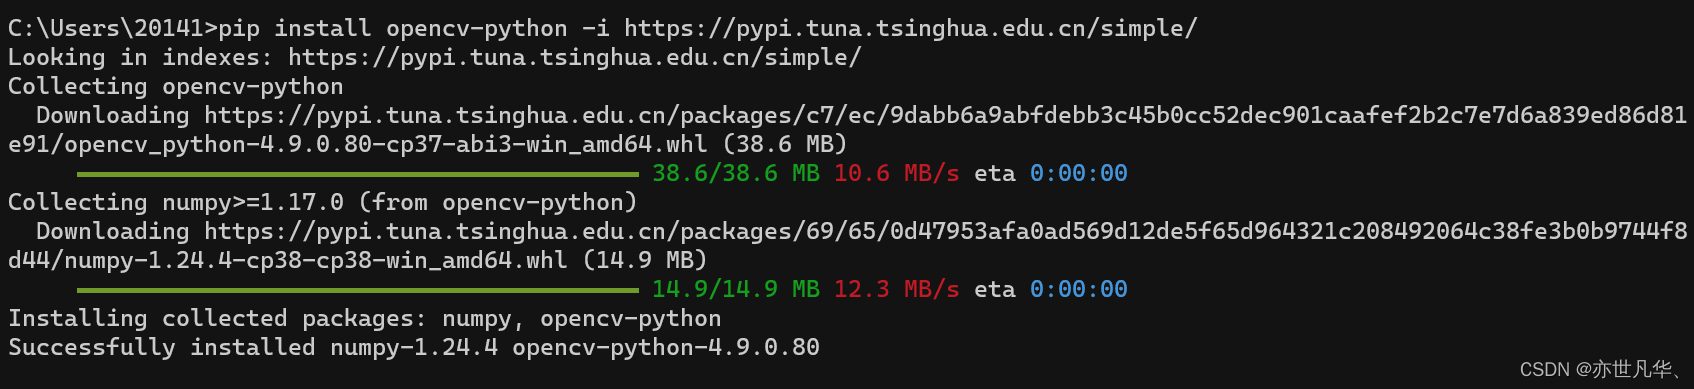
具体代码如下:
# 可以进行图像读取、显示、保存、转换、滤波、特征提取等操作。
import cv2
# 可以进行矩阵运算、数组操作、数值计算等,常用于图像数据的处理和分析。
import numpy as np
# 提供了丰富的图像读取、写入、裁剪、旋转、缩放等功能。
from PIL import ImageTk, Imageglobal_img = ""  # 表示文件路径
panelA = None  # 也是一个用于显示图像的容器,可以将其添加到tkinter窗口中以显示图像。
panelB = None  # 也是一个用于显示图像的容器,可以将其添加到tkinter窗口中以显示图像。# 定义图像处理的相关信息的字典
encryption_img = {  # 加密"encryption": np.array([]), "EncryptionImg": np.array([]), "ImgPath": "", "width": None, "height": None
}
decrypt_img = {"decrypt": None, "DecryptionImg": None, "ImgPath": "", "width": None, "height": None}  # 解密# 上传图像
def Open_img():global global_img, panelA# 让用户选择一个文件,并返回所选文件的路径,并赋值给 global_imgglobal_img = filedialog.askopenfilename(title='open')if global_img.endswith('jpg') or global_img.endswith('png') or global_img.endswith('bmp'):img = cv2.imdecode(np.fromfile(global_img, dtype=np.uint8), 1)rgb = cv2.cvtColor(img, cv2.COLOR_BGR2RGB)size = img.shapenew_width = 320scale_factor = new_width / rgb.shape[1]new_height = int(rgb.shape[0] * scale_factor)resize_image0 = cv2.resize(rgb, dsize=(new_width, new_height), interpolation=cv2.INTER_LINEAR)resize_image1 = Image.fromarray(resize_image0)img1 = ImageTk.PhotoImage(resize_image1)panelA = Label(image=img1)panelA.image = img1panelA.place(x=10, y=(500 - panelA.winfo_reqheight()) / 2)if encryption:encryption_img["encryption"] = imgencryption_img["ImgPath"] = global_imgencryption_img["width"] = size[1]encryption_img["height"] = size[0]else:print(1)print("----------图像已打开----------")else:mbox.showinfo("错误", "上传的文件不是图片格式,请重新上传")
完成上传图像之后,接下来我们基于混沌Logistic的加密图像算法对图像进行加密:
def int2bin8(x):  # 整型转8位二进制return bin(x)[2:].zfill(8)def int2bin16(x):  # 整型转16位二进制return bin(x)[2:].zfill(16)# 基于混沌Logistic的加密图像
def Logistical():global panelBimg = encryption_img["encryption"]encryptionImg = np.zeros(img.shape, np.uint8)x0 = 0.15624562g0 = 164j0 = 10x = img.shape[0]y = img.shape[1]c = img.shape[2]g0 = int2bin16(g0)for s in range(x):for n in range(y):for z in range(c):m = int2bin8(img[s][n][z])  # 像素值转八位二进制ans = ""for i in range(8):ri = int(g0[-1])  # 取手摇密码机最后一位riqi = int(m[i]) ^ ri  # 与像素值异或得qixi = 1 - math.sqrt(abs(2 * x0 - 1))  # f1(x)混沌迭代if qi == 0:  # 如果qi=0,则运用x0i+x1i=1;xi = 1 - xix0 = xi  # xi迭代t = int(g0[0]) ^ int(g0[12]) ^ int(g0[15])  # 本源多项式x^15+x^3+1g0 = str(t) + g0[0:-1]  # gi迭代ci = math.floor(xi * (2 ** j0)) % 2  # 非线性转换算子ans += str(ci)re = int(ans, 2)encryptionImg[s][n][z] = re  # 写入新图像encryption_img["EncryptionImg"] = encryptionImgrgb = cv2.cvtColor(encryptionImg, cv2.COLOR_BGR2RGB)new_width = 320scale_factor = new_width / rgb.shape[1]new_height = int(rgb.shape[0] * scale_factor)resize_image0 = cv2.resize(rgb, dsize=(new_width, new_height), interpolation=cv2.INTER_LINEAR)arrayImage = Image.fromarray(np.uint8(resize_image0))encryptionImg = ImageTk.PhotoImage(arrayImage)panelB = Label(image=encryptionImg)panelB.image = encryptionImgpanelB.place(x=(800 - panelB.winfo_reqwidth() - 10), y=(500 - panelB.winfo_reqheight()) / 2)print("-----加密完成-----")
接下来就是将加密后的图片进行保存以及对图片进行重置两个函数的实现:
# 保存图片
def SaveEncryptionImg():filePath = filedialog.askdirectory(title='open')cv2.imencode(".jpg", encryption_img["EncryptionImg"])[1].tofile(filePath+'/EncryptionImg.jpg')print("-----保存完成-----")# 重置图片
def ResetEncryptionImg():global panelA, panelBencryption_img["encryption"] = np.array([])encryption_img["EncryptionImg"] = np.array([])if panelA:panelA.place_forget()if panelB:panelB.place_forget()print("-----重置完成-----")
最终呈现的结果如下:
基于三重DES的图像加密
当我们点击该加密算法的按钮之后,通过回调函数进入到该加密算法界面:
然后接下来我们开始设置进入到该图像加密的UI界面的设置,代码如下:
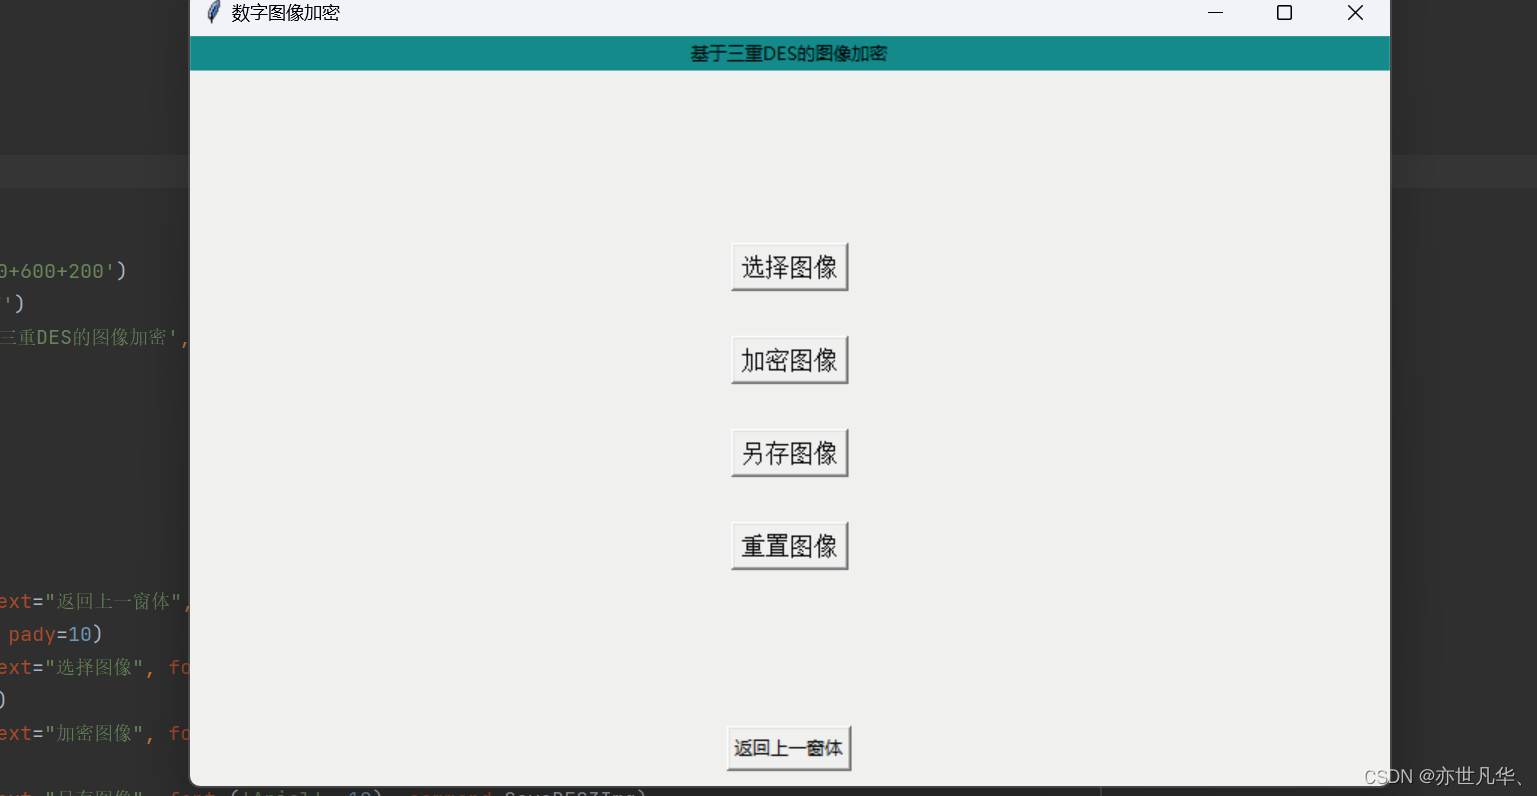
# 第1_2个子窗口
def One_two():# 页面布局root1_2 = Tk()root1_2.geometry('800x500+600+200')root1_2.title('数字图像加密')Label(root1_2, text='基于三重DES的图像加密', bg='#008c8c').pack(fill=X)# 回调函数def goOne():root1_2.destroy()One()# 设置窗口布局btn1 = Button(root1_2, text="返回上一窗体", command=goOne)btn1.pack(side="bottom", pady=10)btn2 = Button(root1_2, text="选择图像", font=('Arial', 12), command=Open_img)btn2.pack(pady=(115, 15))btn3 = Button(root1_2, text="加密图像", font=('Arial', 12), command=DES3_encryption)btn3.pack(pady=15)btn4 = Button(root1_2, text="另存图像", font=('Arial', 12), command=SaveDES3Img)btn4.pack(pady=15)btn5 = Button(root1_2, text="重置图像", font=('Arial', 12), command=ResetEncryptionImg)btn5.pack(pady=15)root1_2.mainloop()
呈现的界面如下:
基于三重数据加密标准(Triple Data Encryption Standard,简称3DES)的图像加密是一种使用3DES算法对图像进行保护和加密的方法。
3DES是一种对称加密算法,它是对经典DES算法的改进和扩展。经典DES使用56位密钥对64位的数据块进行加密,但随着计算能力的提升,DES算法的安全性逐渐降低。为了增强安全性,3DES采用了多次DES加密操作,通常使用两个或三个不同的密钥,对数据进行多轮加密。
基于三重DES的图像加密过程如下:
密钥选择:选择两个或三个不同的密钥作为加密算法的输入。
分组操作:将待加密的图像数据分为固定大小的数据块(例如64位),每个数据块进行独立的加密操作。
加密操作:对每个数据块进行多轮的DES加密操作,通常采用加密-解密-加密(EDE)的模式。具体步骤如下:
使用第一个密钥进行DES加密;使用第二个密钥进行DES解密;(可选)使用第三个密钥再次进行DES加密。
合并结果:将加密后的数据块重新组合成加密图像。
基于三重DES的图像加密能够提供较高的安全性,通过多次加密操作增加了破解的难度。同时,由于每个数据块是独立加密的,因此即使出现部分数据损坏或丢失,也不会影响整个图像的解密。这使得基于三重DES的图像加密在保护敏感图像数据方面具有一定的优势。
具体实现代码如下:
"""
基于三重DES的加密图像与解密图像代码
"""# 图片像素二进制值获取
def get_pixel(img):img = cv2.imread(img)img = cv2.cvtColor(img, cv2.COLOR_BGR2RGB)img_width = img.shape[1]img_height = img.shape[0]bin_data = ''for i in range(img_width):for j in range(img_height):r, g, b = img[j, i] # 获取像素点的rgb值bin_data += '{:08b}'.format(r)bin_data += '{:08b}'.format(g)bin_data += '{:08b}'.format(b)return bin_data, img_width, img_height# DES明文分组处理函数
def set_group(bin_data):print("*** 正在进行明文分组 ***")bin_data_list = []data_length = len(bin_data)i = 0while data_length >= 64: # 按照# print("正在划分第"+str(i)+"个明文分组 ",data_length)bin_data_list.append(bin_data[:64])data_length -= 64bin_data = bin_data[64:]i += 1print("正在处理最后一个明文分组 ", data_length)if data_length == 0: # 若恰好能够完全分组return bin_data_listelse:padding_length = 64 - data_lengthpadding_byte_size = padding_length # 8# 填充采用 PKCS#5填充标准padding_data = ('{:08b}'.format(padding_byte_size)) * padding_byte_sizelast_group_data = bin_data + padding_databin_data_list.append(last_group_data) # 填加最后填充的内容return bin_data_list# 将明文分组信息储存在txt文件中,便于2组内加密中获取相应的明文数据
def save_group_data(bin_data_list):f = open('group.txt', 'w')for i in bin_data_list:f.write(i + '\n')f.close()# 获取明文的全部分组
def get_group():group_list = []group_file_name = 'group.txt' # 明文分组文件名f = open(group_file_name, 'r')for line in f:group_list.append(line.strip('\n'))f.close()return group_list# 获取初始IV向量
def get_IV():iv_seed = os.urandom(8) # 随机获取8个字符iv_bin_str = ''for i in iv_seed:iv_bin_str += '{:08b}'.format(i)return iv_bin_str# 随机生成满足奇偶校验的64位密钥
def get_rand_key(p):key_seed = os.urandom(8) # 随机获取8个字符KEY_bin_str = ''for i in key_seed:binstr = '{:07b}'.format(i) # 将每个字符转成7位二进制,第8位用于表示奇偶校验位xor = int(binstr[0]) ^ int(binstr[1]) ^ int(binstr[2]) ^ int(binstr[3]) ^ int(binstr[4]) ^ int(binstr[5]) ^ int(binstr[6])for ix in range(7):KEY_bin_str += str(binstr[ix])KEY_bin_str += str(xor)print('随机生成的密钥', p, '为: ', KEY_bin_str, ' ', len(KEY_bin_str), '位')return KEY_bin_str# 检测64位密钥的奇偶校验是否通过
def check_key(key_bin):for i in range(0, 64, 8):xor = int(key_bin[i]) ^ int(key_bin[i + 1]) ^ int(key_bin[i + 2]) ^ int(key_bin[i + 3]) ^ int(key_bin[i + 4]) ^ int(key_bin[i + 5]) ^ int(key_bin[i + 6])if xor != int(key_bin[i + 7]):return Falsereturn True# 密钥置换选择 1
key_table1 = [56, 48, 40, 32, 24, 16, 8, 0, 57, 49, 41, 33, 25, 17, 9, 1, 58, 50, 42, 34, 26, 18, 10, 2, 59, 51, 43, 35, 62, 54,46, 38, 30, 22, 14, 6, 61, 53, 45, 37, 29, 21, 13, 5, 60, 52, 44, 36, 28, 20, 12, 4, 27, 19, 11, 3
]
# 密钥置换选择 2
key_table2 = [13, 16, 10, 23, 0, 4, 2, 27, 14, 5, 20, 9, 22, 18, 11, 3, 25, 7, 15, 6, 26, 19, 12, 1, 40, 51, 30, 36, 46, 54, 29,39, 50, 44, 32, 47, 43, 48, 38, 55, 33, 52, 45, 41, 49, 35, 28, 31
]
# 初始置换 IP
IP = [57, 49, 41, 33, 25, 17, 9, 1, 59, 51, 43, 35, 27, 19, 11, 3, 61, 53, 45, 37, 29, 21, 13, 5, 63, 55, 47, 39, 31,23, 15, 7, 56, 48, 40, 32, 24, 16, 8, 0, 58, 50, 42, 34, 26, 18, 10, 2, 60, 52, 44, 36, 28, 20, 12, 4, 62, 54,46, 38, 30, 22, 14, 6
]
# 逆初始置换
IP_1 = [39, 7, 47, 15, 55, 23, 63, 31, 38, 6, 46, 14, 54, 22, 62, 30, 37, 5, 45, 13, 53, 21, 61, 29, 36, 4, 44, 12, 52,20, 60, 28, 35, 3, 43, 11, 51, 19, 59, 27, 34, 2, 42, 10, 50, 18, 58, 26, 33, 1, 41, 9, 49, 17, 57, 25, 32, 0,40, 8, 48, 16, 56, 24]
# 选择扩展运算 E
E = [31, 0, 1, 2, 3, 4, 3, 4, 5, 6, 7, 8, 7, 8, 9, 10, 11, 12, 11, 12, 13, 14, 15, 16, 15, 16, 17, 18, 19, 20, 19, 20,21, 22, 23, 24, 23, 24, 25, 26, 27, 28, 27, 28, 29, 30, 31, 0]
# 置换运算 P
P = [15, 6, 19, 20, 28, 11, 27, 16, 0, 14, 22, 25, 4, 17, 30, 9, 1, 7, 23, 13, 31, 26, 2, 8, 18, 12, 29, 5, 21, 10, 3,24]
# S盒
sbox = [# S1[14, 4, 13, 1, 2, 15, 11, 8, 3, 10, 6, 12, 5, 9, 0, 7, 0, 15, 7, 4, 14, 2, 13, 1, 10, 6, 12, 11, 9, 5, 3, 8,4, 1, 14, 8, 13, 6, 2, 11, 15, 12, 9, 7, 3, 10, 5, 0, 15, 12, 8, 2, 4, 9, 1, 7, 5, 11, 3, 14, 10, 0, 6, 13],# S2[15, 1, 8, 14, 6, 11, 3, 4, 9, 7, 2, 13, 12, 0, 5, 10, 3, 13, 4, 7, 15, 2, 8, 14, 12, 0, 1, 10, 6, 9, 11, 5,0, 14, 7, 11, 10, 4, 13, 1, 5, 8, 12, 6, 9, 3, 2, 15, 13, 8, 10, 1, 3, 15, 4, 2, 11, 6, 7, 12, 0, 5, 14, 9],# S3[10, 0, 9, 14, 6, 3, 15, 5, 1, 13, 12, 7, 11, 4, 2, 8, 13, 7, 0, 9, 3, 4, 6, 10, 2, 8, 5, 14, 12, 11, 15, 1,13, 6, 4, 9, 8, 15, 3, 0, 11, 1, 2, 12, 5, 10, 14, 7, 1, 10, 13, 0, 6, 9, 8, 7, 4, 15, 14, 3, 11, 5, 2, 12],# S4[7, 13, 14, 3, 0, 6, 9, 10, 1, 2, 8, 5, 11, 12, 4, 15, 13, 8, 11, 5, 6, 15, 0, 3, 4, 7, 2, 12, 1, 10, 14, 9,10, 6, 9, 0, 12, 11, 7, 13, 15, 1, 3, 14, 5, 2, 8, 4, 3, 15, 0, 6, 10, 1, 13, 8, 9, 4, 5, 11, 12, 7, 2, 14],# S5[2, 12, 4, 1, 7, 10, 11, 6, 8, 5, 3, 15, 13, 0, 14, 9, 14, 11, 2, 12, 4, 7, 13, 1, 5, 0, 15, 10, 3, 9, 8, 6,4, 2, 1, 11, 10, 13, 7, 8, 15, 9, 12, 5, 6, 3, 0, 14, 11, 8, 12, 7, 1, 14, 2, 13, 6, 15, 0, 9, 10, 4, 5, 3],# S6[12, 1, 10, 15, 9, 2, 6, 8, 0, 13, 3, 4, 14, 7, 5, 11, 10, 15, 4, 2, 7, 12, 9, 5, 6, 1, 13, 14, 0, 11, 3, 8,9, 14, 15, 5, 2, 8, 12, 3, 7, 0, 4, 10, 1, 13, 11, 6, 4, 3, 2, 12, 9, 5, 15, 10, 11, 14, 1, 7, 6, 0, 8, 13],# S7[4, 11, 2, 14, 15, 0, 8, 13, 3, 12, 9, 7, 5, 10, 6, 1, 13, 0, 11, 7, 4, 9, 1, 10, 14, 3, 5, 12, 2, 15, 8, 6,1, 4, 11, 13, 12, 3, 7, 14, 10, 15, 6, 8, 0, 5, 9, 2, 6, 11, 13, 8, 1, 4, 10, 7, 9, 5, 0, 15, 14, 2, 3, 12],# S8[13, 2, 8, 4, 6, 15, 11, 1, 10, 9, 3, 14, 5, 0, 12, 7, 1, 15, 13, 8, 10, 3, 7, 4, 12, 5, 6, 11, 0, 14, 9, 2,7, 11, 4, 1, 9, 12, 14, 2, 0, 6, 10, 13, 15, 3, 5, 8, 2, 1, 14, 7, 4, 10, 8, 13, 15, 12, 9, 0, 3, 5, 6, 11],
]l = [1, 1, 2, 2, 2, 2, 2, 2, 1, 2, 2, 2, 2, 2, 2, 1] # 循环左移位数# 密钥置换选择1
def key_ds1(key):s = ''for i in key_table1:s += key[i]return s# 密钥置换选择2
def key_ds2(key):s = ''for i in key_table2:s += key[i]return s# 密钥循环左移
def key_move(key, r):s = keyfor i in range(l[r]):s = s[1:] + s[:1]return s# 通过64位密钥获取全部的子密钥
def get_subkey(key_bin):# 首先进行key_bin的奇偶校验检查if not check_key(key_bin):print('密钥奇偶校验不通过!')returnkey = []# 密钥置换选择1key1_res = key_ds1(key_bin)L = key1_res[:28]R = key1_res[28:]for i in range(16):# 循环左移L = key_move(L, i)R = key_move(R, i)# 密钥置换选择2key.append(key_ds2(L + R))return key# 扩展置换E
def extend_E(R):r = ''for i in E:r += R[i]return r# 代换选择S盒
def alter_s(t):j = 0res = ''for i in range(0, 48, 6):c = int(t[i + 1:i + 5], 2)r = int(t[i] + t[i + 5], 2)res += '{:04b}'.format((sbox[j][r * 16 + c]))j += 1# print(res)return res# P置换
def p_repl(s):p = ''for i in P:p += s[i]return p# DES加密基本函数,输入64位明文和密钥
def DES(M, key):# 首先将明文进行初始置换IPm = ''for i in IP:m += M[i]L = []R = []# print('m=',m)L.append(m[:32])R.append(m[32:])# 16轮feistel结构for i in range(16):L.append(R[i])# 将R进行扩展置换ER_extend = extend_E(R[i])# 异或子密钥 K(i)t = '{:048b}'.format(int(R_extend, 2) ^ int(key[i], 2))# 代换选择S盒s = alter_s(t)# P置换p = p_repl(s)# 异或L(i-1)r = '{:032b}'.format(int(p, 2) ^ int(L[i], 2))R.append(r)# 左右交换c = R[16] + L[16]# 逆初始置换cipher = ''for i in IP_1:cipher += c[i]return cipher# DES加密函数
def DES_encrypt(message_bin_data, sub_key, i):print('正在利用密钥', i, '对数据进行DES加密')ciphertext = DES(message_bin_data, sub_key)# print('加密后得到的二进制流为:', ciphertext, ' ', len(ciphertext), '位')return ciphertext# DES解密函数
def DES_decrypt(ciphertext, key, i):print('正在利用密钥', i, '对数据进行DES解密')plainbin = DES(ciphertext, key)return plainbin# 三重DES加密
def DES_3_encrypt(s, sub_key1, sub_key2, sub_key3):sub_key2 = sub_key2[::-1] # 解密密钥# print("*** 正在进行三重DES加密 ***")ciphertext = DES_encrypt(s, sub_key1, 1)ciphertext = DES_decrypt(ciphertext, sub_key2, 2)ciphertext = DES_encrypt(ciphertext, sub_key3, 3)return ciphertext# 三重DES解密
def DES_3_decrypt(ciphertext, sub_key1, sub_key2, sub_key3):# print("*** 正在进行三重DES解密 ***")sub_key1 = sub_key1[::-1]sub_key2 = sub_key2 # 加密密钥sub_key3 = sub_key3[::-1]ciphertext = DES_decrypt(ciphertext, sub_key3, 3)ciphertext = DES_encrypt(ciphertext, sub_key2, 2)plaintext = DES_decrypt(ciphertext, sub_key1, 1)print("*** 三重DES解密成功 ***")return plaintext# CBC加密
def CBC_encrypt(group_list, iv, key_bin1, key_bin2, key_bin3):print("*** 正在获取子密钥 ***")# 获取子密钥sub_key1 = get_subkey(key_bin1)sub_key2 = get_subkey(key_bin2)sub_key3 = get_subkey(key_bin3)C_list = []Iv = ivprint("*** 正在进行CBC加密 ***")# 进行CBC加密for group in group_list:xor_res = '{:064b}'.format(int(group, 2) ^ int(Iv, 2))C = DES_3_encrypt(xor_res, sub_key1, sub_key2, sub_key3)C_list.append(C)Iv = Creturn C_list# 存储加密后的分组信息
def save_img_data(list_data):filename = 'encrypt_data.txt'f = open(filename, 'w')for i in list_data:f.write(i + '\n')f.close()
def save_iv_data(iv):filename = 'iv.txt'f = open(filename, 'w')f.write(iv + '\n')f.close()
def save_keys(key_bin1, key_bin2, key_bin3):filename = 'keys.txt'f = open(filename, 'w')f.write(key_bin1 + '\n')f.write(key_bin2 + '\n')f.write(key_bin3 + '\n')f.close()# 获取加密图像的像素信息
def get_img_data():img_data = ''filename = 'encrypt_data.txt'f = open(filename, 'r')for line in f:img_data += (line.strip('\n'))f.close()return img_data# 基于三重DES的加密图像
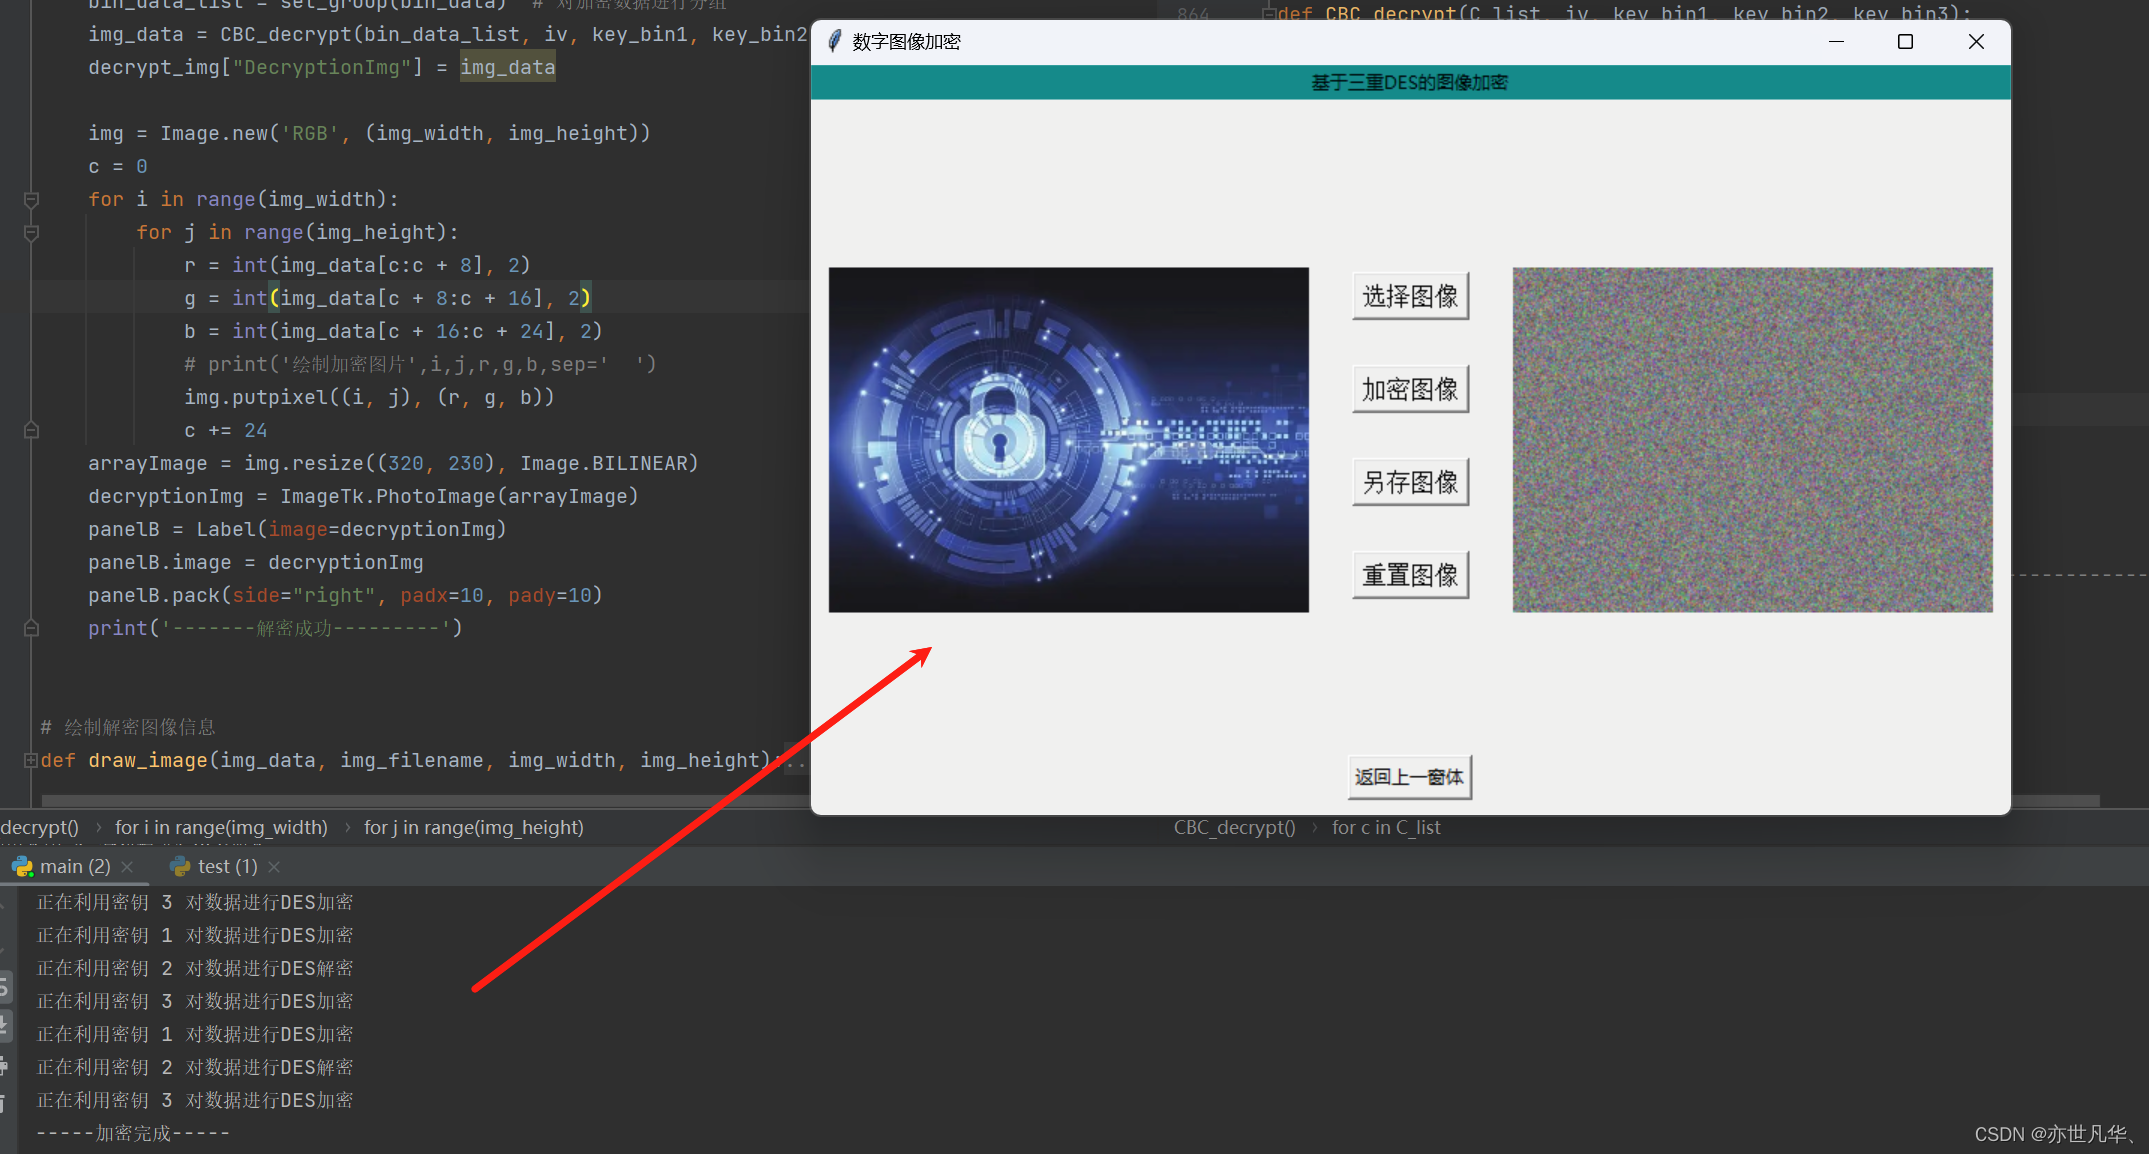
def DES3_encryption():global panelB# 获取图像信息# img = encryption_img["encryption"]# encryptionImg = np.zeros(img.shape, np.uint8)path = encryption_img["ImgPath"]print("*** 正在获取图像信息 ***")bin_data, img_width, img_height = get_pixel(path)bin_data_list = set_group(bin_data)# 保存明文分组信息,存储在group.txt文件中print("*** 保存明文分组信息成功 ***")print("*** 明文分组信息存储在group.txt文件中 ***")save_group_data(bin_data_list)group_list = get_group() # 获取分组列表iv = get_IV() # 获取初始向量IV# 随机生成3个DES密钥key_bin1 = get_rand_key(1)key_bin2 = get_rand_key(2)key_bin3 = get_rand_key(3)c_list = CBC_encrypt(group_list, iv, key_bin1, key_bin2, key_bin3) # 进行CBC模型下的三重DES加密# CBC模型下的三重DES解密save_img_data(c_list) # 保存加密后分组数据便于 4密文图像显示save_iv_data(iv) # 保存初始向量IV信息用于解密save_iv_data(iv) # 保存初始向量IV信息用于解密# 保存解密数据save_keys(key_bin1, key_bin2, key_bin3) # 保存密钥信息img_data = get_img_data()img = Image.new('RGB', (img_width, img_height))c = 0for i in range(img_width):for j in range(img_height):r = int(img_data[c:c + 8], 2)g = int(img_data[c + 8:c + 16], 2)b = int(img_data[c + 16:c + 24], 2)# print('绘制加密图片',i,j,r,g,b,sep=' ')img.putpixel((i, j), (r, g, b))c += 24arrayImage = img.resize((320, 230), Image.BILINEAR)encryptionImg = ImageTk.PhotoImage(arrayImage)panelB = Label(image=encryptionImg)panelB.image = encryptionImgpanelB.place(x=(800 - panelB.winfo_reqwidth() - 10), y=(500 - panelB.winfo_reqheight()) / 2)print("-----加密完成-----")结果如下:
数字图像解密
数字图像解密按钮,当我们点击之后也是呈现一个窗口,这里撰写两种对图像进行解密的方式,ok接下来我们首先实现基本窗口的设置:
窗口布局设置
图像加密窗口的布局样式与主窗口的布局样式一致,这里就不再赘述了,具体的代码如下:
# 第二个窗口
def Two():# 函数内部使用全局变量decryptglobal decrypt# 将全局变量decrypt的值设置为True,以表示已经进行了加密操作decrypt = True# 创建子窗口布局root2 = Tk()# 设置窗口大小为 300x200 像素,并将其放置在屏幕位置 (600, 200)root2.geometry('800x500+600+200')# 设置标题root2.title('数字图像解密')Label(root2, text='功能选择', bg='#008c8c').pack(fill=X)# 进入当前窗口的子窗体回调函数def goto(num):# 关闭主窗口root2.destroy()# 使用字典来映射数字和对应的窗口函数,然后在 goto 函数中进行查找和调用,如果找到则调用该函数,否则不执行任何操作。windows = {1: Two_one,2: Two_two,}func = windows.get(num, lambda: None)if func:func()# 设置窗口布局btn1 = Button(root2, text="返回主窗体", command=lambda: gotoMain(root2))btn1.pack(side="bottom", pady=10)btn2 = Button(root2, text="基于混沌Logistic的图像解密", font=('Arial', 12), command=lambda: goto(1))btn2.pack(pady=(115, 15))btn3 = Button(root2, text="基于三重DES的图像解密", font=('Arial', 12), command=lambda: goto(2))btn3.pack(pady=15)btn4 = Button(root2, text="退出系统", font=('Arial', 12), command=lambda: LogDown(root2))btn4.pack(pady=15)root2.mainloop()
从上面的代码中,我们设置了一个全局变量用于表达图像是否处在加密状态中:
# 定义全局变量
decrypt = False  # 表示未解密状态
最终呈现的结果如下:

基于混沌Logistic的图像解密
我们需要在全局声明变量用于存储解密的相关图片信息:
decrypt_img = { # 解密"decrypt": np.array([]), "DecryptionImg": np.array([]), "ImgPath": "", "width": None, "height": None
}
当我们点击上传图像上传我们之前用该算法加密后的图片,然后点击解密图像即可:
这里给出具体的代码:
# 基于混沌Logistic的解密图像
def Logistical_decrypt():global panelBencryptionImg = decrypt_img["decrypt"]decryptionImg = np.zeros(encryptionImg.shape, np.uint8)x0 = 0.15624562g0 = 164j0 = 10x = encryptionImg.shape[0]y = encryptionImg.shape[1]c = encryptionImg.shape[2]g0 = int2bin16(g0)for s in range(x):for n in range(y):for z in range(c):cc = int2bin8(encryptionImg[s][n][z])ans = ""for i in range(8):xi = 1 - math.sqrt(abs(2 * x0 - 1))x0 = xissi = math.floor(xi * (2 ** j0)) % 2qi = 1 - (ssi ^ int(cc[i]))ri = int(g0[-1])mi = ri ^ qit = int(g0[0]) ^ int(g0[12]) ^ int(g0[15])g0 = str(t) + g0[0:-1]ans += str(mi)re = int(ans, 2)# 写回16位二进制数decryptionImg[s][n][z] = redecrypt_img["DecryptionImg"] = decryptionImgrgb = cv2.cvtColor(decryptionImg, cv2.COLOR_BGR2RGB)new_width = 320scale_factor = new_width / rgb.shape[1]new_height = int(rgb.shape[0] * scale_factor)resize_image0 = cv2.resize(rgb, dsize=(new_width, new_height), interpolation=cv2.INTER_LINEAR)arrayImage = Image.fromarray(np.uint8(resize_image0))decryptionImg = ImageTk.PhotoImage(arrayImage)panelB = Label(image=decryptionImg)panelB.image = decryptionImgpanelB.place(x=(800 - panelB.winfo_reqwidth() - 10), y=(500 - panelB.winfo_reqheight()) / 2)print("-----解密完成-----")
最终得到的效果如下:

然后另存图像进行保存即可,这里不再赘述,功能和上面类似。
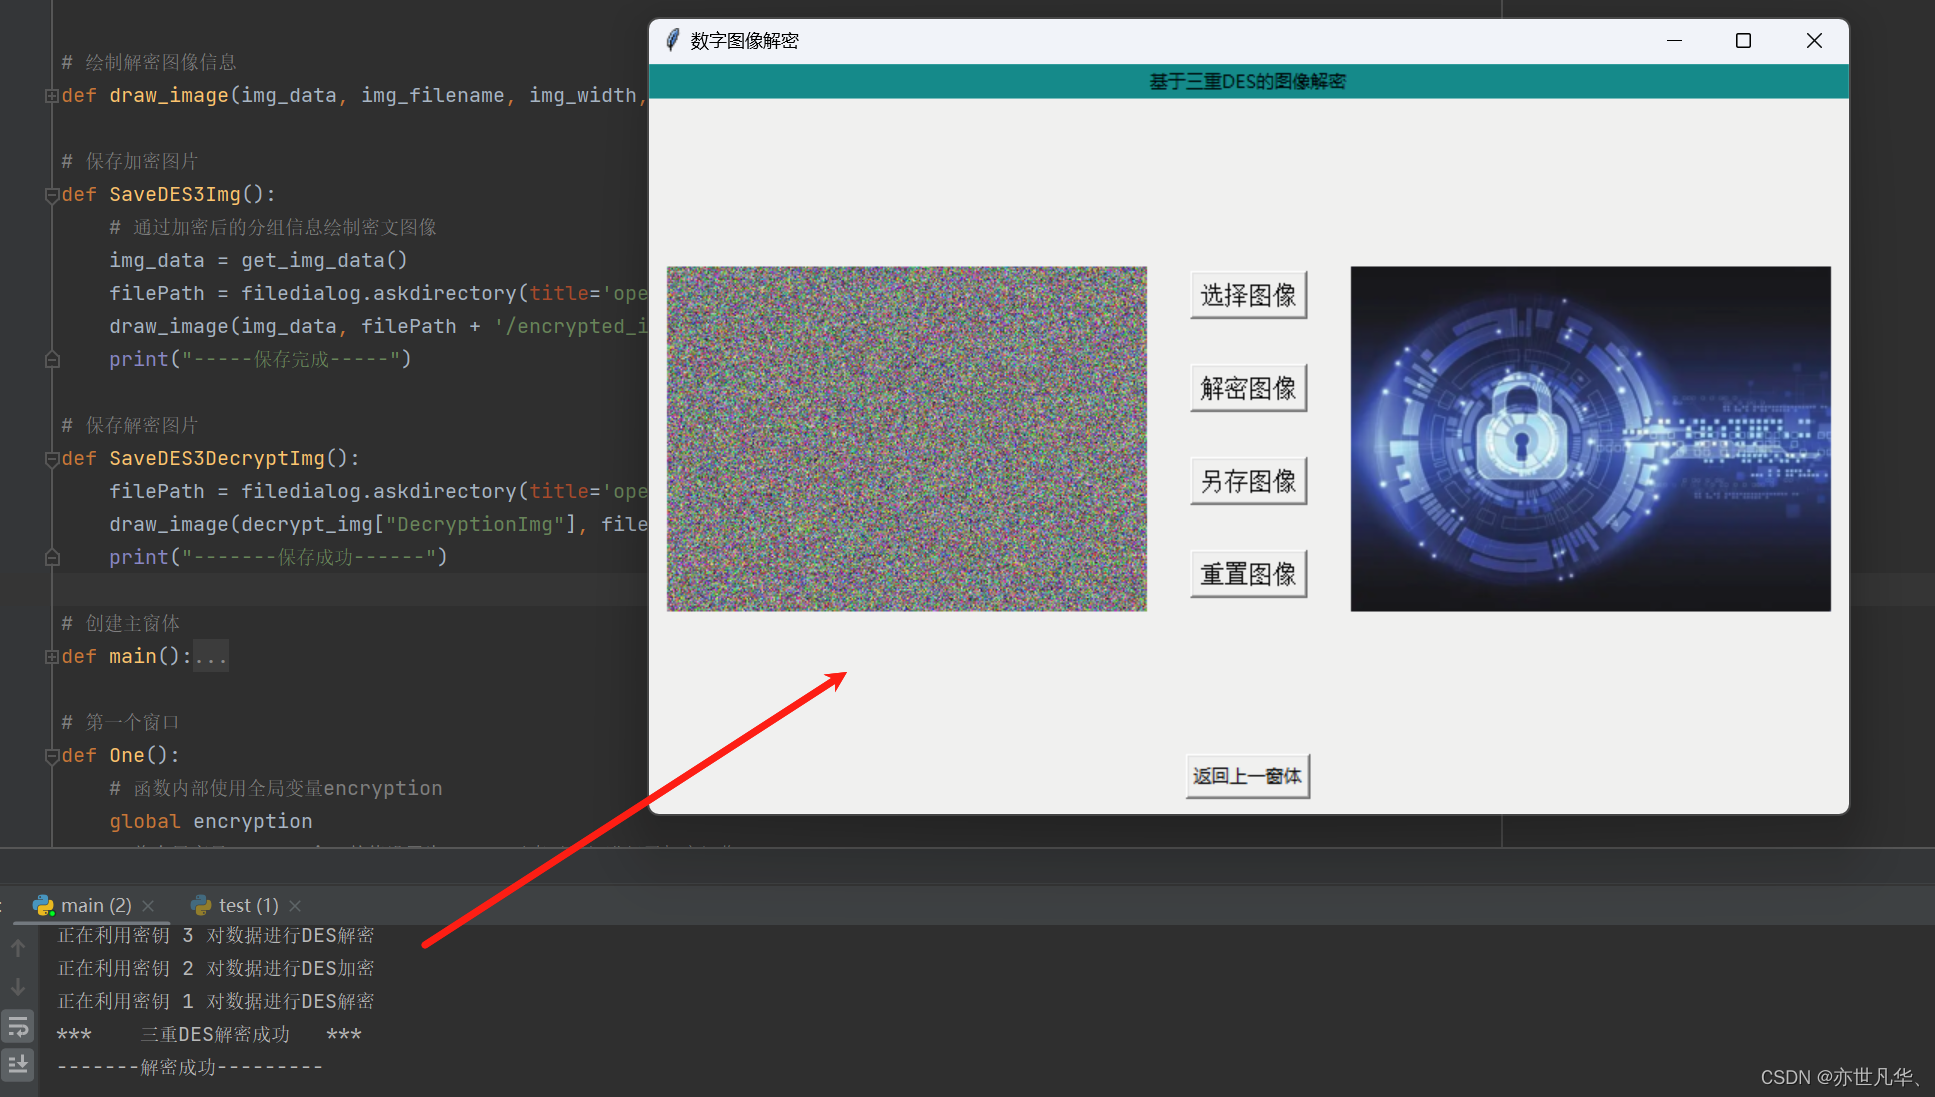
基于三重DES的图像解密
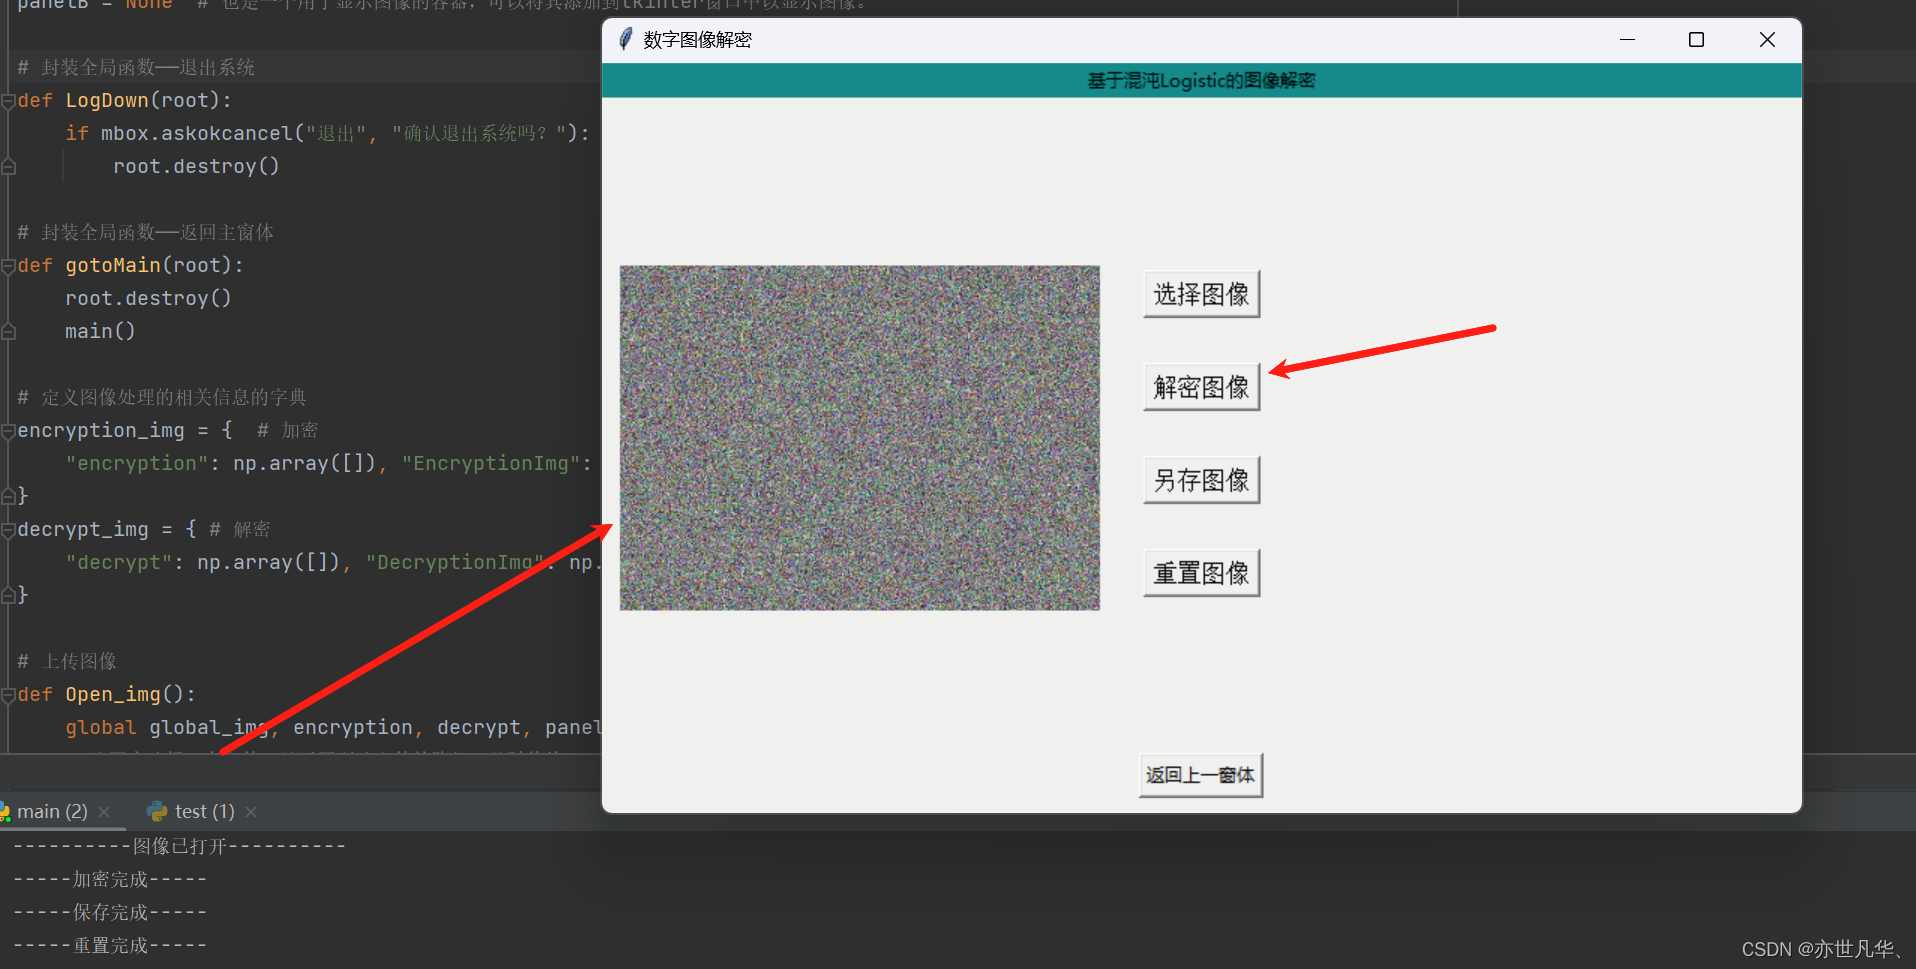
我们需要在全局声明变量用于存储解密的相关图片信息:
decrypt_img = { # 解密"decrypt": np.array([]), "DecryptionImg": np.array([]), "ImgPath": "", "width": None, "height": None
}
当我们点击上传图像上传我们之前用该算法加密后的图片,然后点击解密图像即可:
具体代码如下:
# 获取密钥信息函数
def get_keys():filename = 'keys.txt' # 密钥文件f = open(filename, 'r')keys = []for line in f:keys.append(line.strip('\n'))return keys[0], keys[1], keys[2]# 获取iv信息
def get_iv():filename = 'iv.txt' # iv文件f = open(filename, 'r')return f.readline().strip('\n')# CBC解密
def CBC_decrypt(C_list, iv, key_bin1, key_bin2, key_bin3):sub_key1 = get_subkey(key_bin1)sub_key2 = get_subkey(key_bin2)sub_key3 = get_subkey(key_bin3)P_list = []Iv = ivfor c in C_list:res = DES_3_decrypt(c, sub_key1, sub_key2, sub_key3)xor_res = '{:064b}'.format(int(res, 2) ^ int(Iv, 2))P_list.append(xor_res)Iv = cimg_data = ''.join(P_list)return img_data# 基于三重DES的解密图像
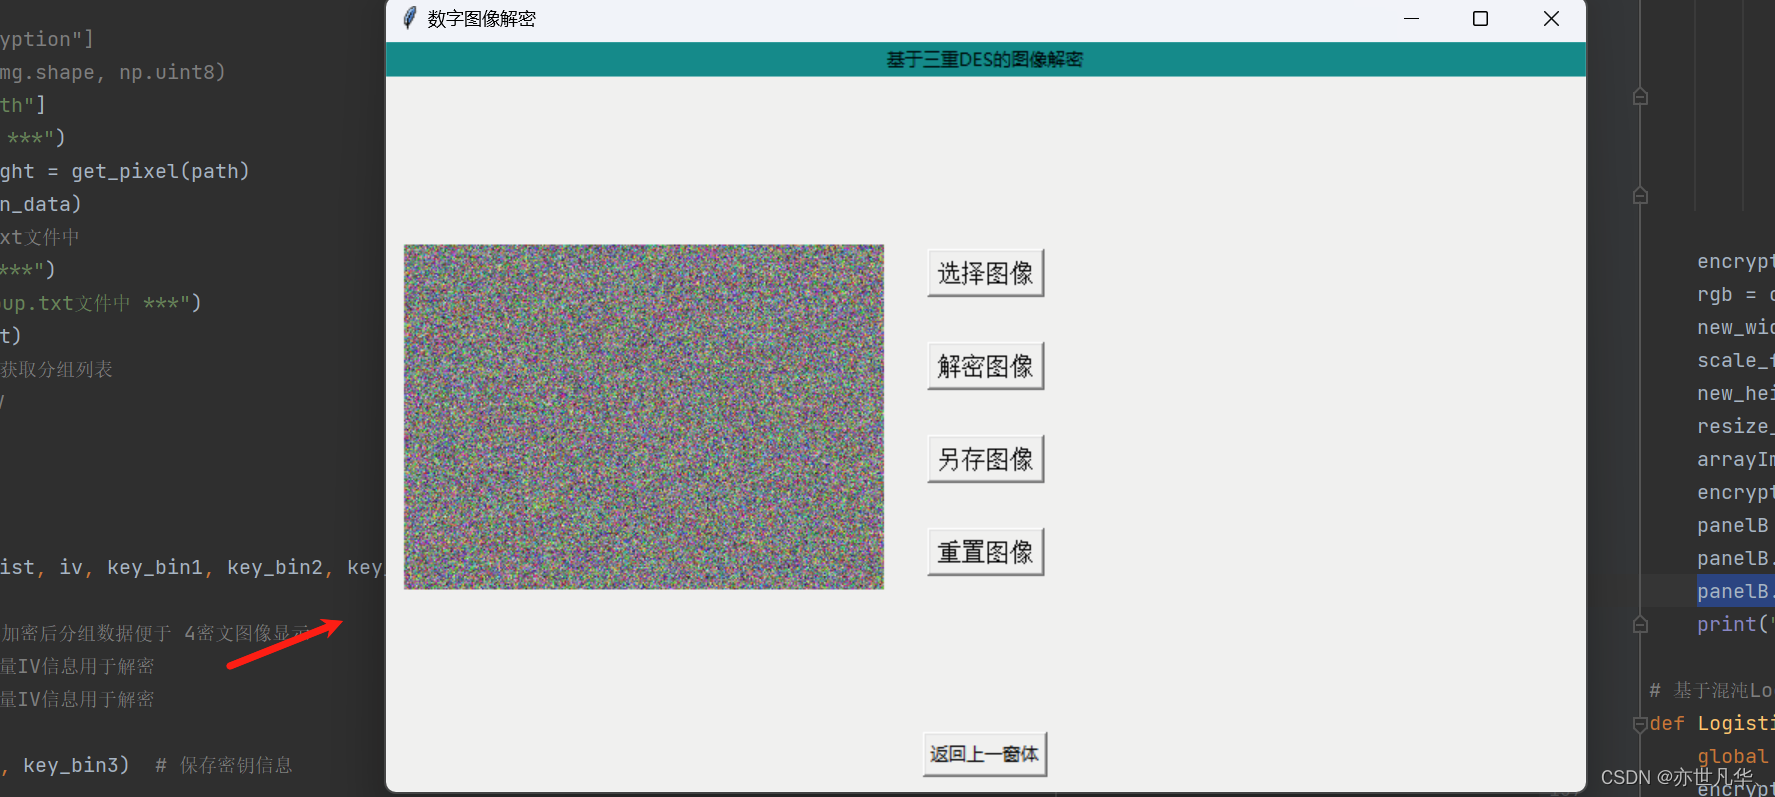
def DES3_decrypt():global decrypt_img, panelBpath = decrypt_img["ImgPath"]# print('*** 正在进行密文图像解密 ***')bin_data, img_width, img_height = get_pixel(path) # 获取加密后图像的像素值和宽高# print('*** 获取加密图像数据成功! ***')key_bin1, key_bin2, key_bin3 = get_keys() # 获取密钥信息# print('*** 获取密钥信息成功! ****')iv = get_iv() # 获取初始向量IVbin_data_list = set_group(bin_data) # 对加密数据进行分组img_data = CBC_decrypt(bin_data_list, iv, key_bin1, key_bin2, key_bin3) # 获取解密的分组信息decrypt_img["DecryptionImg"] = img_dataimg = Image.new('RGB', (img_width, img_height))c = 0for i in range(img_width):for j in range(img_height):r = int(img_data[c:c + 8], 2)g = int(img_data[c + 8:c + 16], 2)b = int(img_data[c + 16:c + 24], 2)# print('绘制加密图片',i,j,r,g,b,sep=' ')img.putpixel((i, j), (r, g, b))c += 24arrayImage = img.resize((320, 230), Image.BILINEAR)decryptionImg = ImageTk.PhotoImage(arrayImage)panelB = Label(image=decryptionImg)panelB.image = decryptionImgpanelB.place(x=(800 - panelB.winfo_reqwidth() - 10), y=(500 - panelB.winfo_reqheight()) / 2)print('-------解密成功---------')最终呈现的效果如下:
最后对两个图像解密操作进行图片保存处理:
# 绘制解密图像信息
def draw_image(img_data, img_filename, img_width, img_height):img = Image.new('RGB', (img_width, img_height))c = 0for i in range(img_width):for j in range(img_height):r = int(img_data[c:c + 8], 2)g = int(img_data[c + 8:c + 16], 2)b = int(img_data[c + 16:c + 24], 2)# print('绘制加密图片',i,j,r,g,b,sep='  ')img.putpixel((i, j), (r, g, b))c += 24img.save(img_filename)# 保存加密图片
def SaveDES3Img():# 通过加密后的分组信息绘制密文图像img_data = get_img_data()filePath = filedialog.askdirectory(title='open')draw_image(img_data, filePath + '/encrypted_img.png', encryption_img["width"], encryption_img["height"])print("-----保存完成-----")# 保存解密图片
def SaveDES3DecryptImg():filePath = filedialog.askdirectory(title='open')draw_image(decrypt_img["DecryptionImg"], filePath+'/decrypted_img.png', decrypt_img["width"], decrypt_img["height"])print("-------保存成功------")
基于LSB的数字水印提取
LSB数字水印是一种常见的数字水印技术,通过将隐藏信息嵌入到图像的最低有效位中,实现对图像进行隐秘性的信息嵌入和提取。
用户可以在界面上方便地输入待提取的水印信息,并通过点击按钮来执行水印提取操作,从而实现基于LSB的数字水印提取功能。这种方法简单有效,适用于一些对水印提取速度要求不高、对图像质量要求不严格的应用场景。以下是数字水印实现的具体步骤:
窗口布局设置
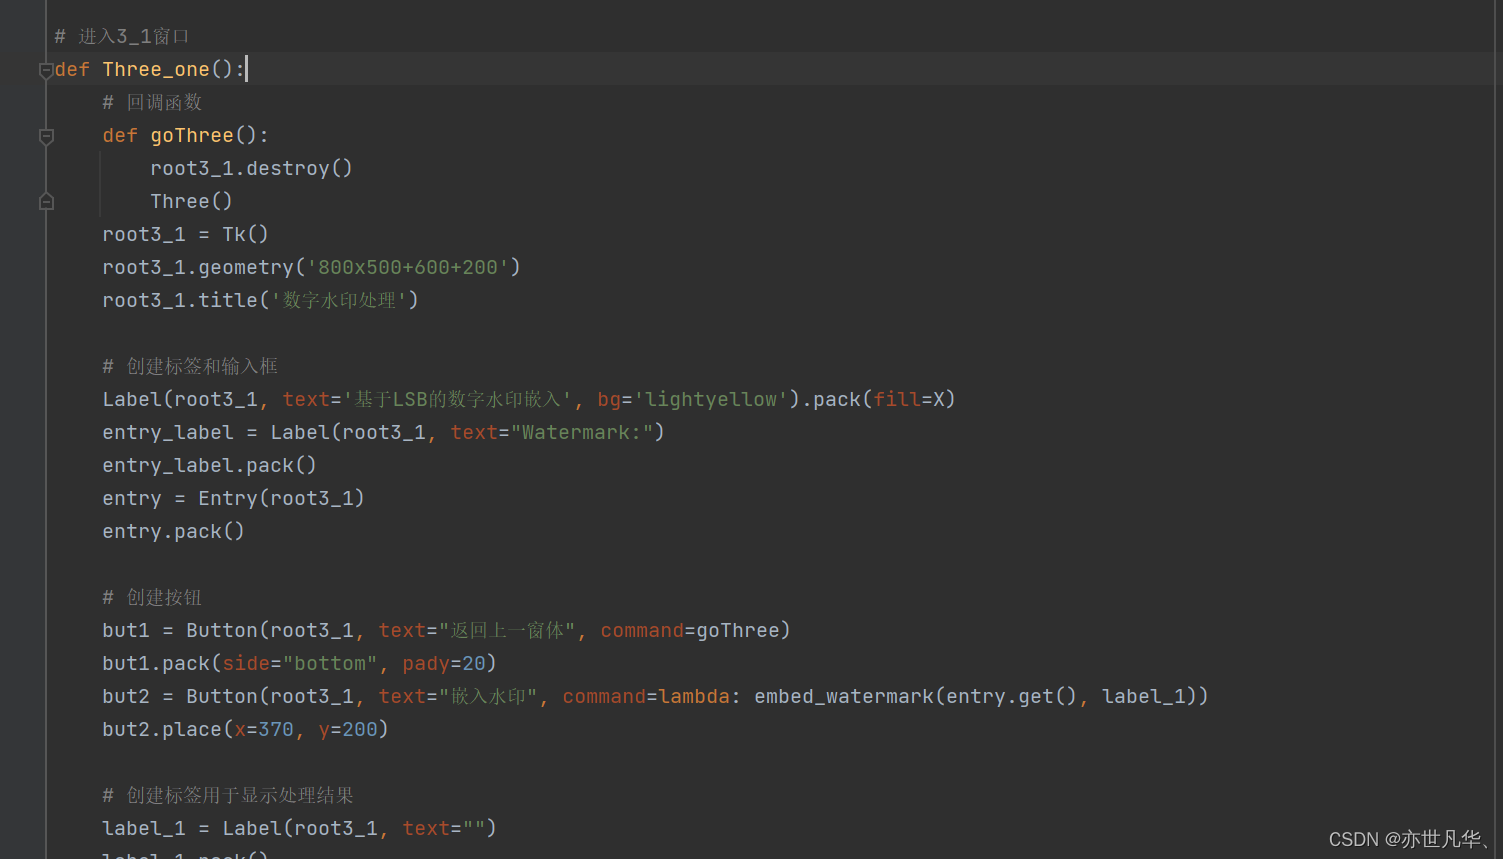
这里我们在这里创建第三个窗口用于展示数字水印的功能,窗口布局的代码如下:
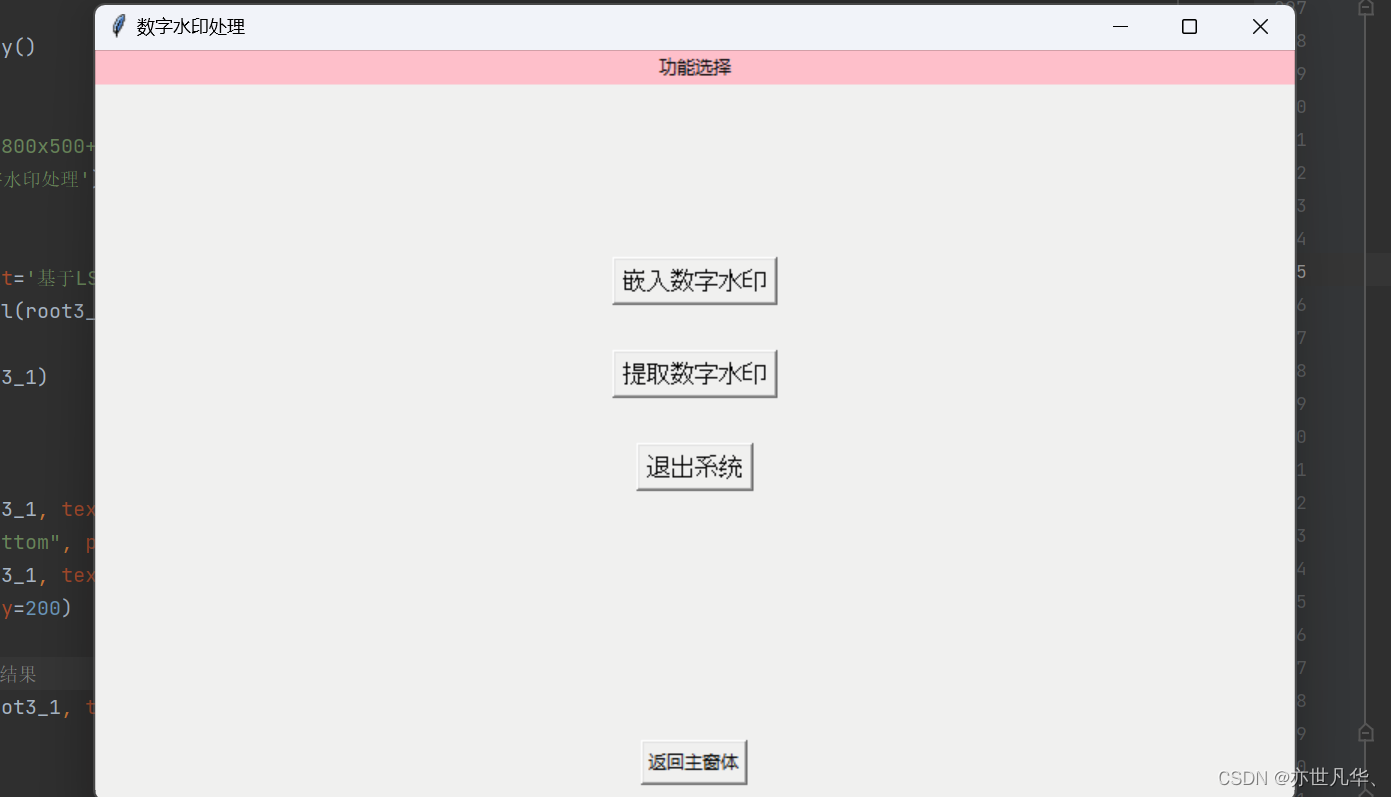
# 第三个窗口
def Three():root3 = Tk()root3.geometry('800x500+600+200')root3.title('数字水印处理')Label(root3, text='功能选择', bg='pink').pack(fill=X)# 进入当前窗口的子窗体回调函数def goto(num):# 关闭主窗口root3.destroy()# 使用字典来映射数字和对应的窗口函数,然后在 goto 函数中进行查找和调用,如果找到则调用该函数,否则不执行任何操作。windows = {1: Three_one,2: Three_two,}func = windows.get(num, lambda: None)if func:func()but1 = Button(root3, text="返回主窗体", command=lambda: gotoMain(root3))but1.pack(side="bottom", pady=10)but2 = Button(root3, text="嵌入数字水印", font=('Arial', 12), command=lambda: goto(1))  # 进入窗口3-1but2.pack(pady=(115, 15))but3 = Button(root3, text="提取数字水印", font=('Arial', 12), command=lambda: goto(2))  # 进入窗口3-2but3.pack(pady=15)but4 = Button(root3, text="退出系统", font=('Arial', 12), command=lambda: LogDown(root3))but4.pack(pady=15)
再创建一些子窗口用于图片水印的嵌入与提取:
最终展示的效果如下所示:
水印的嵌入与提取
下面这段代码实现了一个简单的基于LSB(Least Significant Bit,最低有效位)的数字水印嵌入和提取功能。下面是代码的实现思路:
嵌入水印回调函数 embed_watermark:
1)用户在输入框中输入待嵌入的水印信息。
2)用户选择一张要嵌入水印的图像文件(支持png、jpg、jpeg格式)。
3)打开选定的图像文件,并将其转换为RGB格式。
4)将用户输入的水印文本转换为二进制字符串。
5)检查水印长度是否超过图像容量,若超过则提示水印过长。
6)遍历每个像素位置,将水印信息的每一位嵌入到图像的红色通道的最低有效位。
7)保存嵌入水印后的图像文件(支持用户选择保存路径)。
# 嵌入水印回调函数
def embed_watermark(entry_text, label):# 选择要嵌入水印的图像文件image_path = filedialog.askopenfilename(filetypes=[("Image Files", "*.png;*.jpg;*.jpeg")])if not image_path:return# 打开图像文件image = Image.open(image_path).convert('RGB')width, height = image.size# 输入水印文本watermark = entry_text# 将水印转换为二进制字符串binary_watermark = ''.join(format(ord(c), '08b') for c in watermark)# 检查水印长度是否超过图像容量if len(binary_watermark) > width * height * 3:label["text"] = "Watermark is too long for the selected image."return# 嵌入水印for i in range(len(binary_watermark)):x = i % widthy = i // widthpixel = list(image.getpixel((x, y)))bit = int(binary_watermark[i])# 将最低有效位设置为水印比特pixel[0] = (pixel[0] & 0xFE) | bitimage.putpixel((x, y), tuple(pixel))# 保存嵌入水印后的图像save_path = filedialog.asksaveasfilename(defaultextension=".png", filetypes=[("PNG Image", "*.png")])if save_path:image.save(save_path)label["text"] = "Watermark embedded and image saved successfully."
实现的效果如下所示:
提取水印函数 extract_watermark:
1)用户选择一张含有水印的图像文件(支持png、bmp、jpg、jpeg格式)。
2)打开选定的图像文件,并将其转换为RGB格式。
3)遍历每个像素位置,提取图像红色通道的最低位作为水印信息。
4)将提取的水印信息转换为二进制字符串,再将二进制字符串转换为字符形式的水印文本。
5)创建一个包含滚动条和文本框的父容器,显示提取的水印文本信息。
def extract_watermark(root):# 选择要提取水印的图像文件image_path = filedialog.askopenfilename(filetypes=[("Image Files", "*.png;*.bmp;*.jpg;*.jpeg")])if not image_path:return# 打开图像文件image = Image.open(image_path).convert('RGB')width, height = image.sizewatermark = ""# 提取水印for y in range(height):for x in range(width):pixel = list(image.getpixel((x, y)))bit = pixel[0] & 0x01 # 提取红色通道的最低位watermark += str(bit)# 将二进制字符串转换为字符extracted_text = "".join(chr(int(watermark[i:i+8], 2)) for i in range(0, len(watermark), 8))# 创建滚动条和文本框的父容器frame = Frame(root)frame.pack(expand=True, fill="both")scrollbar = Scrollbar(frame)scrollbar.pack(side="right", fill="y")text_area = Text(frame, height=10, width=40)text_area.insert("1.0", "Extracted Watermark:\n" + extracted_text)text_area.pack(side="left", expand=True, fill="both")# 将滚动条与文本框绑定text_area.config(yscrollcommand=scrollbar.set)scrollbar.config(command=text_area.yview)实现的效果如下所示:
