重庆新闻发布会直播专业培训seo的机构

把我之前发布在简书的博客搬运过来。
目录
- 场景
- 思路
- 具体实现
- 1. 自定义一个继承自UILabel的IrregularLabel
- 2. 在初始化方法中进行相应初始化和设置
- 3. 在layoutSubviews方法中进行路径的设置
- 最终效果
- 箭头 label
场景
最近 App 改版,以下是截取的部分 UI 设计图:

其中有一个不规则的 label:

这个 label 顶部的两个角是圆角,底部的两个角是直角,底部还有一个小三角。
思路
CAShapeLayer 联合 UIBezierPath 画一个不规则的 layer 作为 label.layer 的 mask。
具体实现
1. 自定义一个继承自UILabel的IrregularLabel
#import "IrregularLabel.h"@interface IrregularLabel ()/** 遮罩 */
@property (nonatomic, strong) CAShapeLayer *maskLayer;
/** 路径 */
@property (nonatomic, strong) UIBezierPath *borderPath;@end
2. 在初始化方法中进行相应初始化和设置
- (instancetype)initWithFrame:(CGRect)frame {if (self = [super initWithFrame:frame]) {// 初始化遮罩self.maskLayer = [CAShapeLayer layer];// 设置遮罩[self.layer setMask:self.maskLayer];// 初始化路径self.borderPath = [UIBezierPath bezierPath];}return self;
}
3. 在layoutSubviews方法中进行路径的设置
- (void)layoutSubviews {[super layoutSubviews];// 遮罩层frameself.maskLayer.frame = self.bounds;// 设置path起点[self.borderPath moveToPoint:CGPointMake(0, 10)];// 左上角的圆角[self.borderPath addQuadCurveToPoint:CGPointMake(10, 0) controlPoint:CGPointMake(0, 0)];// 直线,到右上角[self.borderPath addLineToPoint:CGPointMake(self.bounds.size.width - 10, 0)];// 右上角的圆角[self.borderPath addQuadCurveToPoint:CGPointMake(self.bounds.size.width, 10) controlPoint:CGPointMake(self.bounds.size.width, 0)];// 直线,到右下角[self.borderPath addLineToPoint:CGPointMake(self.bounds.size.width, self.bounds.size.height)];// 底部的小三角形[self.borderPath addLineToPoint:CGPointMake(self.bounds.size.width/2+5, self.bounds.size.height)];[self.borderPath addLineToPoint:CGPointMake(self.bounds.size.width/2, self.bounds.size.height-5)];[self.borderPath addLineToPoint:CGPointMake(self.bounds.size.width/2 - 5, self.bounds.size.height)];// 直线,到左下角[self.borderPath addLineToPoint:CGPointMake(0, self.bounds.size.height)];// 直线,回到起点[self.borderPath addLineToPoint:CGPointMake(0, 10)];// 将这个path赋值给maskLayer的pathself.maskLayer.path = self.borderPath.CGPath;
}
- 左上角的坐标是
(0,0) - 右下角的坐标是
(maxX,maxY)
圆角是用的二次贝塞尔曲线,关于二次贝塞尔曲线,我在网上看到一张比较形象的图:

3个点确定一个圆角。
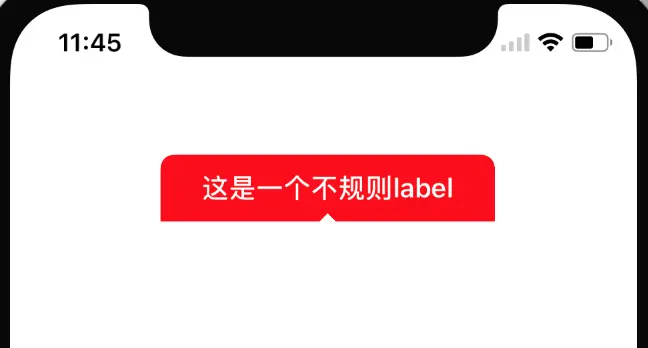
最终效果
- (void)viewDidLoad {[super viewDidLoad];// Do any additional setup after loading the view, typically from a nib.self.label = [[IrregularLabel alloc] initWithFrame:CGRectMake(90, 200, 200, 40)];[self.view addSubview:self.label];self.label.text = @"这是一个不规则label";self.label.textAlignment = NSTextAlignmentCenter;self.label.backgroundColor = [UIColor redColor];self.label.textColor = [UIColor whiteColor];self.label.font = [UIFont boldSystemFontOfSize:16];
}
效果图:
箭头 label
有读者说要带箭头的 label:
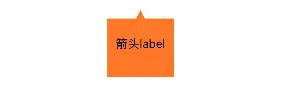
其实思路是一样的:
- (void)layoutSubviews {[super layoutSubviews];// 遮罩层frameself.maskLayer.frame = self.bounds;// 设置path起点[self.borderPath moveToPoint:CGPointMake(0, 10)];// 箭头[self.borderPath addLineToPoint:CGPointMake(self.bounds.size.width/2-5, 10)];[self.borderPath addLineToPoint:CGPointMake(self.bounds.size.width/2, 0)];[self.borderPath addLineToPoint:CGPointMake(self.bounds.size.width/2+5, 10)];// 到右上角[self.borderPath addLineToPoint:CGPointMake(self.bounds.size.width, 10)];// 到右下角[self.borderPath addLineToPoint:CGPointMake(self.bounds.size.width, self.bounds.size.height)];// 到左下角[self.borderPath addLineToPoint:CGPointMake(0, self.bounds.size.height)];// 回到起点[self.borderPath addLineToPoint:CGPointMake(0, 10)];// 将这个path赋值给maskLayer的pathself.maskLayer.path = self.borderPath.CGPath;
}
如果想让文本相对方形框居中,可以在 view 上放一个 label。