佛山新网站建设如何怎么优化网站关键词排名
文章目录
- 1.简单回归实战:
- 2.手写数据识别
1.简单回归实战:
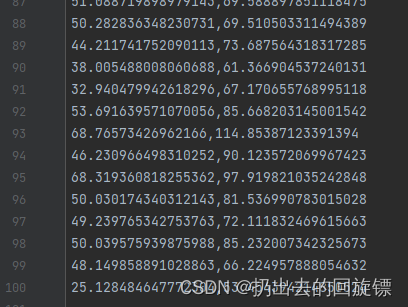
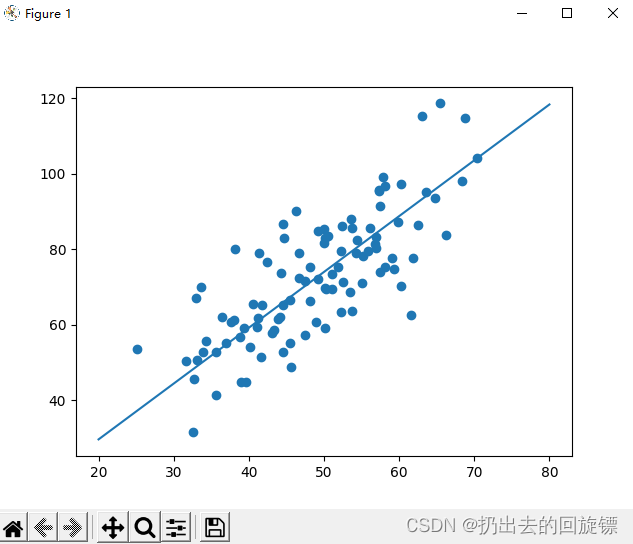
用 线性回归拟合二维平面中的100个点
公式:y=wx+by=wx+by=wx+b
损失函数:∑(yreally−y)2\sum(y_{really}-y)^2∑(yreally−y)2
迭代方法:梯度下降法,其中www,bbb更新公式如下:
wN+1=wN−η∗∂loss∂wbN+1=bN−η∗∂loss∂bw_{N+1}=w_N-\eta*\frac{\partial loss}{\partial w}\\ b_{N+1}=b_{N}-\eta*\frac{\partial loss}{\partial b}wN+1=wN−η∗∂w∂lossbN+1=bN−η∗∂b∂loss
其中η\etaη表示学习率,∂\partial∂表示微分
∂loss∂w=2(wx+b−y)x/n∂loss∂b=2(wx+b−y)/n\frac{\partial loss}{\partial w}=2(wx+b-y)x/n\\ \frac{\partial loss}{\partial b}=2(wx+b-y)/n ∂w∂loss=2(wx+b−y)x/n∂b∂loss=2(wx+b−y)/n
项目文件:
计算损失函数:
def compute_loss(b,w,points):total = 0for i in range(0,len(points)):x = points[i,0]y = points[i,1]total += (y-(w*x+b)) ** 2return total / float(len(points))
梯度下降迭代更新:
def gradient(b,w,points,leanrningRate):b_gradient = 0w_gradient = 0N = float(len(points))for i in range(0,len(points)):x = points[i,0]y = points[i,1]b_gradient += (2/N) * (((w * x)+b)-y)w_gradient += (2/N) * (((w * x)+b)-y) * xnew_b = b - (leanrningRate * b_gradient)new_w = w - (leanrningRate * w_gradient)return [new_b , new_w]def graient_descent_runner(points, b, w, learning_rate, num_iterations):new_b = bnew_w = wfor i in range(num_iterations):new_b, new_w = gradient(new_b, new_w, np.array(points), learning_rate)return [new_b, new_w]
主函数运行以及绘图结果:
def run():points = np.genfromtxt("data.csv",delimiter=",")learning_rate = 0.0001initial_b = 0initial_w = 0num_iteractions = 1000print("Starting gradient descent at b = {0}, w = {1}, error = {2}".format(initial_b,initial_w,compute_loss(initial_b,initial_w,points)))print("Runing...")[b, w] = graient_descent_runner(points,initial_b,initial_w,learning_rate,num_iteractions)print("After {0} iterations b = {1}, w = {2}, error = {3}".format(num_iteractions,b,w,compute_loss(b,w,points)))x = np.linspace(20, 80, 5)y = w * x + bpyplot.plot(x, y)pyplot.scatter(points[:, 0], points[:, 1])pyplot.show()if __name__ == '__main__':run()

2.手写数据识别
工具函数库:
import torch
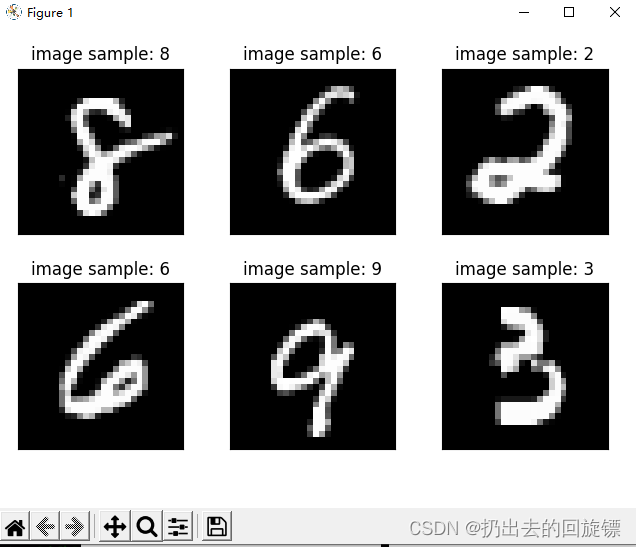
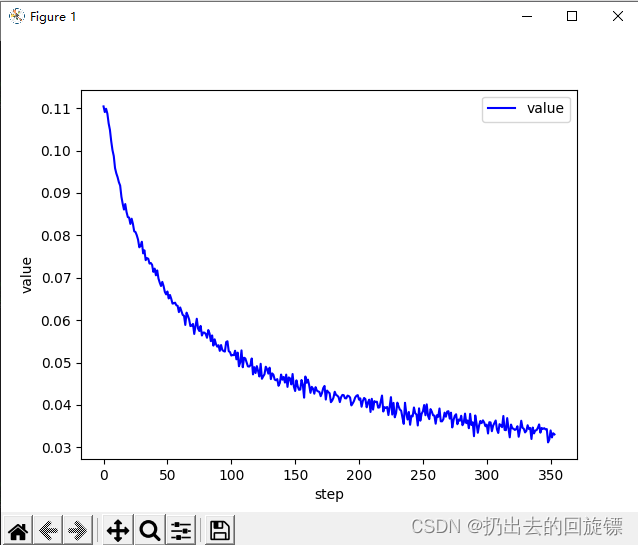
from matplotlib import pyplot as pltdef plot_curve(data):fig = plt.figure()plt.plot(range(len(data)), data, color='blue')plt.legend(['value'], loc='upper right')plt.xlabel('step')plt.ylabel('value')plt.show()def plot_image(img, label, name):fig = plt.figure()for i in range(6):plt.subplot(2, 3, i + 1)plt.tight_layout()plt.imshow(img[i][0]*0.3081+0.1307, cmap='gray', interpolation='none')plt.title("{}: {}".format(name, label[i].item()))plt.xticks([])plt.yticks([])plt.show()def one_hot(label, depth=10):out = torch.zeros(label.size(0), depth)idx = torch.LongTensor(label).view(-1, 1)out.scatter_(dim=1, index=idx, value=1)return out
第一步:导入库和图像数据
import torch
from torch import nn #构建神经网络
from torch.nn import functional as F
from torch import optim #最优化工具
import torchvision #视觉工具
from utils import plot_image, plot_curve, one_hotbatch_size = 512
train_loader = torch.utils.data.DataLoader(torchvision.datasets.MNIST('mnist_data', train=True, download=True,transform=torchvision.transforms.Compose([torchvision.transforms.ToTensor(),torchvision.transforms.Normalize((0.1307,), (0.3081,))])),batch_size=batch_size, shuffle=True)test_loader = torch.utils.data.DataLoader(torchvision.datasets.MNIST('mnist_data/', train=False, download=True,transform=torchvision.transforms.Compose([torchvision.transforms.ToTensor(),torchvision.transforms.Normalize((0.1307,), (0.3081,))])),batch_size=batch_size, shuffle=False)x, y = next(iter(train_loader))
print(x.shape, y.shape, x.min(), y.min())
plot_image(x, y, 'image sample')
第二步:新建一个三层的非线性的网层
class Net(nn.Module):def __init__(self):super(Net, self).__init__()#第一层(28*28是图片,256根据经验随机决定)self.fc1 = nn.Linear(28 * 28, 256)self.fc2 = nn.Linear(256, 64)#第三层(十分类输出一定是10)self.fc3 = nn.Linear(64, 10)def forward(self, x):# x: [b, 1, 28, 28]# h1 = relu(xw1+b1) h2 = relu(h1w2+b2) h3 = h2w3+b3x = F.relu(self.fc1(x))x = F.relu(self.fc2(x))x = self.fc3(x)return x
第三步:train训练
net = Net()
# [w1, b1, w2, b2, w3, b3]
optimizer = optim.SGD(net.parameters(), lr=0.01, momentum=0.9)
train_loss = []for epoch in range(3):for batch_idx, (x, y) in enumerate(train_loader):# x: [b, 1, 28, 28], y: [512]# [b, 1, 28, 28] => [b, 784],将整个图片看做特征向量x = x.view(x.size(0), 28*28)# => [b, 10]out = net(x)# [b, 10]y_onehot = one_hot(y)# loss = mse(out, y_onehot)loss = F.mse_loss(out, y_onehot)optimizer.zero_grad()loss.backward()#梯度下降# w' = w - lr*gradoptimizer.step()train_loss.append(loss.item())if batch_idx % 10==0:print(epoch, batch_idx, loss.item())plot_curve(train_loss)
第四步:准确度测试
total_correct = 0
for x,y in test_loader:x = x.view(x.size(0), 28*28)out = net(x)# out: [b, 10] => pred: [b]pred = out.argmax(dim=1)correct = pred.eq(y).sum().float().item()total_correct += correcttotal_num = len(test_loader.dataset)
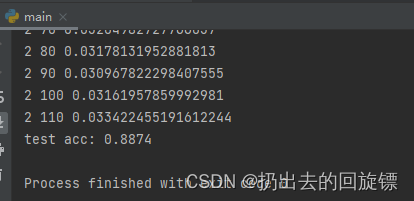
acc = total_correct / total_num
print('test acc:', acc)x, y = next(iter(test_loader))
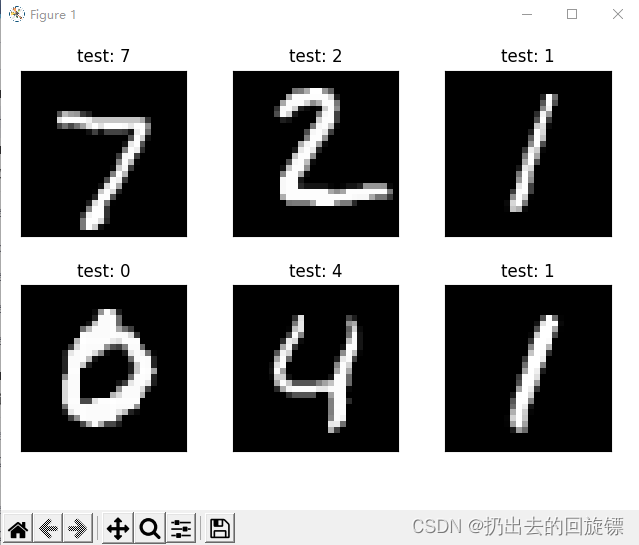
out = net(x.view(x.size(0), 28*28))
pred = out.argmax(dim=1)
plot_image(x, pred, 'test')
无注释代码:
import torch
from torch import nn
from torch.nn import functional as F
from torch import optim
import torchvision
from utils import plot_image, plot_curve, one_hotbatch_size = 512
train_loader = torch.utils.data.DataLoader(torchvision.datasets.MNIST('mnist_data', train=True, download=True,transform=torchvision.transforms.Compose([torchvision.transforms.ToTensor(),torchvision.transforms.Normalize((0.1307,), (0.3081,))])),batch_size=batch_size, shuffle=True)test_loader = torch.utils.data.DataLoader(torchvision.datasets.MNIST('mnist_data/', train=False, download=True,transform=torchvision.transforms.Compose([torchvision.transforms.ToTensor(),torchvision.transforms.Normalize((0.1307,), (0.3081,))])),batch_size=batch_size, shuffle=False)x, y = next(iter(train_loader))
print(x.shape, y.shape, x.min(), y.min())
plot_image(x, y, 'image sample')class Net(nn.Module):def __init__(self):super(Net, self).__init__()self.fc1 = nn.Linear(28 * 28, 256)self.fc2 = nn.Linear(256, 64)self.fc3 = nn.Linear(64, 10)def forward(self, x):x = F.relu(self.fc1(x))x = F.relu(self.fc2(x))x = self.fc3(x)return xnet = Net()
# [w1, b1, w2, b2, w3, b3]
optimizer = optim.SGD(net.parameters(), lr=0.01, momentum=0.9)
train_loss = []for epoch in range(3):for batch_idx, (x, y) in enumerate(train_loader):x = x.view(x.size(0), 28*28)out = net(x)y_onehot = one_hot(y)loss = F.mse_loss(out, y_onehot)optimizer.zero_grad()loss.backward()optimizer.step()train_loss.append(loss.item())if batch_idx % 10==0:print(epoch, batch_idx, loss.item())plot_curve(train_loss)total_correct = 0
for x,y in test_loader:x  = x.view(x.size(0), 28*28)out = net(x)pred = out.argmax(dim=1)correct = pred.eq(y).sum().float().item()total_correct += correcttotal_num = len(test_loader.dataset)
acc = total_correct / total_num
print('test acc:', acc)x, y = next(iter(test_loader))
out = net(x.view(x.size(0), 28*28))
pred = out.argmax(dim=1)
plot_image(x, pred, 'test')