最好使用中文目录常州百度关键词优化
React Native 样式及其布局
参考 https://reactnative.cn/docs/flexbox
一、样式
在 React Native 中,你并不需要学习什么特殊的语法来定义样式。我们仍然是使用 JavaScript 来写样式。所有的核心组件都接受名为style的属性。这些样式名基本上是遵循了 web 上的 CSS 的命名,只是按照 JS 的语法要求使用了驼峰命名法,例如将background-color改为backgroundColor。
style属性可以是一个普通的 JavaScript 对象。这是最简单的用法,因而在示例代码中很常见。你还可以传入一个数组——在数组中位置居后的样式对象比居前的优先级更高,这样你可以间接实现样式的继承。
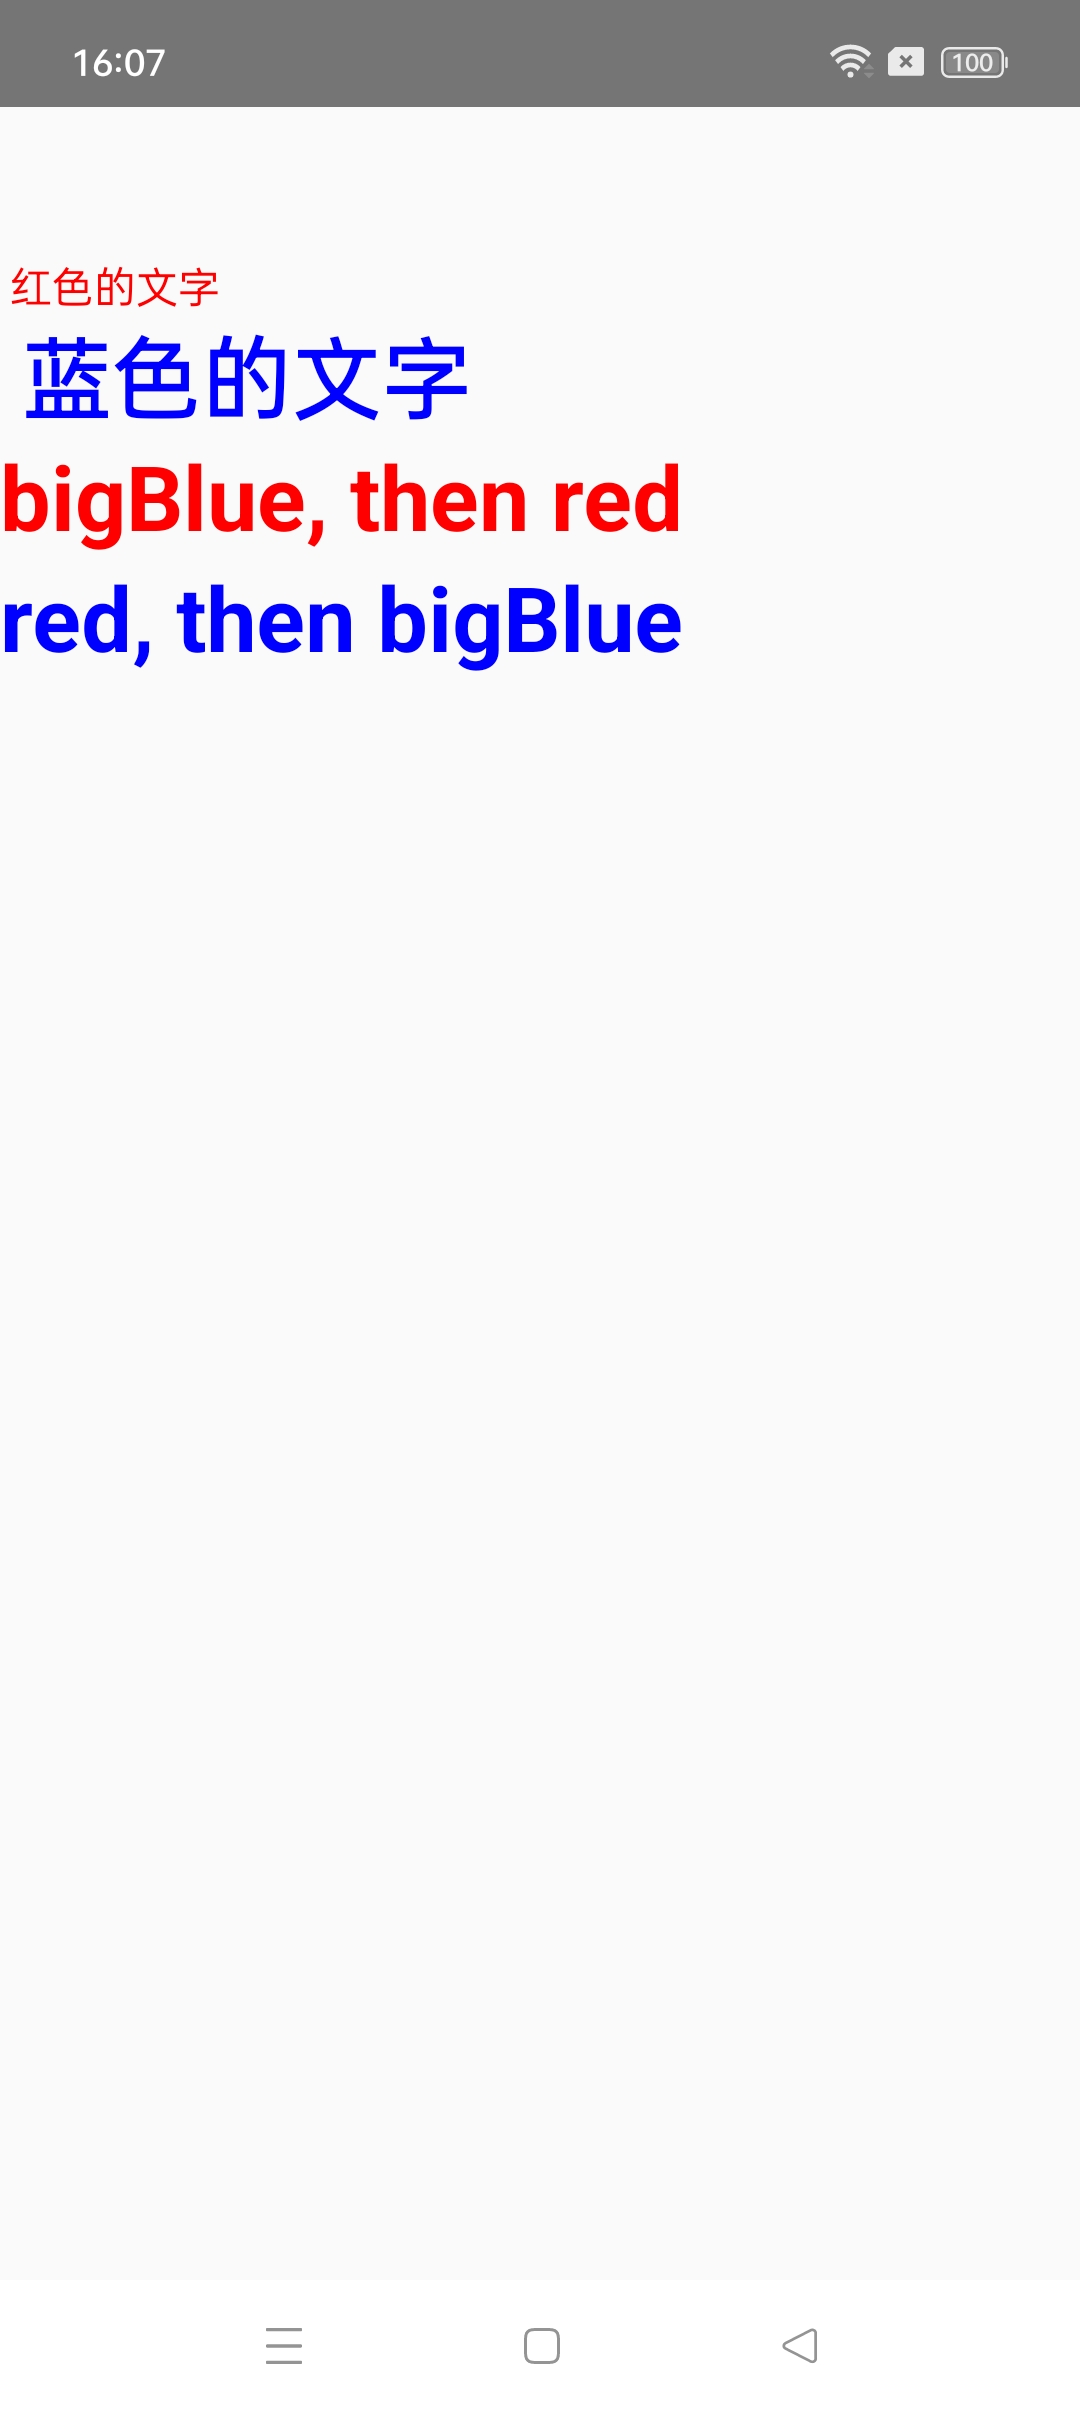
实际开发中组件的样式会越来越复杂,我们建议使用StyleSheet.create来集中定义组件的样式。比如像下面这样:
import React from 'react';
import {StyleSheet, View, Text} from 'react-native';const App = () => {return (<View style={styles.container}><Text style={styles.red}> 红色的文字 </Text><Text style={styles.bigBlue}> 蓝色的文字 </Text><Text style={[styles.bigBlue, styles.red]}>bigBlue, then red</Text><Text style={[styles.red, styles.bigBlue]}>red, then bigBlue</Text></View>);
};const styles = StyleSheet.create({container: {marginTop: 50,},bigBlue: {color: 'blue',fontWeight: 'bold',fontSize: 30,},red: {color: 'red',},
});export default App;
一行一行来解释:
-
第1行是需要导入React 包,是因为 react 在编译 jsx 后的需要使用
React.createElement -
第2行是需要导入StyleSheet、View、Text三个库
-
第4~13行是App组件里的样式
-
第15~27行是声明styles属性,方便App组件里使用这个属性里的子属性
-
第29行就是导出App组件,方便index.js里渲染这个组件
最后效果如下图所示:
二、高度与宽度
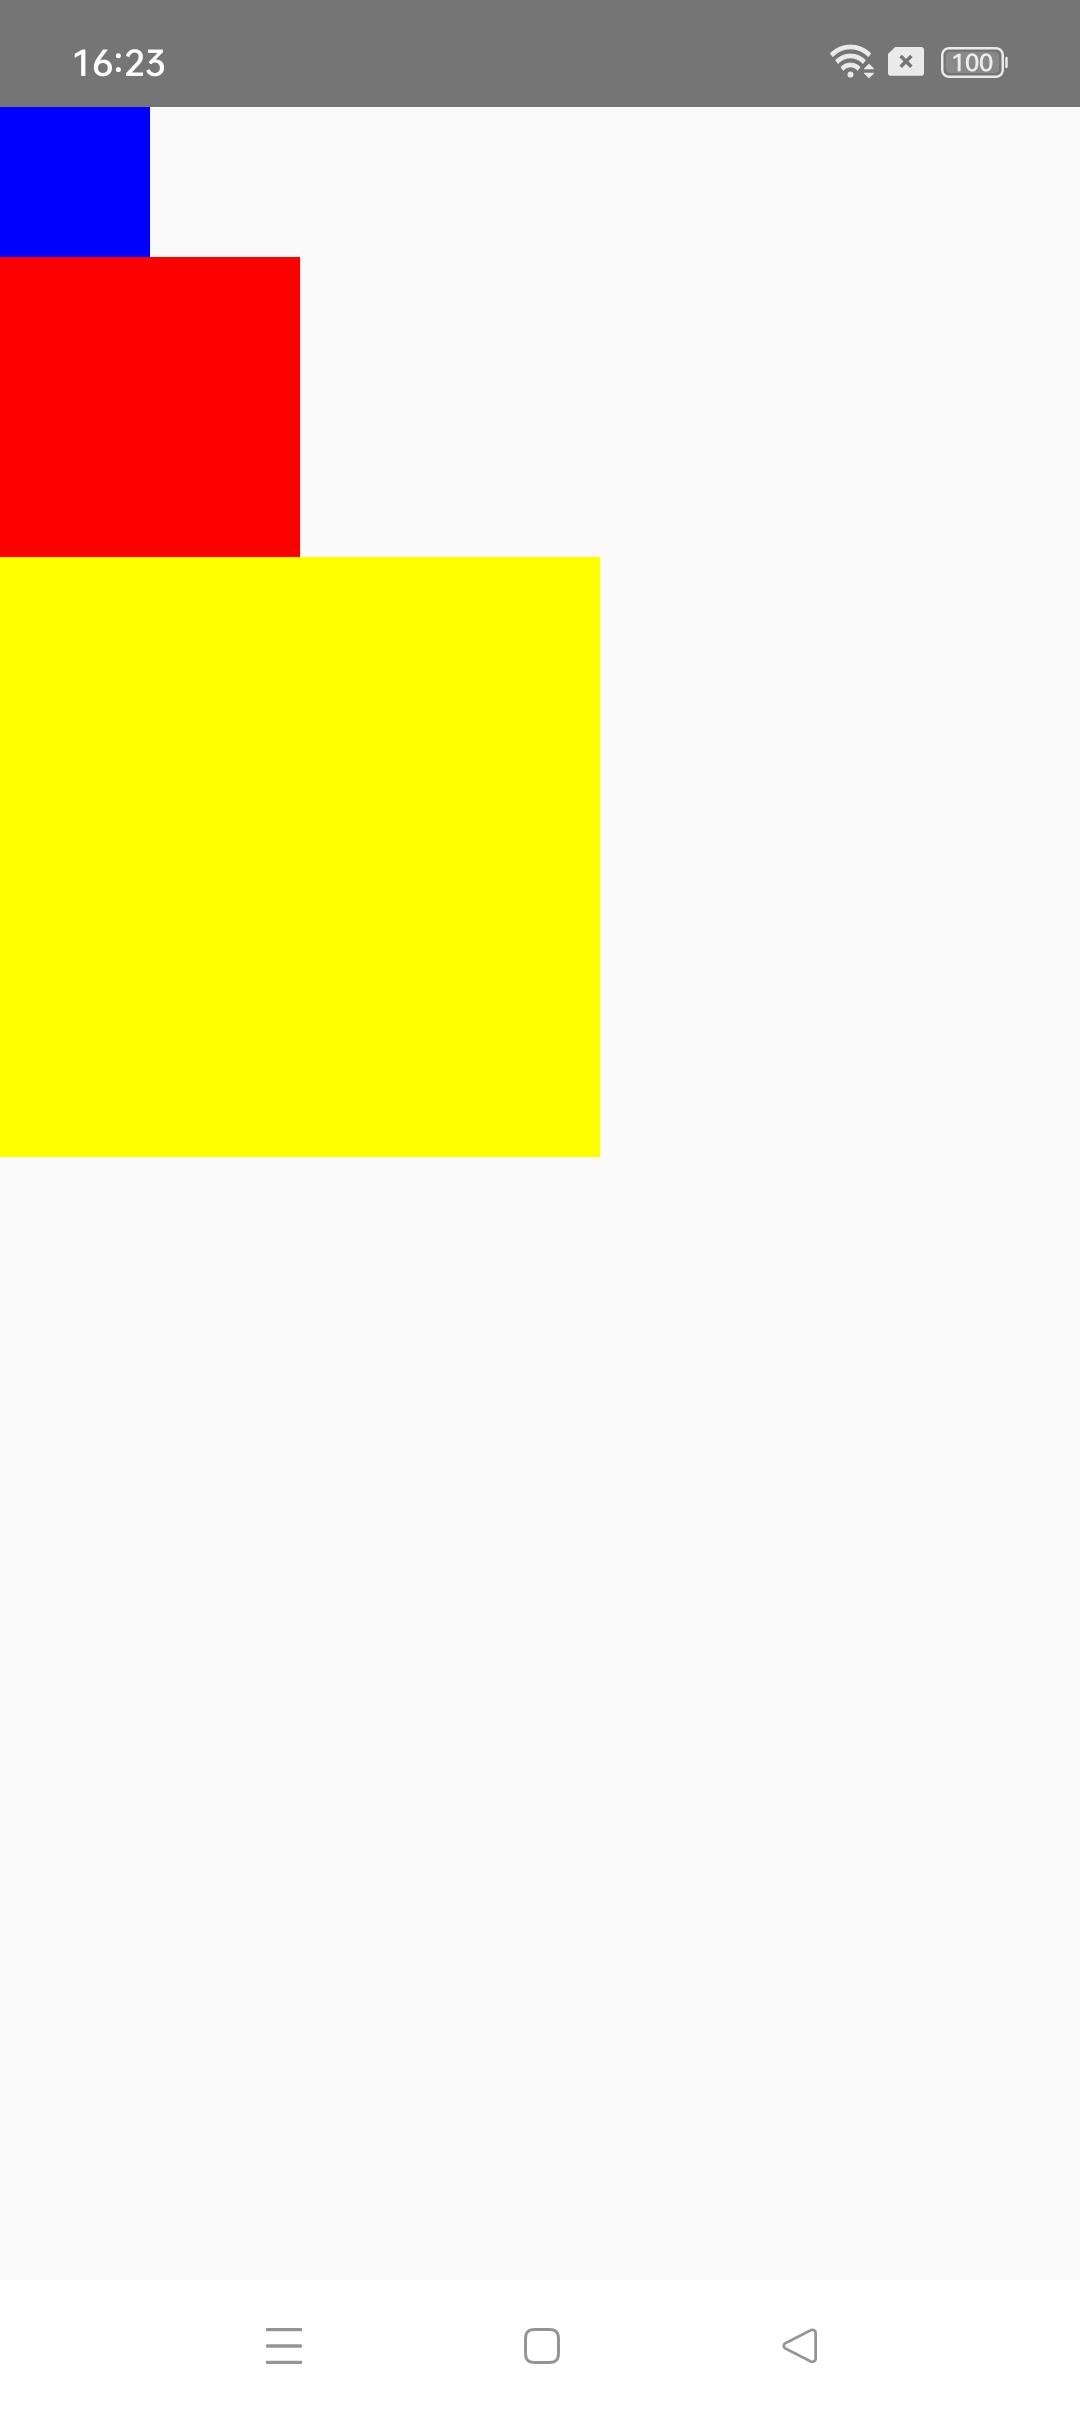
2.1 固定宽高
组件的高度和宽度决定了其在屏幕上显示的尺寸。
最简单的给组件设定尺寸的方式就是在样式中指定固定的width和height。React Native 中的尺寸都是无单位的,表示的是与设备像素密度无关的逻辑像素点。
一种是这样写
import React from 'react';
import {View} from 'react-native';const FixedDimensionsBasics = () => {return (<View><View style={{width: 50, height: 50, backgroundColor: 'blue'}} /><View style={{width: 100, height: 100, backgroundColor: 'red'}} /><View style={{width: 200, height: 200, backgroundColor: 'yellow'}} /></View>);
};export default FixedDimensionsBasics;
一种是这样写
import React from 'react';
import {StyleSheet, View} from 'react-native';const FixedDimensionsBasics = () => {return (<><View style={styles.smallStyle} /><View style={styles.midStyle} /><View style={styles.bigStyle} /></>);
};const styles = StyleSheet.create({smallStyle: {width: 50,height: 50,backgroundColor: 'blue',},midStyle: {width: 100,height: 100,backgroundColor: 'red',},bigStyle: {width: 200,height: 200,backgroundColor: 'yellow',},
});export default FixedDimensionsBasics;
上面代码运行如下:
个人更加推荐使用第二种写法,便于统一编写样式和查看样式。因为通常而言一个文件里会有很多种样式,如果都写在view组件的括号里,视觉效果看起来会很不友好,而且去排查样式问题的时候也不利于去排查到底是哪块的问题。
2.2 弹性(Flex)宽高
在组件样式中使用flex可以使其在可利用的空间中动态地扩张或收缩。一般而言我们会使用flex:1来指定某个组件扩张以撑满所有剩余的空间。如果有多个并列的子组件使用了flex:1,则这些子组件会平分父容器中剩余的空间。如果这些并列的子组件的flex值不一样,则谁的值更大,谁占据剩余空间的比例就更大(即占据剩余空间的比等于并列组件间flex值的比)。
组件能够撑满剩余空间的前提是其父容器的尺寸不为零。如果父容器既没有固定的
width和height,也没有设定flex,则父容器的尺寸为零。其子组件如果使用了flex,也是无法显示的。
import React from 'react';
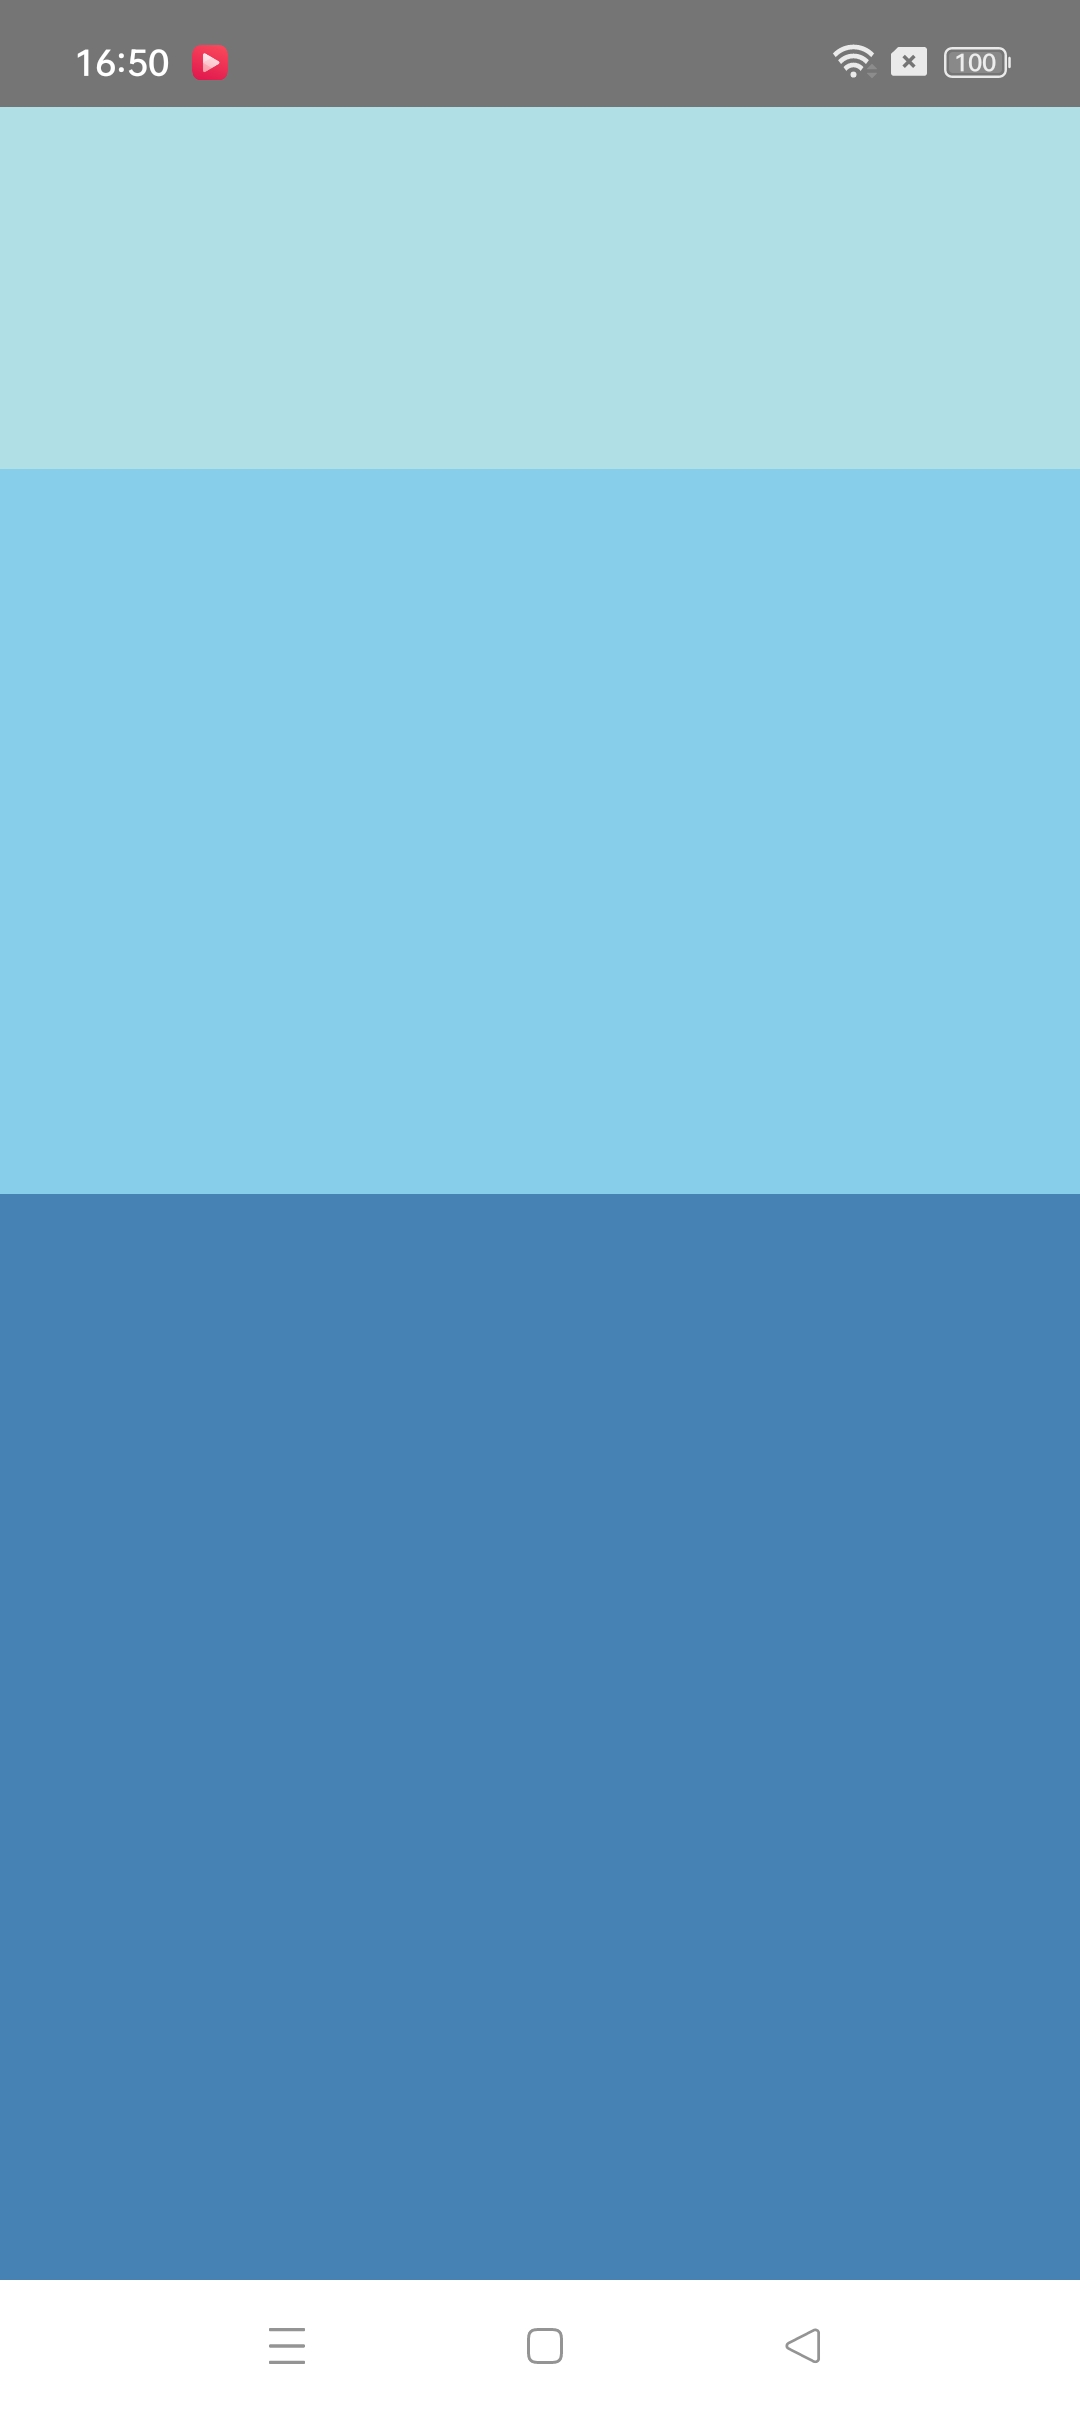
import {StyleSheet, View} from 'react-native';const FlexDimensionsBasics = () => {return (// 试试去掉父View中的`flex: 1`。// 则父View不再具有尺寸,因此子组件也无法再撑开。// 然后再用`height: 300`来代替父View的`flex: 1`试试看? => 结果是三个view平分父view的300高度的<View style={styles.container}><View style={styles.powderblueStyle} /><View style={styles.skyblueStyle} /><View style={styles.steelblueStyle} /></View>);
};const styles = StyleSheet.create({container: {flex: 1,},powderblueStyle: {flex: 1,backgroundColor: 'powderblue',},skyblueStyle: {flex: 2,backgroundColor: 'skyblue',},steelblueStyle: {flex: 3,backgroundColor: 'steelblue',},
});export default FlexDimensionsBasics;
上述代码效果图如下:
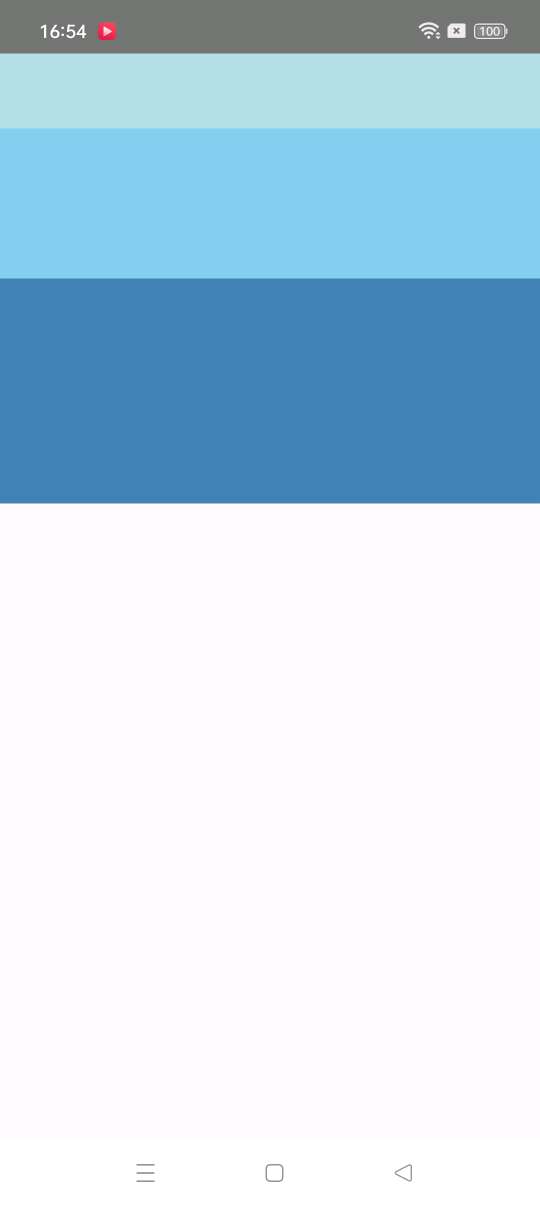
如果上述代码的container下的样式flex不为1,设置的是height: 300的话,则效果如下所示:
三、使用Flexbox布局
我们在 React Native 中使用 flexbox 规则来指定某个组件的子元素的布局。Flexbox 可以在不同屏幕尺寸上提供一致的布局结构。
一般来说,使用flexDirection、alignItems和 justifyContent三个样式属性就已经能满足大多数布局需求。
React Native 中的 Flexbox 的工作原理和 web 上的 CSS 基本一致,当然也存在少许差异。首先是默认值不同:
flexDirection的默认值为column(而不是row),alignContent默认值为flex-start(而不是stretch),flexShrink默认值为0(而不是1), 而flex只能指定一个数字值。
3.1 Flex
flex 属性决定元素在主轴上如何填满可用区域。整个区域会根据每个元素设置的 flex 属性值被分割成多个部分。
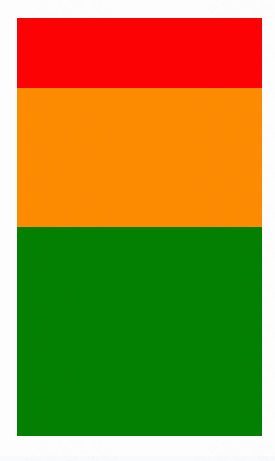
在下面的例子中,在设置了flex: 1的容器 view 中,有红色,黄色和绿色三个子 view。红色 view 设置了flex: 1,黄色 view 设置了flex: 2,绿色 view 设置了flex: 3。1+2+3 = 6,这意味着红色 view 占据整个区域的1/6,黄色 view 占据整个区域的2/6,绿色 view 占据整个区域的3/6。
import React from "react";
import { StyleSheet, Text, View } from "react-native";const Flex = () => {return (<View style={[styles.container, {// Try setting `flexDirection` to `"row"`.flexDirection: "column"}]}><View style={{ flex: 1, backgroundColor: "red" }} /><View style={{ flex: 2, backgroundColor: "darkorange" }} /><View style={{ flex: 3, backgroundColor: "green" }} /></View>);
};const styles = StyleSheet.create({container: {flex: 1,padding: 20,},
});export default Flex;
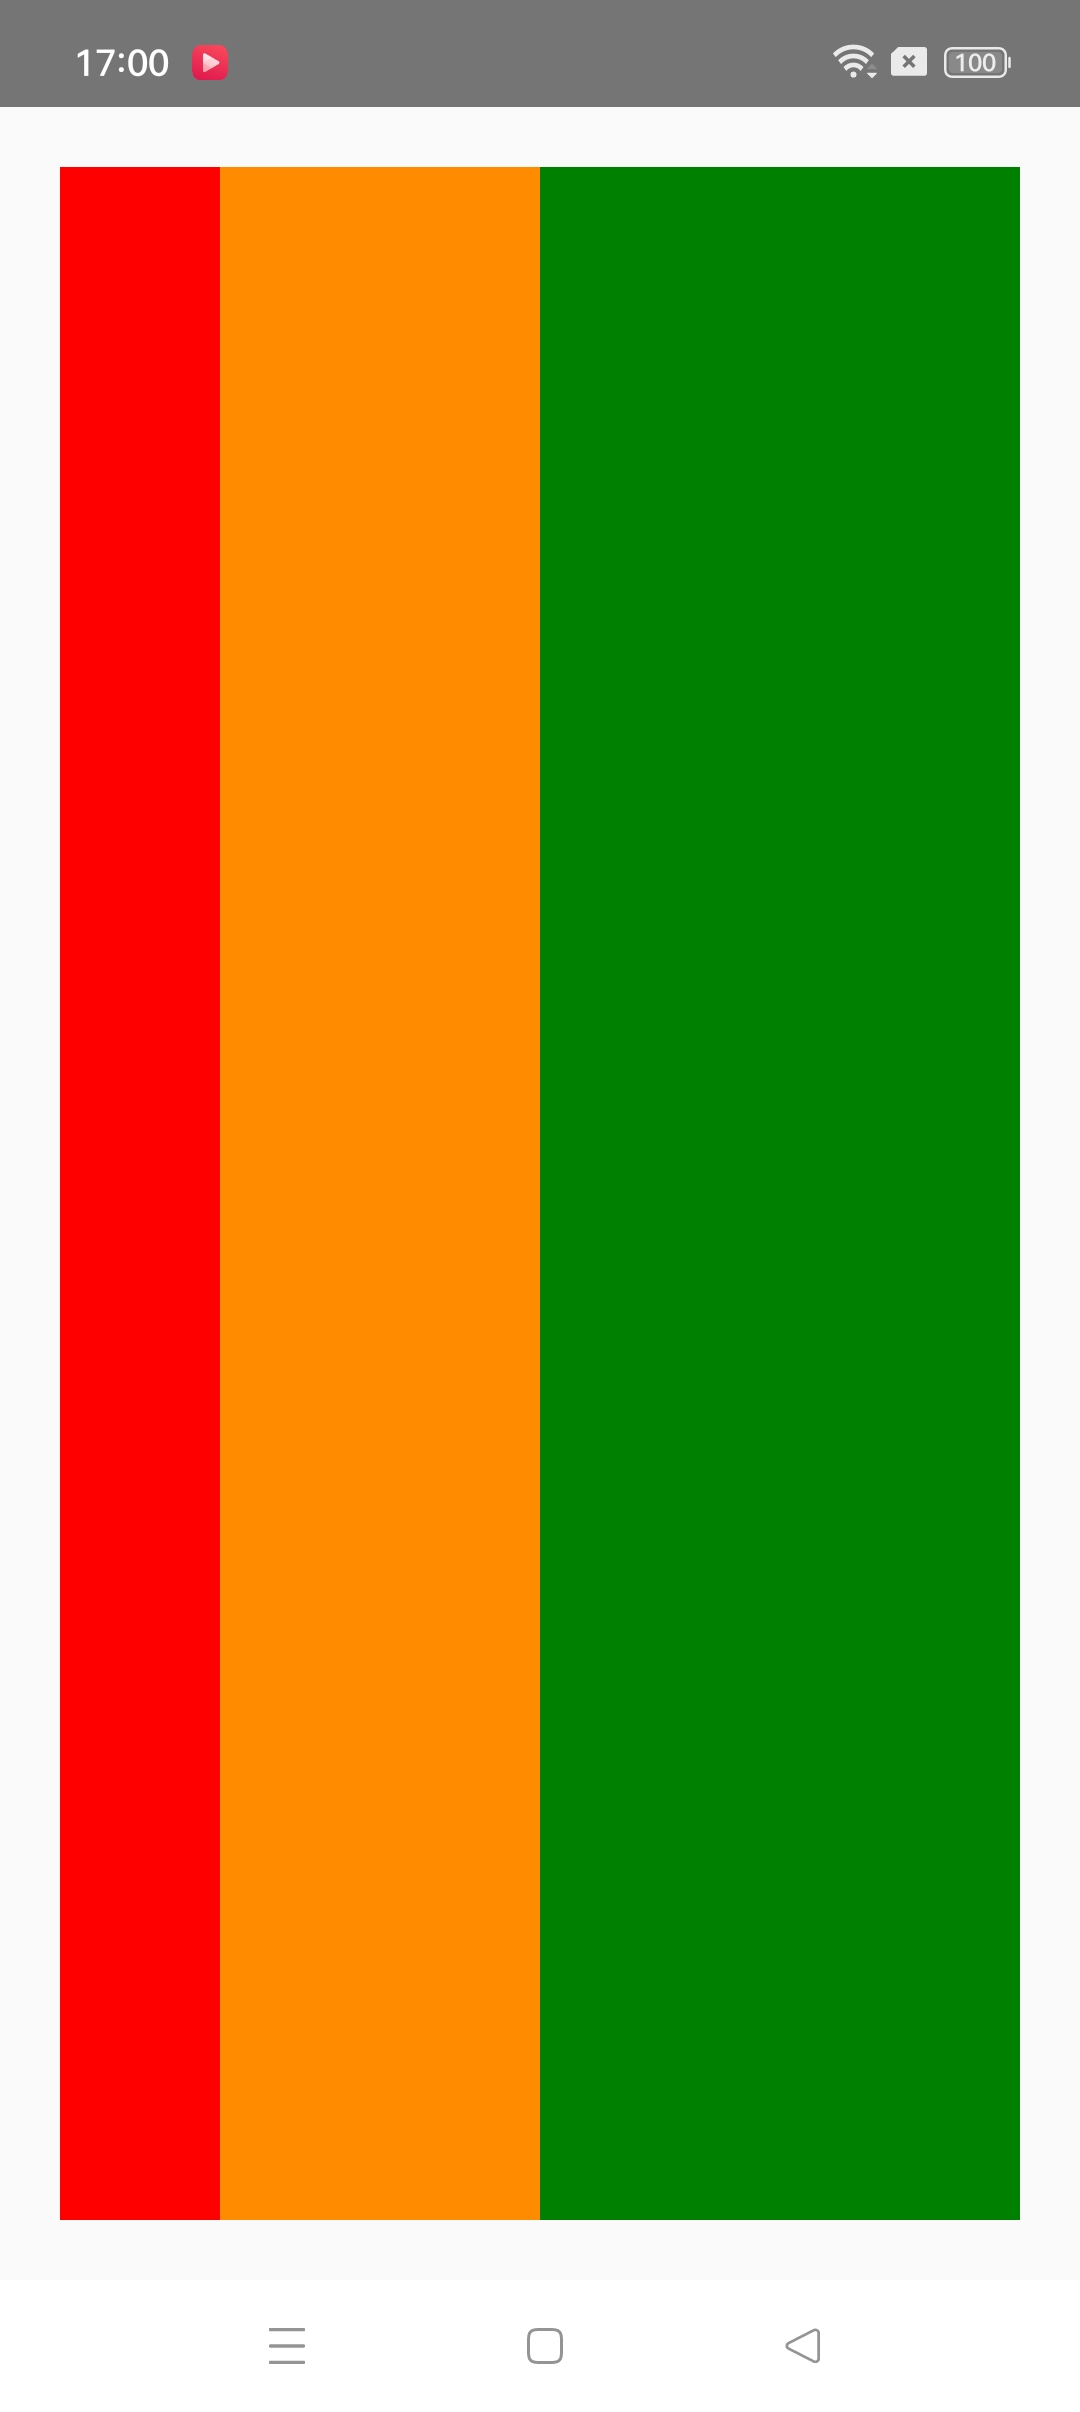
如果将上述 flexDirection: “column” 改为 flexDirection: "row"的话,效果图如下:
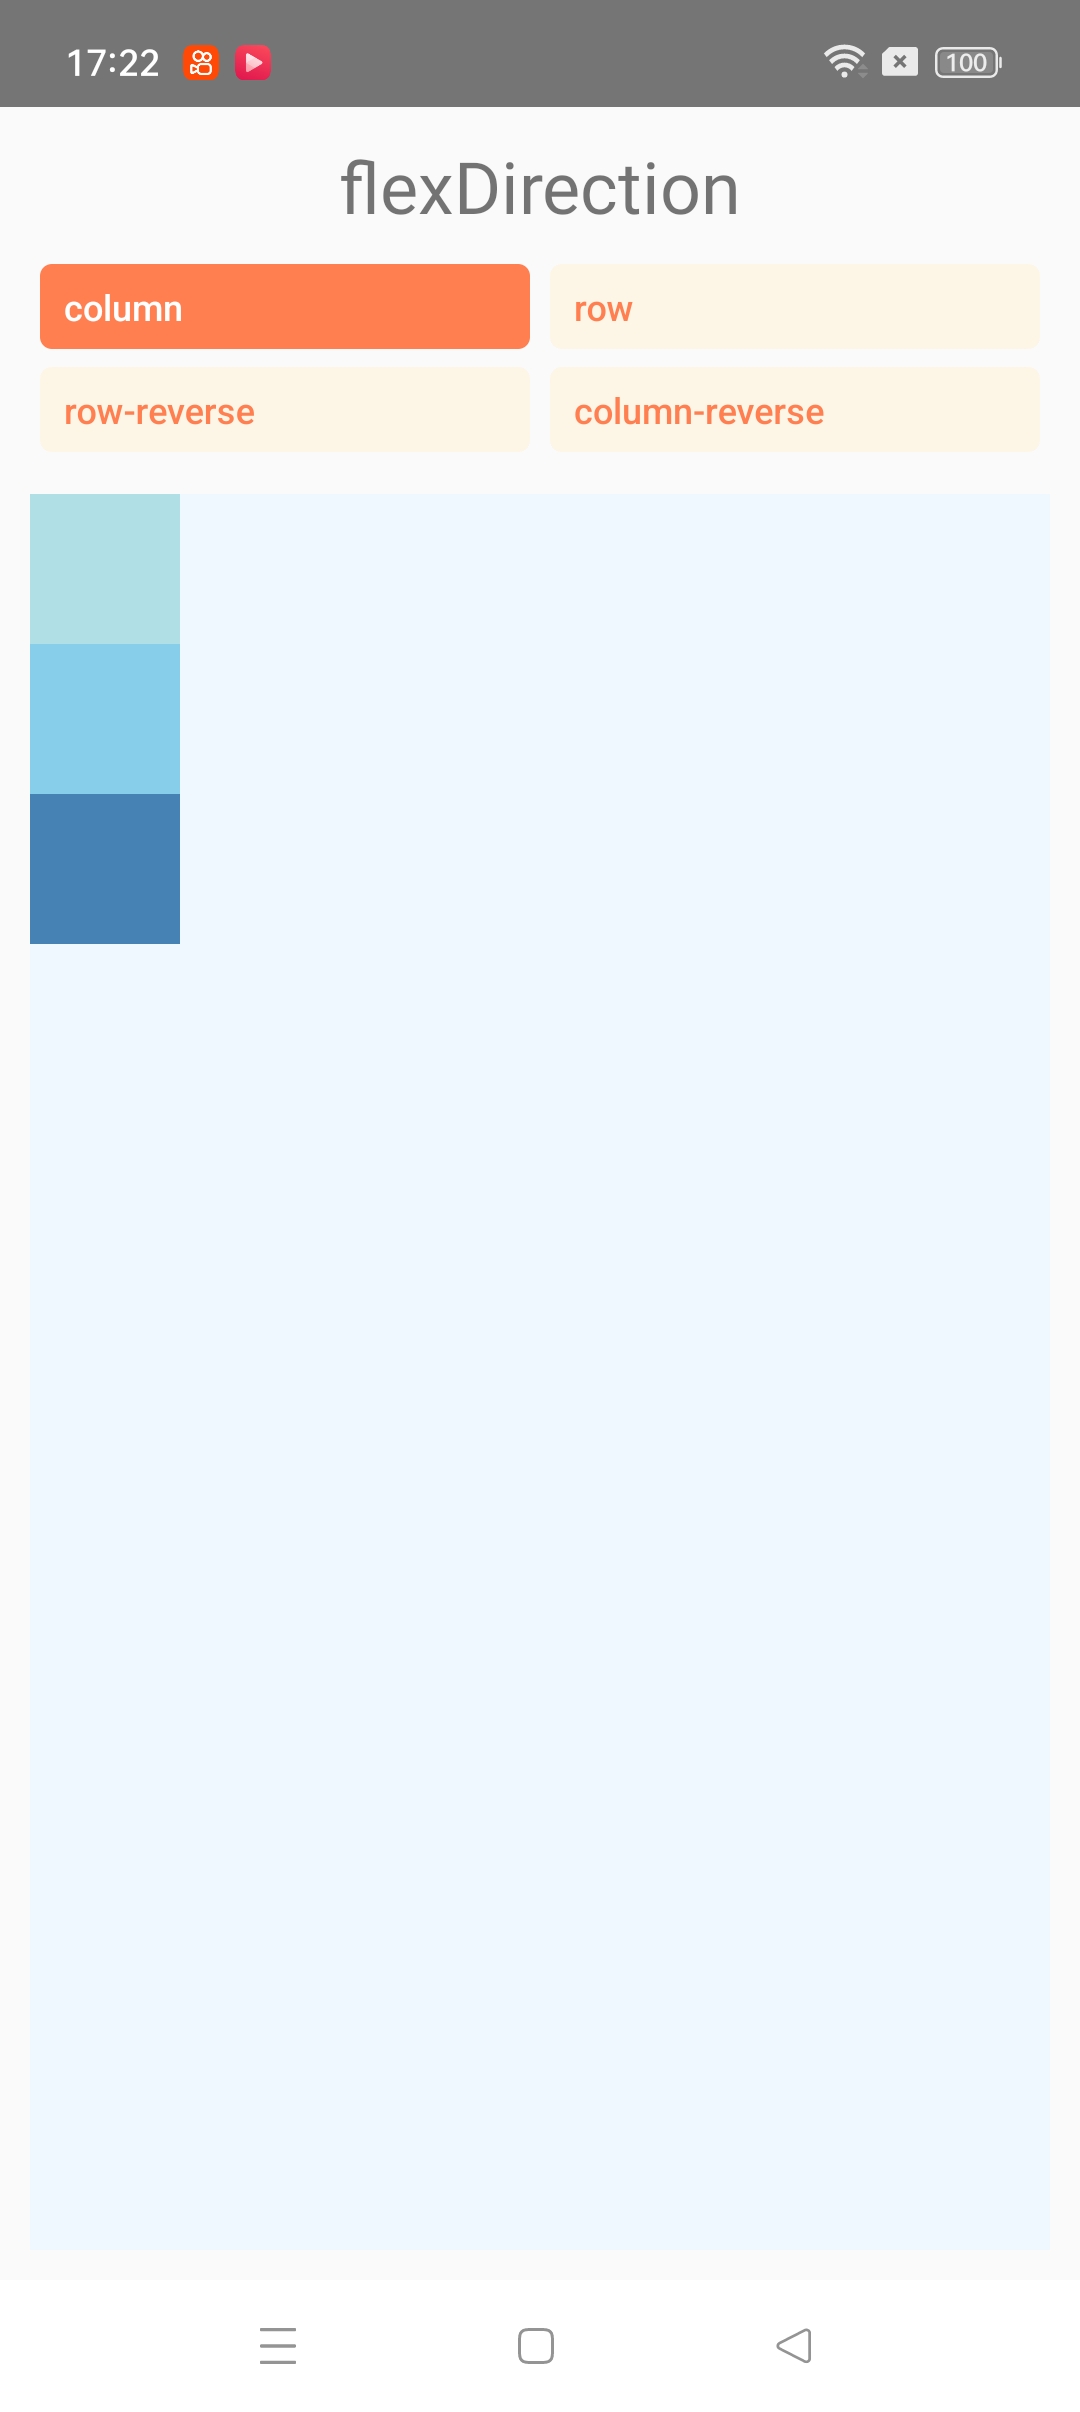
3.2 Flex Direction
在组件的style中指定flexDirection可以决定布局的主轴。子元素是应该沿着**水平轴(row)方向排列,还是沿着竖直轴(column)方向排列呢?默认值是竖直轴(column)**方向。
column(默认值):将子元素从上到下对齐。如果启用换行,则下一行将从容器顶部的第一个项目右侧开始。row:将子元素从左到右对齐。如果启用换行,则下一行将在容器左侧的第一个项目下方开始。column-reverse:将子元素从底部向上对齐。如果启用换行,则下一行将从容器底部的第一个项目右侧开始。row-reverse:将子元素从右到左对齐。如果启用换行,则下一行将在容器右侧的第一个项目下方开始。
import React, {useState} from 'react';
import {StyleSheet, Text, TouchableOpacity, View} from 'react-native';const FlexDirectionBasics = () => {const [flexDirection, setFlexDirection] = useState('column');return (<PreviewLayoutlabel="flexDirection"values={['column', 'row', 'row-reverse', 'column-reverse']}selectedValue={flexDirection}setSelectedValue={setFlexDirection}><View style={[styles.box, {backgroundColor: 'powderblue'}]} /><View style={[styles.box, {backgroundColor: 'skyblue'}]} /><View style={[styles.box, {backgroundColor: 'steelblue'}]} /></PreviewLayout>);
};const PreviewLayout = ({label,children,values,selectedValue,setSelectedValue,
}) => (<View style={{padding: 10, flex: 1}}><Text style={styles.label}>{label}</Text><View style={styles.row}>{values.map(value => (<TouchableOpacitykey={value}onPress={() => setSelectedValue(value)}style={[styles.button, selectedValue === value && styles.selected]}><Textstyle={[styles.buttonLabel,selectedValue === value && styles.selectedLabel,]}>{value}</Text></TouchableOpacity>))}</View><View style={[styles.container, {[label]: selectedValue}]}>{children}</View></View>
);const styles = StyleSheet.create({container: {flex: 1,marginTop: 8,backgroundColor: 'aliceblue',},box: {width: 50,height: 50,},row: {flexDirection: 'row',flexWrap: 'wrap',},button: {paddingHorizontal: 8,paddingVertical: 6,borderRadius: 4,backgroundColor: 'oldlace',alignSelf: 'flex-start',marginHorizontal: '1%',marginBottom: 6,minWidth: '48%',textAlign: 'center',},selected: {backgroundColor: 'coral',borderWidth: 0,},buttonLabel: {fontSize: 12,fontWeight: '500',color: 'coral',},selectedLabel: {color: 'white',},label: {textAlign: 'center',marginBottom: 10,fontSize: 24,},
});export default FlexDirectionBasics;
解析一下:
第5行:设置flexDirection这个属性默认值为column
第8行和第16行:调用PreviewLayout这个组件
第9~12行:分别给PreviewLayout传参
- label=“flexDirection” 一个字符串
- values={[‘column’, ‘row’, ‘row-reverse’, ‘column-reverse’]} 一个字符串数组
- selectedValue={flexDirection} selectedValue属性值就是flexDirection变量的值
- setSelectedValue={setflexDirection} setSelectedValue属性值调用setflexDirection方法,相当于会改变flexDirection的值
第13~15行:声明三个正方形的view,宽和高分别为50
第20~26行:声明PreviewLayout组件
第27和46行:声明整个父容器,距离边距是10,flex为1代表占据整个边距是10的容器
第28行:声明一个Text的组件,样式是styles.label,居中显示距离下面组件的间距是10,字体大小是24。文字内容是21行传参过来的label,也就是第九行的"flexDirection"
label: {textAlign: 'center',marginBottom: 10,fontSize: 24,
}
第29行和44行:声明要展示的第二部分view
第30行:对传下来的values数组,遍历里面的每个元素
第31行和第42行:声明一个TouchableOpacity系统组件
第32行:声明TouchableOpacity组件的key为values数组里每个元素的值
第33行:声明TouchableOpacity组件的按压下去触发的动作会调用setSelectedValue(value)方法,而setSelectedValue(value)实际上就是改变flexDirection这个变量的值
第34行:声明TouchableOpacity组件的style属性为styles.button的属性,以及如果selectedValue的值等于遍历当前values数组的值,那么就会再拼接上styles.selected属性的值,也就是下面两个css的值。(遍历到的那个组件的元素css样式是下面两个css样式组合起来的,否则就只是button一个css样式的)
button: {paddingHorizontal: 8,paddingVertical: 6,borderRadius: 4,backgroundColor: 'oldlace',alignSelf: 'flex-start',marginHorizontal: '1%',marginBottom: 6,minWidth: '48%',textAlign: 'center',
},
selected: {backgroundColor: 'coral',borderWidth: 0,
},
第35行和第41行:在TouchableOpacity组件里声明一个Text组件
第36~39行:如果被选中,声明Text的样式为下面两个css的样式;否则声明的Text样式为buttonLabel的css样式
buttonLabel: {fontSize: 12,fontWeight: '500',color: 'coral',
},
selectedLabel: {color: 'white',
}
第45行:声明在PreviewLayout组件里的子组件,也就是13到15行里的组件,对应的样式是container,其中每个组件里的flexDirection属性就是当前selectedValue的属性值
<View style={[styles.box, {backgroundColor: 'powderblue'}]} />
<View style={[styles.box, {backgroundColor: 'skyblue'}]} />
<View style={[styles.box, {backgroundColor: 'steelblue'}]} />
上述代码运行如下: