帮别人做网站开票开什么税目网站关键词优化价格
JUnit 5 学习笔记
- 1.JUnit5的改变
- 2.JUnit5常用注解及测试
- 2.1 @DisplayName/@Disabled/@BeforeEach/@AfterEach/@BeforeAll/@AfterAll
- 2.2 @Timeout
- 2.3 @RepeatedTest
- 3.断言
- 3.1 简单断言
- 3.2 数组断言
- 3.3 组合断言
- 3.4 异常断言
- 3.5 超时断言
- 3.6 快速失败
- 4.前置条件
- 5.嵌套测试
- 6.参数化测试
- 6.1 @ValueSource
- 6.2. @EnumSource
- 6.3 @CsvSource 和 @CsvFileSource
- 6.4. @MethodSource
- 7.JUnit4 → Junit5
1.JUnit5的改变
JUnit 5 =
JUnit Platform+JUnit Jupiter+JUnit Vintage
JUnit Platform:Junit
Platform是在JVM上启动测试框架的基础,不仅支持Junit自制的测试引擎,其他测试引擎也都可以接入。
JUnit Jupiter:JUnit Jupiter提供了JUnit5的新的编程模型,是JUnit5新特性的核心。内部包含了一个测试引擎,用于在Junit Platform上运行。
JUnit Vintage: 由于JUint已经发展多年,为了照顾老的项目,JUnit Vintage提供了兼容JUnit4.x,Junit3.x的测试引擎。
2.JUnit5常用注解及测试
JUnit5的注解与JUnit4的注解有所变化
- @Test :表示方法是测试方法。但是与JUnit4的@Test不同,他的职责非常单一不能声明任何属性,拓展的测试将会由Jupiter提供额外测试
- @ParameterizedTest :表示方法是参数化测试,下方会有详细介绍
- @RepeatedTest :表示方法可重复执行,下方会有详细介绍
- @DisplayName :为测试类或者测试方法设置展示名称
- @BeforeEach :表示在每个单元测试之前执行
- @AfterEach :表示在每个单元测试之后执行 @BeforeAll :表示在所有单元测试之前执行
- @AfterAll :表示在所有单元测试之后执行
- @Tag :表示单元测试类别,类似于JUnit4中的@Categories
- @Disabled :表示测试类或测试方法不执行,类似于JUnit4中的@Ignore
- @Timeout :表示测试方法运行如果超过了指定时间将会返回错误
- @ExtendWith :为测试类或测试方法提供扩展类引用
2.1 @DisplayName/@Disabled/@BeforeEach/@AfterEach/@BeforeAll/@AfterAll
@SpringBootTest
@DisplayName("Junit5功能测试类")
public class TestJunit {//----------------------------常用注解----------------------------
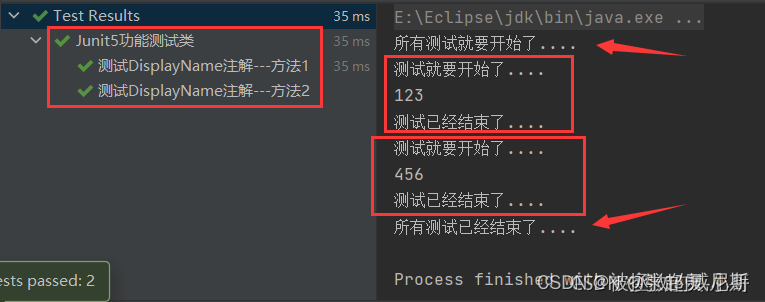
//@DisplayName("测试DisplayName注解---方法1")@Testpublic void testDisplayName1() {System.out.println(123);}@Disabled@DisplayName("测试DisplayName注解---方法2")@Testpublic void testDisplayName2() {System.out.println(456);}@BeforeEachpublic void testBeforeEach() {System.out.println("测试就要开始了....");}@AfterEachpublic void testAfterEach() {System.out.println("测试已经结束了....");}@BeforeAllpublic static void testBeforeAll() {System.out.println("所有测试就要开始了....");}@AfterAllpublic static void testAfterAll() {System.out.println("所有测试已经结束了....");}
}
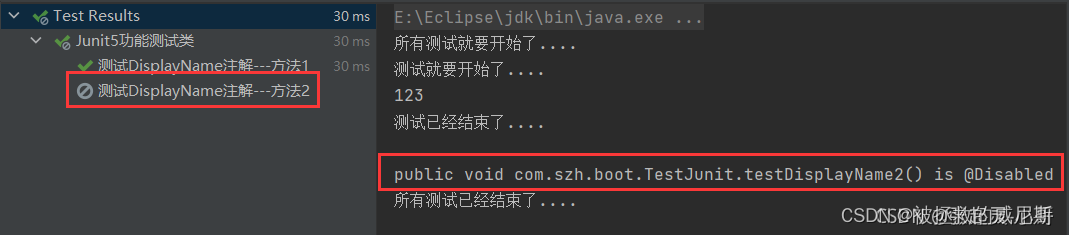
我们再把 testDisplayName2 方法上的@Disabled注解打开。可以看到,这个测试方法已经被禁用了。
2.2 @Timeout
package com.szh.boot;import org.junit.jupiter.api.*;import java.time.Duration;
import java.util.concurrent.TimeUnit;import static org.junit.jupiter.api.Assertions.*;@SpringBootTest
@DisplayName("Junit5功能测试类")
public class TestJunit {@BeforeEachpublic void testBeforeEach() {System.out.println("测试就要开始了....");}@AfterEachpublic void testAfterEach() {System.out.println("测试已经结束了....");}@BeforeAllpublic static void testBeforeAll() {System.out.println("所有测试就要开始了....");}@AfterAllpublic static void testAfterAll() {System.out.println("所有测试已经结束了....");}@DisplayName("测试Timeout注解")@Timeout(value = 5, unit = TimeUnit.MILLISECONDS)@Testpublic void testTimeout() throws InterruptedException {Thread.sleep(1000);}
}

2.3 @RepeatedTest
package com.szh.boot;import org.junit.jupiter.api.*;import java.time.Duration;
import java.util.concurrent.TimeUnit;import static org.junit.jupiter.api.Assertions.*;@SpringBootTest
@DisplayName("Junit5功能测试类")
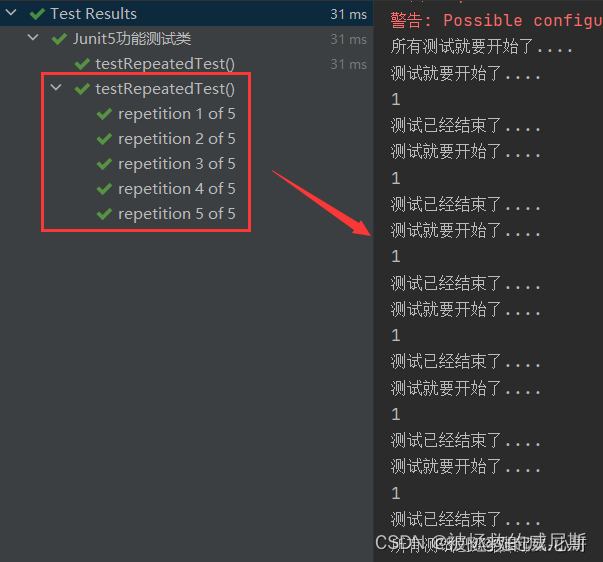
public class TestJunit {@BeforeEachpublic void testBeforeEach() {System.out.println("测试就要开始了....");}@AfterEachpublic void testAfterEach() {System.out.println("测试已经结束了....");}@BeforeAllpublic static void testBeforeAll() {System.out.println("所有测试就要开始了....");}@AfterAllpublic static void testAfterAll() {System.out.println("所有测试已经结束了....");}@RepeatedTest(5)@Testpublic void testRepeatedTest() {System.out.println(1);}
}
3.断言
断言(assertions)是测试方法中的核心部分,用来对测试需要满足的条件进行验证。这些断言方法都是
org.junit.jupiter.api.Assertions的静态方法。JUnit 5 内置的断言可以分成如下几个类别:
3.1 简单断言
用来对单个值进行简单的验证。如:
| 方法 | 说明 |
|---|---|
| assertEquals | 判断两个对象或两个原始类型是否相等 |
| assertNotEquals | 判断两个对象或两个原始类型是否不相等 |
| assertSame | 判断两个对象引用是否指向同一个对象 |
| assertNotSame | 判断两个对象引用是否指向不同的对象 |
| assertTrue | 判断给定的布尔值是否为 true |
| assertFalse | 判断给定的布尔值是否为 false |
| assertNull | 判断给定的对象引用是否为 null |
| assertNotNull | 判断给定的对象引用是否不为 null |
package com.szh.boot;import org.junit.jupiter.api.*;import java.time.Duration;
import java.util.concurrent.TimeUnit;import static org.junit.jupiter.api.Assertions.*;@SpringBootTest
@DisplayName("Junit5功能测试类")
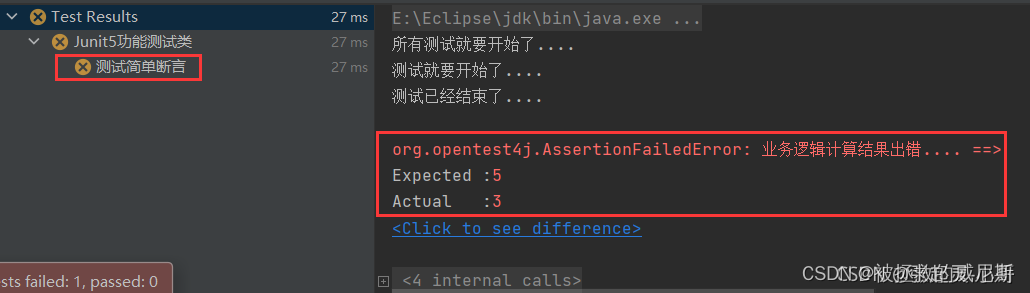
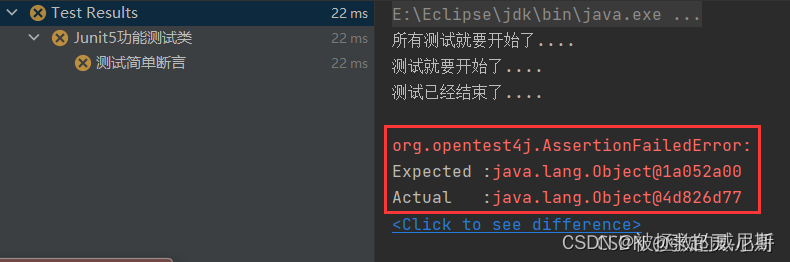
public class TestJunit {@BeforeEachpublic void testBeforeEach() {System.out.println("测试就要开始了....");}@AfterEachpublic void testAfterEach() {System.out.println("测试已经结束了....");}@BeforeAllpublic static void testBeforeAll() {System.out.println("所有测试就要开始了....");}@AfterAllpublic static void testAfterAll() {System.out.println("所有测试已经结束了....");}//----------------------------断言---------------------------- /** * 如果前面的断言失败,则后面的代码不会再执行 * * */ @DisplayName("测试简单断言")@Testpublic void testSimpleAssertions() {int result = cal(1, 2);assertEquals(5, result, "业务逻辑计算结果出错....");Object obj1 = new Object();Object obj2 = new Object();assertSame(obj1, obj2);}public int cal(int x, int y) {return x + y;}
}
assertEquals方法判断出运算结果不同,也即此时第一个断言失败了,那么后面的assertSame不会再执行。
当我们修改assertEquals方法使其断言成功,那么后续的assertSame将会继续执行。
3.2 数组断言
通过 assertArrayEquals 方法来判断两个对象或原始类型的数组是否相等。
package com.szh.boot;import org.junit.jupiter.api.*;import java.time.Duration;
import java.util.concurrent.TimeUnit;import static org.junit.jupiter.api.Assertions.*;@SpringBootTest
@DisplayName("Junit5功能测试类")
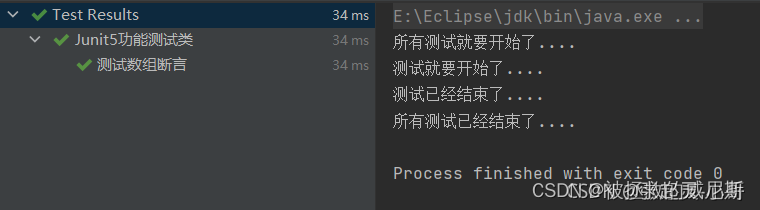
public class TestJunit {@BeforeEachpublic void testBeforeEach() {System.out.println("测试就要开始了....");}@AfterEachpublic void testAfterEach() {System.out.println("测试已经结束了....");}@BeforeAllpublic static void testBeforeAll() {System.out.println("所有测试就要开始了....");}@AfterAllpublic static void testAfterAll() {System.out.println("所有测试已经结束了....");} //----------------------------断言---------------------------- @DisplayName("测试数组断言1")@Testpublic void testArrayAssertions1() {assertArrayEquals(new int[]{1, 2}, new int[]{1, 2});}@DisplayName("测试数组断言2")@Testpublic void testArrayAssertions2() {assertArrayEquals(new int[]{3, 4}, new int[]{1, 2}, "数组内容不相等....");}
}

3.3 组合断言
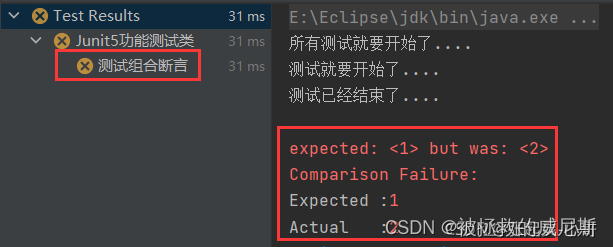
assertAll 方法接受多个 org.junit.jupiter.api.Executable 函数式接口的实例作为要验证的断言,可以通过 lambda 表达式很容易的提供这些断言。
组合断言中,当所有断言都成功时,代码才会顺利向下执行。assertTrue虽然执行成功了,但是assertEquals失败了,所有下面的sout不会执行。
package com.szh.boot;import org.junit.jupiter.api.*;import java.time.Duration;
import java.util.concurrent.TimeUnit;import static org.junit.jupiter.api.Assertions.*;@SpringBootTest
@DisplayName("Junit5功能测试类")
public class TestJunit {@BeforeEachpublic void testBeforeEach() {System.out.println("测试就要开始了....");}@AfterEachpublic void testAfterEach() {System.out.println("测试已经结束了....");}@BeforeAllpublic static void testBeforeAll() {System.out.println("所有测试就要开始了....");}@AfterAllpublic static void testAfterAll() {System.out.println("所有测试已经结束了....");}     //----------------------------断言---------------------------- @DisplayName(("测试组合断言"))@Testpublic void testAllAssertions() {assertAll("testAll", () -> assertTrue(true && true),() -> assertEquals(1, 2));//当以上两个断言全部成功时,才会打印下面的内容 System.out.println("success!!!");}
}
3.4 异常断言
在JUnit4时期,想要测试方法的异常情况时,需要用@Rule注解的ExpectedException变量还是比较麻烦的。而JUnit5提供了一种新的断言方式Assertions.assertThrows() ,配合函数式编程就可以进行使用。
package com.szh.boot;import org.junit.jupiter.api.*;import java.time.Duration;
import java.util.concurrent.TimeUnit;import static org.junit.jupiter.api.Assertions.*;@SpringBootTest
@DisplayName("Junit5功能测试类")
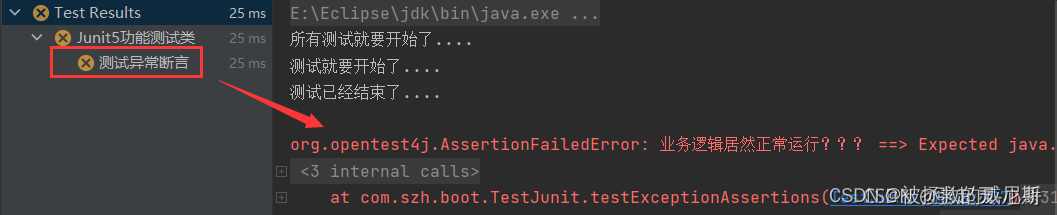
public class TestJunit {@BeforeEachpublic void testBeforeEach() {System.out.println("测试就要开始了....");}@AfterEachpublic void testAfterEach() {System.out.println("测试已经结束了....");}@BeforeAllpublic static void testBeforeAll() {System.out.println("所有测试就要开始了....");}@AfterAllpublic static void testAfterAll() {System.out.println("所有测试已经结束了....");} //----------------------------断言---------------------------- @DisplayName("测试异常断言")@Testpublic void testExceptionAssertions() {assertThrows(ArithmeticException.class, () -> {int i = 10 / 2;//此时断言会执行 // int j = 10 / 0; // 此时断言不会执行 }, "业务逻辑居然正常运行???");}
}
如果代码执行 int i = 10 / 2 运行正确,不会出现 ArithmeticException 异常,所以此时assertThrows断言会执行。反之则不会执行。
3.5 超时断言
Junit5还提供了Assertions.assertTimeout() 为测试方法设置了超时时间。
package com.szh.boot;import org.junit.jupiter.api.*;import java.time.Duration;
import java.util.concurrent.TimeUnit;import static org.junit.jupiter.api.Assertions.*;@SpringBootTest
@DisplayName("Junit5功能测试类")
public class TestJunit {@BeforeEachpublic void testBeforeEach() {System.out.println("测试就要开始了....");}@AfterEachpublic void testAfterEach() {System.out.println("测试已经结束了....");}@BeforeAllpublic static void testBeforeAll() {System.out.println("所有测试就要开始了....");}@AfterAllpublic static void testAfterAll() {System.out.println("所有测试已经结束了....");}@DisplayName("测试超时断言")@Testpublic void testTimeoutAssertions() {assertTimeout(Duration.ofMillis(1000), () -> Thread.sleep(2000));}
}

3.6 快速失败
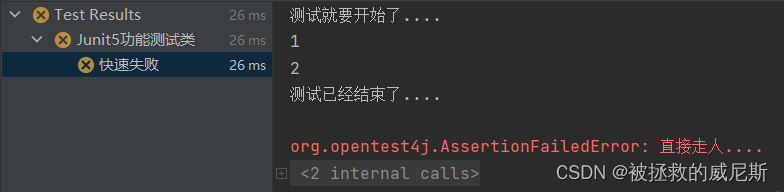
通过 fail 方法直接使得测试失败。
package com.szh.boot;import org.junit.jupiter.api.*;import java.time.Duration;
import java.util.concurrent.TimeUnit;import static org.junit.jupiter.api.Assertions.*;@SpringBootTest
@DisplayName("Junit5功能测试类")
public class TestJunit {@BeforeEachpublic void testBeforeEach() {System.out.println("测试就要开始了....");}@AfterEachpublic void testAfterEach() {System.out.println("测试已经结束了....");}@BeforeAllpublic static void testBeforeAll() {System.out.println("所有测试就要开始了....");}@AfterAllpublic static void testAfterAll() {System.out.println("所有测试已经结束了....");}@DisplayName("快速失败")@Testpublic void testFailAssertions() {System.out.println(1);System.out.println(2);fail("直接走人....");System.out.println(3);System.out.println(4);}
}
4.前置条件
JUnit 5 中的前置条件(assumptions【假设】)类似于断言,不同之处在于不满足的断言会使得测试方法失败,而不满足的前置条件只会使得测试方法的执行终止。前置条件可以看成是测试方法执行的前提,当该前提不满足时,就没有继续执行的必要。
package com.szh.boot;import org.junit.jupiter.api.*;import java.time.Duration;
import java.util.concurrent.TimeUnit;import static org.junit.jupiter.api.Assertions.*;@SpringBootTest
@DisplayName("Junit5功能测试类")
public class TestJunit {@BeforeEachpublic void testBeforeEach() {System.out.println("测试就要开始了....");}@AfterEachpublic void testAfterEach() {System.out.println("测试已经结束了....");}@BeforeAllpublic static void testBeforeAll() {System.out.println("所有测试就要开始了....");}@AfterAllpublic static void testAfterAll() {System.out.println("所有测试已经结束了....");}     //----------------------------前置条件----------------------------    @DisplayName("测试前置条件")@Testpublic void testAssumptions() {Assumptions.assumeTrue(true, "结果不是true....");System.out.println(111);}
}

将 Assumptions.assumeTrue(false, “结果不是true…”); 中的 true 改为 false,此时因为 true != false,所以不满足该前置条件,则直接导致测试方法被终止执行。

5.嵌套测试
JUnit 5 可以通过 Java 中的内部类和@Nested 注解实现嵌套测试,从而可以更好的把相关的测试方法组织在一起。在内部类中可以使用@BeforeEach 和@AfterEach 注解,而且嵌套的层次没有限制。
package com.szh.boot;import org.junit.jupiter.api.BeforeEach;
import org.junit.jupiter.api.DisplayName;
import org.junit.jupiter.api.Nested;
import org.junit.jupiter.api.Test;import java.util.EmptyStackException;
import java.util.Stack;import static org.junit.jupiter.api.Assertions.*;/*** 嵌套测试中,外层的@Test不能驱动内层的@Before(After)Each/All之类的方法提前/之后运行          * 内层的@Test可以驱动外层的@Before(After)Each/All之类的方法提前/之后运行*/
@DisplayName("A stack")
public class TestingAStackDemo {Stack<Object> stack;@Test@DisplayName("is instantiated with new Stack()")void isInstantiatedWithNew() {new Stack<>();}@Nested@DisplayName("when new")class WhenNew {@BeforeEachvoid createNewStack() {stack = new Stack<>();}@Test@DisplayName("is empty")void isEmpty() {assertTrue(stack.isEmpty());}@Test@DisplayName("throws EmptyStackException when popped")void throwsExceptionWhenPopped() {assertThrows(EmptyStackException.class, stack::pop);}@Test@DisplayName("throws EmptyStackException when peeked")void throwsExceptionWhenPeeked() {assertThrows(EmptyStackException.class, stack::peek);}@Nested@DisplayName("after pushing an element")class AfterPushing {String anElement = "an element";@BeforeEachvoid pushAnElement() {stack.push(anElement);}@Test@DisplayName("it is no longer empty")void isNotEmpty() {assertFalse(stack.isEmpty());}@Test@DisplayName("returns the element when popped and is empty")void returnElementWhenPopped() {assertEquals(anElement, stack.pop());assertTrue(stack.isEmpty());}@Test@DisplayName("returns the element when peeked but remains not empty")void returnElementWhenPeeked() {assertEquals(anElement, stack.peek());assertFalse(stack.isEmpty());}}}
}
6.参数化测试
参数化测试是JUnit5很重要的一个新特性,它使得用不同的参数多次运行测试成为了可能,也为我们的单元测试带来许多便利。
利用@ValueSource等注解,指定入参,我们将可以使用不同的参数进行多次单元测试,而不需要每新增一个参数就新增一个单元测试,省去了很多冗余代码。
@ValueSource: 为参数化测试指定入参来源,支持八大基础类以及String类型,Class类型
@NullSource: 表示为参数化测试提供一个null的入参
@EnumSource: 表示为参数化测试提供一个枚举入参
@CsvFileSource:表示读取指定CSV文件内容作为参数化测试入参
@MethodSource:表示读取指定方法的返回值作为参数化测试入参(注意方法返回需要是一个流)
6.1 @ValueSource
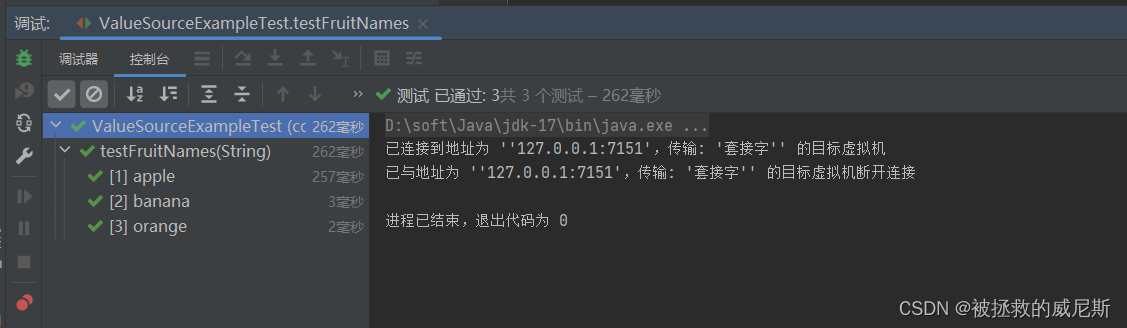
@ValueSource 是参数化测试的最简单形式。它允许你为测试方法提供一组简单的值,就像是一份精选的薯片口味列表。
应用场景 :适用于测试方法只有一个参数,而且这个参数的类型为简单类型(如 int、long、double、float、boolean、String)。
案例:
import org.junit.jupiter.params.ParameterizedTest;
import org.junit.jupiter.params.provider.ValueSource;class ValueSourceExampleTest {@ParameterizedTest@ValueSource(strings = {"apple", "banana", "orange"})void testFruitNames(String fruitName) {assertNotNull(fruitName);}
}
注意事项 :测试方法的参数列表中的参数类型必须与 @ValueSource 中的类型相匹配。例如,如果你使用 @ValueSource(ints = {…}),那么测试方法的参数类型必须是 int 或 Integer。
6.2. @EnumSource
@EnumSource 是针对枚举类型的参数化测试。它允许你为测试方法提供一个枚举类型的值集合,就像是为不同口味的薯片定义了一个标准分类。
应用场景 :适用于测试方法只有一个参数,而且这个参数的类型为枚举类型。
案例 :
package com.example.test;import org.junit.jupiter.params.ParameterizedTest;
import org.junit.jupiter.params.provider.EnumSource;import static org.junit.jupiter.api.Assertions.assertNotNull;public class EnumSourceExampleTest {enum Size {SMALL, MEDIUM, LARGE}@ParameterizedTest@EnumSource(Size.class)void testSizes(Size size) {assertNotNull(size);}}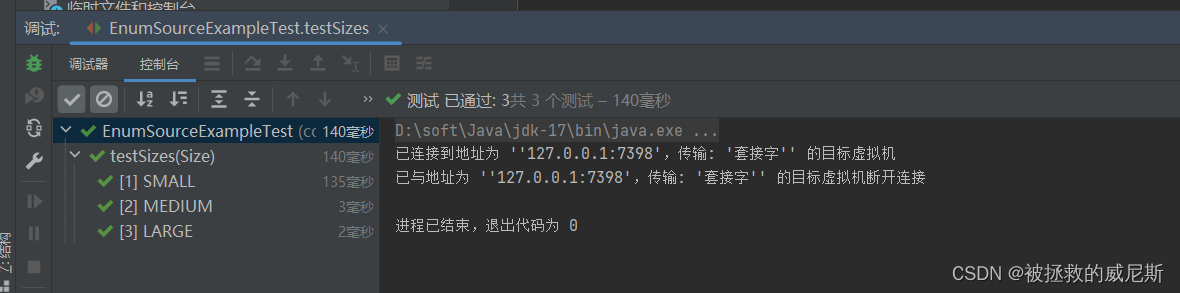
注意事项 :测试方法的参数列表中的参数类型必须与 @EnumSource 中指定的枚举类型相匹配。
6.3 @CsvSource 和 @CsvFileSource
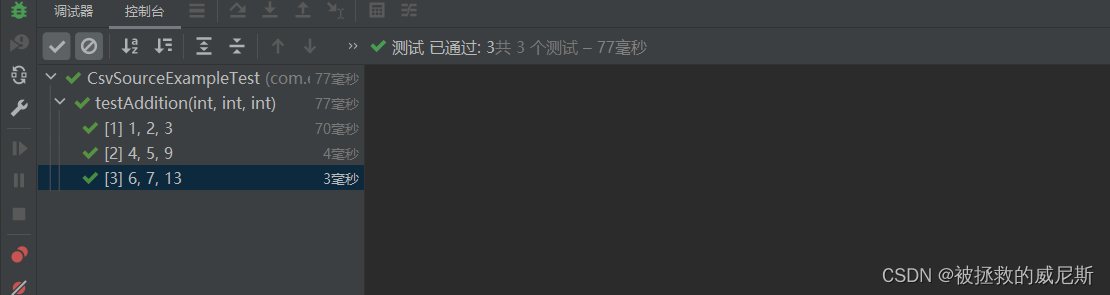
@CsvSource 和 @CsvFileSource 是基于 CSV 格式的参数化测试。它们允许你为测试方法提供一组 CSV 格式的值,就像是一张详细的薯片销售报表。
应用场景 :适用于测试方法有多个参数,需要以 CSV 格式提供输入数据。
案例:
package com.example.test;import org.junit.jupiter.params.ParameterizedTest;
import org.junit.jupiter.params.provider.CsvSource;import static org.junit.jupiter.api.Assertions.assertEquals;public class CsvSourceExampleTest {@ParameterizedTest@CsvSource({"1, 2, 3", "4, 5, 9", "6, 7, 13"})void testAddition(int a, int b, int expectedSum) {assertEquals(expectedSum, a + b);}
}
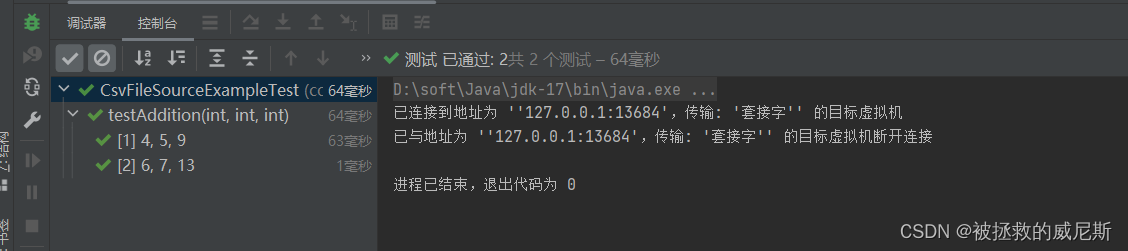
对于 @CsvFileSource,你需要将 CSV 数据存储在一个文件中,并通过 resources 属性指定文件路径。
package com.example.test;import org.junit.jupiter.params.ParameterizedTest;
import org.junit.jupiter.params.provider.CsvFileSource;import static org.junit.jupiter.api.Assertions.assertEquals;public class CsvFileSourceExampleTest {@ParameterizedTest@CsvFileSource(resources = "/addition.csv", numLinesToSkip=1)void testAddition(int a, int b, int expectedSum) {assertEquals(expectedSum, a + b);}
}
注意事项 :确保 CSV 数据与测试方法的参数类型和数量相匹配。对于 @CsvFileSource,文件应该放在项目的资源文件夹中。
6.4. @MethodSource
@MethodSource是基于方法返回值的参数化测试。它允许你为测试方法提供一个方法的返回值作为参数,就像是一个智能贩卖机,根据顾客的喜好自动调整薯片口味。
应用场景 :适用于测试方法有多个参数,需要从方法返回值中获取输入数据。
案例 :
package com.example.test;import org.junit.jupiter.params.ParameterizedTest;
import org.junit.jupiter.params.provider.Arguments;
import org.junit.jupiter.params.provider.MethodSource;import java.util.stream.Stream;import static org.junit.jupiter.api.Assertions.assertEquals;public class MethodSourceExampleTest {@ParameterizedTest@MethodSource("provideStrings")void testStringLength(String input, int expectedLength) {assertEquals(expectedLength, input.length());}static Stream<Arguments> provideStrings() {return Stream.of(Arguments.of("apple", 5),Arguments.of("banana", 6),Arguments.of("orange", 6));}
}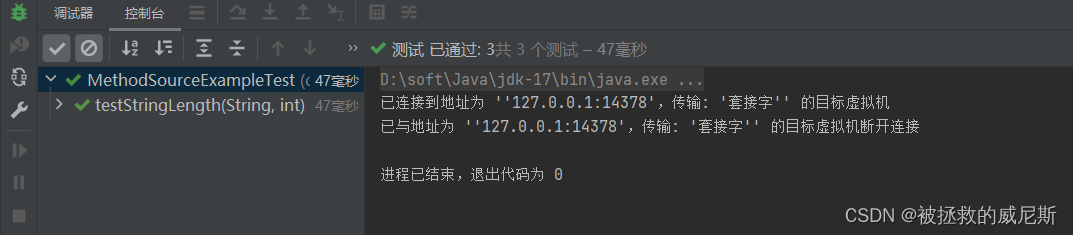
注意事项 :确保提供方法的返回值与测试方法的参数类型和数量相匹配。提供方法必须是静态方法,且无需参数。
7.JUnit4 → Junit5
在进行迁移的时候需要注意如下的变化:
- 注解在 org.junit.jupiter.api 包中,断言在 org.junit.jupiter.api.Assertions 类中,前置条件在org.junit.jupiter.api.Assumptions 类中。
- 把@Before 和@After替换成@BeforeEach 和@AfterEach。
- 把@BeforeClass 和@AfterClass 替换成@BeforeAll和@AfterAll。
- 把@Ignore 替换成@Disabled。 把@Category 替换成@Tag。
- 把@RunWith、@Rule 和@ClassRule 替换成@ExtendWith。