公司做网站需要好多钱提高搜索引擎检索效果的方法
前言
最近有用到搜索引擎的功能,这不得把之前的es过程实践一遍,但发现过程坎坷,因为版本太低了。
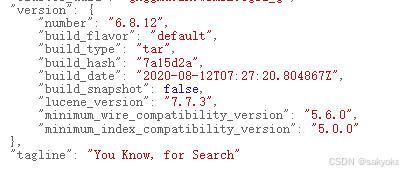
一、安装es 6.8.12
安装过程跟之前写那章日常记录:elasticsearch 在linux安装_elasticsearch linux安装-CSDN博客一样,安装包下载Elasticsearch 6.8.12 | Elastic。
下载完毕,上传到服务器之后直接用tar -zxvf 解压。然后进入config目录,编辑elasticsearch.yml文件。
# ======================== Elasticsearch Configuration =========================
#
# NOTE: Elasticsearch comes with reasonable defaults for most settings.
# Before you set out to tweak and tune the configuration, make sure you
# understand what are you trying to accomplish and the consequences.
#
# The primary way of configuring a node is via this file. This template lists
# the most important settings you may want to configure for a production cluster.
#
# Please consult the documentation for further information on configuration options:
# https://www.elastic.co/guide/en/elasticsearch/reference/index.html
#
# ---------------------------------- Cluster -----------------------------------
#
# Use a descriptive name for your cluster:
#
cluster.name: es
#
# ------------------------------------ Node ------------------------------------
#
# Use a descriptive name for the node:
#
node.name: master
#cluster.initial_master_nodes: ["master"]
discovery.type: single-node
#
# Add custom attributes to the node:
#
#node.attr.rack: r1
#
# ----------------------------------- Paths ------------------------------------
#
# Path to directory where to store the data (separate multiple locations by comma):
#
path.data: /home/elasticsearch-6.8.12/to/data
#
# Path to log files:
#
path.logs: /home/elasticsearch-6.8.12/to/logs
#
# ----------------------------------- Memory -----------------------------------
#
# Lock the memory on startup:
#
#bootstrap.memory_lock: true
#
# Make sure that the heap size is set to about half the memory available
# on the system and that the owner of the process is allowed to use this
# limit.
#
# Elasticsearch performs poorly when the system is swapping the memory.
#
# ---------------------------------- Network -----------------------------------
#
# Set the bind address to a specific IP (IPv4 or IPv6):
#
network.host: 0.0.0.0
#
# Set a custom port for HTTP:
#http 请求端口
http.port: 9200#通讯端口
transport.tcp.port: 9300
#
# For more information, consult the network module documentation.
#
# --------------------------------- Discovery ----------------------------------
#
#discovery.type: zen
#discovery.zen.minimum_master_nodes: 1
# Pass an initial list of hosts to perform discovery when new node is started:
# The default list of hosts is ["127.0.0.1", "[::1]"]
#
#discovery.zen.ping.unicast.hosts: ["host1", "host2"]
#
# Prevent the "split brain" by configuring the majority of nodes (total number of master-eligible nodes / 2 + 1):
#
#discovery.zen.minimum_master_nodes:
#
# For more information, consult the zen discovery module documentation.
#
#
# ---------------------------------- Gateway -----------------------------------
#
# Block initial recovery after a full cluster restart until N nodes are started:
#
#gateway.recover_after_nodes: 3
#
# For more information, consult the gateway module documentation.
#
# ---------------------------------- Various -----------------------------------
#
# Require explicit names when deleting indices:
#
#action.destructive_requires_name: true
#开启登录校验,不开启登录的话两个都关闭掉xpack.security.enabled: true
xpack.security.transport.ssl.enabled: true
配置完毕之后,进入es 的bin 目录执行./elasticsearch -d 后台挂起启动。
然后需要初始化一次es密码,执行命令./elasticsearch-setup-passwords interactive 会提示每个账号的密码输入,这里简单输入123456。
好了,在浏览器访问9200,提示账号、密码登录,输入就可以了
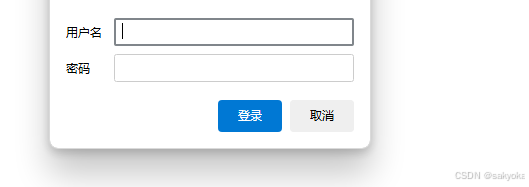
这样就简单设置账号登录成功了
二、程序上连接
springboot maven引入spring-boot-starter-data-elasticsearch ,跟随springboot版本,这里springboot版本是2.2.5,自动引入elasticsearch 3.2.5
...
<dependency>
<groupId>org.springframework.boot</groupId>
<artifactId>spring-boot-starter-data-elasticsearch</artifactId>
</dependency>...
yml配置
spring:
application:
name: es
data:
elasticsearch:#这里填真实cluster-name名字
cluster-name: es#这里填真实 cluster-nodes ip+端口
cluster-nodes: xxxx:9300
rest:
uris: http://xxx:9200
username: elastic
password: 123456
这里很坑的是springboot不会自动读取es 账号密码,尝试过yml多动配置账号、密码,最终还是没生效(但是我看es 7.x的springboot是会读取的,知道的同学可以说下),然后自己写一个配置类读取账号、密码 。
package com.xxxxx.configuration;import org.apache.http.HttpHost;
import org.apache.http.auth.AuthScope;
import org.apache.http.auth.UsernamePasswordCredentials;
import org.apache.http.client.CredentialsProvider;
import org.apache.http.impl.client.BasicCredentialsProvider;
import org.elasticsearch.client.RestClient;
import org.elasticsearch.client.RestClientBuilder;
import org.elasticsearch.client.RestHighLevelClient;
import org.springframework.beans.factory.annotation.Value;
import org.springframework.context.annotation.Bean;
import org.springframework.context.annotation.Configuration;
import org.springframework.data.elasticsearch.config.AbstractElasticsearchConfiguration;
import org.springframework.data.elasticsearch.core.ElasticsearchRestTemplate;/*** * 描述:elasticsearch配置* @author sakyoka* @date 2024年10月11日 下午3:47:19*/
@Configuration
public class ElasticsearchConfiguration extends AbstractElasticsearchConfiguration {@Value("${spring.data.elasticsearch.rest.username}")private String username;@Value("${spring.data.elasticsearch.rest.password}")private String password;@Value("${spring.data.elasticsearch.rest.uris}")private String uris;@Beanpublic ElasticsearchRestTemplate elasticsearchRestTemplate(RestHighLevelClient client) {return new ElasticsearchRestTemplate(elasticsearchClient());}@Overridepublic RestHighLevelClient elasticsearchClient(){//这句关闭很奏效,不然会有异常System.setProperty("es.set.netty.runtime.available.processors", "false");CredentialsProvider credentialsProvider = new BasicCredentialsProvider();credentialsProvider.setCredentials(AuthScope.ANY, new UsernamePasswordCredentials(username, password));RestClientBuilder builder = RestClient.builder(HttpHost.create(uris)).setHttpClientConfigCallback(http -> {return http.setDefaultCredentialsProvider(credentialsProvider);});return new RestHighLevelClient(builder);}
}
这里es自定义类主要是继承了AbstractElasticsearchConfiguration,重写elasticsearchClient,对RestHighLevelClient设置账号、密码以及请求地址。本来以为重写这个就可以了的,但是提示引用
ElasticsearchTemplate有问题,没错es有两个ElasticsearchRestTemplate以及ElasticsearchTemplate,似乎重写了elasticsearchClient之后一定要用ElasticsearchRestTemplate,所以得重新定义elasticsearchRestTemplate。
好了到目前为止,配置完毕,使用ElasticsearchRestTemplate也正常请求es数据。但是还知道我开启了登录xpack.security.enabled: true同时开启了xpack.security.transport.ssl.enabled: true了吗,这里服务器日志一直打印异常
io.netty.handler.codec.DecoderException: io.netty.handler.ssl.NotSslRecordException: not an SSL/TLS record: 45530000002c00000000000012f208004d3603000016696e7465726e616c3a7463702f68616e647368616b650004bb91f302(已处理日常记录:es TransportClient添加证书处理-CSDN博客)
尝试设置transport的证书,发现还是继续报这个异常,都怀疑生成证书是不是无效的,到目前为止还没解决这个异常,很奇怪的是正常使用,或者这个异常是es节点之间通讯用的?
尝试关闭xpack.security.transport.ssl.enabled: false,但是启动失败至少需要配置证书
xpack.security.transport.ssl.key: ssl/http.key
xpack.security.transport.ssl.certificate: ssl/http.crt
xpack.security.transport.ssl.verification_mode: certificate
关闭之后以及配置这个证书之后,服务器确实不报错了,但是程序报错也不影响使用,一直提示ElasticsearchSecurityException: missing authentication token for action,这个异常问题也没处理,想到这还是让服务器报异常算了,选择开启xpack.security.transport.ssl.enabled: true
以上问题还没处理。。
最后:
1、没有开启登录时候还好好的,啥异常都没有
2、开启登录之后,程序读取不到账号密码,导致需要写配置类,按道理springboot集成es有默认配置,但是网上太多版本、太多配置,没有一个符合的。
3、es证书生成是否有效目前成谜,一直报异常(已处理日常记录:es TransportClient添加证书处理-CSDN博客)